Saturday, February 28, 2009

Daring Bakers February: For the Love of Chocolate

The February 2009 challenge is hosted by Wendy of WMPE's blog and Dharm of Dad ~ Baker & Chef. We have chosen a Chocolate Valentino cake by Chef Wan; a Vanilla Ice Cream recipe from Dharm and a Vanilla Ice Cream recipe from Wendy as the challenge.

For this month's Daring Bakers challenge we all made chocolate valentino cakes. We were to serve our cake with an ice cream of our choice. I made a buttermilk-vanilla ice cream to go with my cake.

The ice cream was a real experiment for me. I am going to be teaching a class later this year on making ice cream without an ice cream maker and so I experimented with David Lebovitz's method for machine-free frozen treats. It's pretty simple: put your ice cream base in a container. Stick in the freezer and stir vigorously about every half hour until it looks like ice cream. The advantage of this method is that is gives you very dense, almost gelato-like ice cream (and you don't need another appliance in the kitchen). That said, I think I prefer the smoother, churned texture I get from my ice-cream maker. But if I didn't have the equipment on hand, the "freeze and stir" method would be a very good fall back technique to have in your arsenal.

The recipe I developed doesn't contain any eggs: I wanted it to be super fast to pull together. I also scaled the recipe for a small quantity (about 2 cups worth).

Creamy Buttermilk Ice Cream
  • 1 cup buttermilk
  • 1 cup heavy cream
  • 1/2 cup sugar
  • pinch salt
  • 2 teaspoons vanilla extract
In a small saucepan, heat the sugar and about 1/2 cup of the cream together. Heat, stirring, until the sugar dissolves. Add the vanilla and salt. Pour the sweetened cream into a storage container and add the rest of the cream and the buttermilk. Stir to combine. Chill for at least four hours if you are going to use an ice cream maker. If you use the "freeze and stir" method, you can start that right away.

----------------------------------------
This flourless chocolate cake is fairly similar to the Cook's Illustrated version I make. The only material difference in the two recipes is the CI version has you whip the whole eggs until very thick. I made a half-batch of the recipe and baked it in a 6" springform. It makes a very dense, fudgy cake. I think I overbaked mine a tiny bit as it was the tiniest but dry (ice cream can cover that sin pretty well however). To account for the smaller pan, I reduced the oven temp to 350 and the baking time to 20 minutes, but I should have pulled it out at 17 minutes, methinks. The full recipe is reprinted below.

Chocolate Valentino Cake
  • 16 ounces (454 grams) of semisweet chocolate, roughly chopped
  • ½ cup plus 2 tablespoons (146 grams total) of unsalted butter
  • 5 large eggs, separated
Put chocolate and butter in a heatproof bowl and set over a pan of simmering water (the bottom of the bowl should not touch the water) and melt, stirring often.

While your chocolate butter mixture is cooling, butter your pan and line with a parchment circle then butter the parchment.

Separate the egg yolks from the egg whites and put into two medium/large bowls.

Whip the egg whites in a medium/large grease free bowl until stiff peaks are formed (do not over-whip or the cake will be dry).

With the same beater beat the egg yolks together.

Add the egg yolks to the cooled chocolate.

Fold in 1/3 of the egg whites into the chocolate mixture and follow with remaining 2/3rds. Fold until no white remains without deflating the batter.

Pour batter into prepared pan, the batter should fill the pan 3/4 of the way full, and bake at 375F/190C.

Bake for 25 minutes until an instant read thermometer reads 140F/60C. (Note – If you do not have an instant read thermometer, the top of the cake will look similar to a brownie and a cake tester will appear wet.)

Cool cake on a rack for 10 minutes then unmold.

Friday, February 27, 2009

Drink of the Week: Old Fashioned

Until recently, I assumed an Old Fashioned was something only old ladies drank and a bad excuse for fruit salad covered with good booze. Frankly, I'd rather have had a Manhattan.

But I started seeing Old Fashioned showing up on cocktail menus at the craft cocktails bars I frequented. Why shouldn't the Old Fashioned get the same sort of fresh fruit and good juice treatment that my other drinks have been getting?

I will not attempt to outline the history of the Old Fashioned (thought by some to be the "original" cocktail), instead I will point you to Robert Hess's excellent history of the Old Fashioned. Old Fashioneds are traditionally made with bourbon or blended whiskey (though some call for rye), and some are topped off with club soda (although Mr. Hess disagrees, as do I). Recently, Imbibe Magazine had a Brandy Old Fashioned featured in a column (apparently it's Michigan's unofficial state cocktail).

Since citrus is a key component of the drink, I thought we would take advantage of the great fruit we've got available right now. For a our first go-round, I pulled out a blood orange and sliced it up to ready it for muddling. We also tried out tangerines and kumquats.

The greater challenge was the traditional cherry garnish. I won't allow those day-glo "cherry" abominations (Did you know they come in blue now? Egads!) into my drink. I had two jars of preserved cherries at hand however, so I pulled out one jar to give them a try. I opened my jar of Toschi Cherries of Vignola and popped one in my mouth to do a quick taste test. I spit it out almost the second it hit my tongue. These cherries are preserved in [totally crappy] alcohol. There was no cherry flavor, just an incredible sensation of alcoholic heat. Bleah. The second jar was sour cherries in syrup. We rinsed off the syrup and after a [very cautious] taste, I was happy: nice and sweet, with a lovely fresh tartness.

So these are the variations we tried, fortunately, there were all delicious (isn't research fun?):
  • Rye, blood orange, cherry, sugar cube, Fee Brothers Whiskey Barrel Aged bitters
  • Bourbon, tangerine, cherry, simple syrup, Angostura bitters
  • Brandy, kumquats, cherry, simple syrup (this one needed more a little syrup), Fee Brothers Whiskey Barrel Aged bitters
Of the three, the rye version was my favorite. The brandy/kumquat option was quite interesting; the kumquats provided a bitter note that contrasted nicely with the sweetness of the brandy.

Old Fashioned
Muddle together in the bottom of a rocks glass - be gentle, you aren't making a citrus puree, just bruise the fruit well to release the aromatic oils from the peel:
  • A sugar cube, soaked with several dashes of bitters and a splash of water or a teaspoon of simple syrup with several dashes of bitters
  • A slice of orange or tangerine or several kumquats
  • One or two fresh or preserved cherries
In an iced mixing glass, add two ounces of your chosen spirit (bourbon, whiskey, rye or brandy) and stir until well chilled.

Add fresh ice to rocks glass, pour chilled spirit over. Stir gently, to blend in the fruit flavors. Garnish, if desired, with additional citrus and cherries.

Wednesday, February 18, 2009

Baps: The Breakfast Bread of Scotland

In a recent post on Serious Eats, Ed Levine took one for the team and found us a collection of great sandwiches to be found in Manhattan. Even though I am far from that city, I read Ed's posts (and devour his pictures) with glee. One of his sandwiches was served on a bap, which he'd not heard of before.

Being the seriously geeked-out food-trivia maven that I am, I immediately leapt in to let him know that baps are a type of Scottish roll, traditionally eaten at breakfast (you can eat them at lunch and dinner too - they make nice sandwiches after all).

Elizabeth David's extensive volume English Bread and Yeast Cookery provides a quick discussion of baps. The traditional bap is just a yeasted roll: very plain and simple. Baps can be enhanced with potato, onion and/or herbs to liven them up. The addition of potato is a helpful one in that it keeps breads fresh-tasting.

Today I made a batch of traditional baps. The dough is not kneaded, it's just stirred together and left to rise. This dough makes a dense, finely textured bread. The crumb will be a little moist. It reminded me a little of a bagel, without as much chewiness. All the recipes I read recommended that baps be eaten right after baking. "Older" ones should be heated or toasted to refresh them.

Here's a basic recipe for baps from David's book. I strongly recommend you add this volume to your bread baking collection. It's full of great stories and anecdotes, not to mention a thorough discussion of breads (quick and yeasted) . She also provides a lot of detailed information on bread ovens, baking equipment, yeasts and flours. Sure, you've heard of scones, crumpets and muffins, but what about manchets, barmbracks or coburgs?

Basic Baps
Makes 8-10 baps
  • 2/3 cup water, warm
  • 2/3 cup milk, warm
  • 1 3/4 teaspoons yeast
  • 3 cups flour
  • 2 teaspoons salt
  • extra milk for brushing the bread
  • flour for dusting
Mix together water, milk and yeast.

Put the flour and salt in a large bowl. Stir in the liquids. Stir until the dough until it is well mixed. If the dough is too stiff, add extra milk to loosen it up (it should be doughy, but not solid). Cover the bowl and let the dough rise for 1 1/2 - 2 hours. It will not double in size.

Heat your oven to 425 degrees.

Dump the dough onto a floured counter and the cut it into 8 to 10 equal pieces. Form them into an oval, flattish roll. Place them on a baking sheet. Cover with plastic and let them rest for 30 minutes.

Brush each bap with milk and then dust them with flour. Poke your thumb into the center of each bap to make an indentation. Bake them for about 15 minutes, until light gold (they will stay fairly pale).

Tuesday, February 17, 2009

Mushroom Pastitio: A Taste of the Mediterranean Entry

Thanks to Tony Tahhan for starting the "A Taste of the Mediterranean" contest (sponsored by igourmet) and Peter from Kalofagas for hosting this month.

The idea is to take that month's classic dish, technique or ingredient and transform it into something new. The classic Greek dish, pastitio, is February's inspiration. Pastitio is traditionally made of layers of pasta (ziti) layered with a rich meat sauce of lamb (sometimes beef) that is spiced with cinnamon and allspice. A thick layer of bechamel (think a white sauce with eggs whisked in) is poured over the top and the dish baked to heat it through and cook the bechamel. It's not hard to make (although it's time consuming) and I've made it many times (using the recipe my mom gave me once upon a time).

The problem with pastitio is that it's pretty rich and I wanted to think of a way to lighten it up for a weeknight dinner. I decided to go vegetarian (sorta) and substitute mushrooms for the meat. To make it even lighter I made a veloute (made with broth) instead of a white sauce (made with milk). I did use a little milk in the veloute for creaminess, but the broth was the primary liquid. Instead of ziti, I used ditalini pasta for a daintier match with the mushrooms.

We were very happy with the outcome: the dish was very satisfying but didn't weigh us down. Since it wasn't super-rich I can safely include it in my weeknight meal rotation.

Mushroom Pastitio
Serves 6-8
Notes:
I used chicken broth to make the veloute. Sub in vegetable broth for a vegetarian dish. Sub in all milk for a creamier bechamel sauce.

Also, instead of sauteing my mushrooms in a skillet, I roasted them in a hot oven. This method is great for a hands-off cooking. See the before and after pictures of the mushrooms to get an idea of how much "shrinkage" there is when you cook mushrooms down.

Finally, there are a lots of steps, but you can make the components ahead of time and assemble the dish before cooking.
  • 1 pound small tube pasta: ditalini, pennette, mini ziti, etc.
  • 24 ounces mushrooms, cleaned and chopped
  • 1 onion, chopped
  • 3 cloves garlic, minced
  • 1 teaspoon cinnamon
  • 1/4 teaspoon ground allspice
  • 28 ounce can of diced tomatoes
  • 3 tablespoons chopped parsley
  • 4 tablespoons butter
  • 4 tablespoons flour
  • 3 cups chicken or vegetable broth
  • 1 cup milk
  • 3 eggs
  • 1/2 cup grated parmesan, romano or mizithra cheese
  • salt and pepper
Make the pasta:
Cook the pasta in a lot of salted, boiling water until just shy of done (you want the pasta to be a little undercooked because it will cook through a little more in the oven). Drain and set aside.

Make the mushroom sauce:
Heat the oven to 400. Spread the mushrooms on a large baking sheet. Drizzle with oil and sprinkle with salt and pepper. Roast the mushrooms in a hot oven, stirring occasionally, until they are browned and all the moisture in the pan has evaporated. They will shrink a lot - look at the before (left) and after (left) for an idea about how much the volume will decrease.

While the mushrooms are cooking, saute the onion with a little olive oil in a large skillet until softened and starting to brown. Add the garlic and spices and saute a few more minutes, until fragrant. Pour in the can of tomatoes. Keep stirring until mixture gets "saucy" (the water from the tomatoes will cook off and the mixture will look like something you'd want to sauce pasta with - a good idea BTW). Set sauce aside until the mushrooms have finished cooking. Add mushrooms to sauce. Taste for salt and pepper. Stir in parsley. Set aside.

Make "bechamel":
Over medium heat melt butter in a large saucepan and add flour. Stir in flour and cook, stirring with a wooden spoon until smooth. Whisk in 1 cup of the broth. Whisk until smooth (the mixture will get very thick). Gradually whisk in the remainder of the broth and the milk. Whisk until there are no lumps. Bring to a simmer. As the sauce starts to bubble it will thicken up. After simmering for 5-7 minutes, the sauce will be thick (about the texture of melting ice cream). Remove sauce from the heat. Taste for salt and pepper and adjust seasoning as needed.

Crack the eggs into a bowl and whisk them to break them up. Whisking rapidly, whisk the eggs into the sauce. The sauce will thicken up a little more.

Assemble the pastitio:
In a large baking dish (9x12ish), layer the ingredients as follows:
  • Enough bechamel sauce to cover the bottom of the pan.
  • A layer of pasta (about half the pasta).
  • The mushroom sauce.
  • The rest of the pasta (you may not use all of it - don't mound the pasta too high over the top of the baking pan - use leftovers in a frittata).
  • Slowly pour the bechamel over the top - use a spoon to move the pasta back and forth so the sauce seeps in between the pasta.
  • Sprinkle the cheese over the top.
Put the baking dish on a baking sheet (to protect your oven from drips) and bake at 350 for 30 minutes or so, until the dish is bubbling. Run under the broiler to melt the cheese if desired.

Let the pastitio sit for 5 minutes or so before serving.

Monday, February 16, 2009

A Message from Your Sponsor

Well, from me actually. I am teaching several cooking classes over the next few months. There's a class for you if you are interested in picking up some new skills, learning a new recipe or two, or just want to get out of the house and have something delicious to eat!

The Newburyport classes are held at Newburyport High School. The Middlesex Community College courses are held at the Middlesex Meetinghouse in Billerica (not at Shawsheen Tech as the Middlesex web site says). For more information on the courses or to register, click through on these links:

February 24: Quick Cooking from the Pantry, Newburyport Adult Education

March 17: Pestos, Salsa and Other Sauces, Newburyport Adult Education

March 18: Quick Cooking from the Pantry, Middlesex Community College

April 8: Pestos, Salsa and Other Sauces, Middlesex Community College

May 13 and May 20 (two session class): Kitchen Survival Skills, Middlesex Community College

Sunday, February 15, 2009

Week of February 15

Has everyone finished their list of ten meal items? I'm going to give you a few more days to work on your list. In the meantime, here's my menu for the week. I'm trying out a few new recipes from blogs in almost every meal (it's hard to keep up with everything I read).

Menu for the Week
Sunday
Chicken milanese with escarole salad and pickled onions (Thanks Smitten Kitchen!)

Monday
Mushroom pastitio (my entry into this month's Taste of the Mediterranean contest, over here at Antonio Tahhan's blog)
Braised leeks

Tuesday
Spicy tofu stir fry (based on this Meat Lite recipe over here)
Spicy celery salad
Brown rice

Wednesday
Butternut squash and sausage bake (also a Meat Lite recipe)

Thursday
Bean and kale (inspired by Heidi at 101 Cookbooks)

Friday
Out on the town - we're getting our groove on at Funk the Farm. If you're near Newburyport, MA, grab your polyester and get ready to shake your money maker!

Thursday, February 12, 2009

Dinner in Under 30 Minutes, Post 1 in an Unnumbered Series

I talk about food a lot. I talk to a lot of people about food. With all these conversations I've been having, it's become extremely clear to me that people really stress out about what they're going to feed themselves for dinner every night. I don't know why it to me so long to figure this out: that stress was the thing that got me to start this blog. The last two years have been all about my need to reduce that stress in my life.

I don't expect people to follow my menus by the week, or even by the day. This is what I cook for my family, but I've realized that there are a few things I do to ease my nights that apply to everyone.

First step:
Build your list of greatest hits: what do you cook that you enjoy eating?
For some of you, this may be a fairly long list: I like variety, so my list of favorite dishes is rather long (well over a month's worth of meals). But if I were busier, I'd be happy with a list of ten meals. Don't think about it too much and don't go into too much detail. Here's a sample list for me:
  1. Macaroni and cheese
  2. Pasta with a long-cooked meat sauce
  3. Some kind of stir fry with rice
  4. Grilled meat (chicken, fish, beef?) with vegetables
  5. Chili (maybe this one, or this one)
  6. Some kind of Thai-spiced soup or curry
  7. Pasta with vegetables, and maybe a fried egg on top.
  8. Some kind of sausage (pork, hot dog, turkey) with beans and a salad or slaw
  9. Breakfast for dinner: eggs, bacon and toast; an omelette; a frittata
  10. Soup, soup and more soup
Now that's just ten items, but each one has multiple variables and so I've got hundreds, if not thousands, of variations to play with. On that list #1, #2, #5, and #10 can all be made ahead (a day, a week, a month - all depends on the size of your freezer). The rest can be made in 20-30 minutes, #9 can be done in less than 15 minutes.

Second step: Here's the hard part: You have to schedule a little time in to do some planning. You make time to watch Desperate Housewives, or 24, or America's Next Top Model, or [insert guilty pleasure here]. So, give yourself 20 minutes to plan your meals. Just 20 minutes, I swear. The added bonus is that it gets easier the more often you do it.

In the next post on this subject, I'll talk about the planning process. So your homework in the meantime is to write a list of five to ten greatest hits. By now, you've probably written 25 Random Things about yourself, so ten things you like to eat shouldn't be so hard. :-)

Wednesday, February 11, 2009

Hi there.

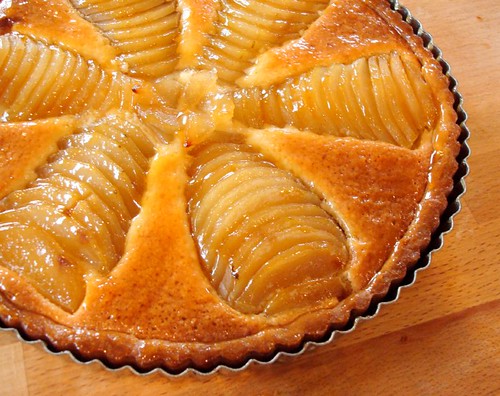
I'm back, sorry y'all. It's been fairly busy here in this neck of the woods. This lovely tart is from a pasta class party I taught and cooked for last week.

Over here, you can see an article on me and my business. There are also several Valentine's Day recipes there for you to take a look at. I'm going to post a copy of a scan of the actual paper soon, I hope.

So anyway, excuses, excuses, I haven't been taking very good care of you over the last week.

Though I haven't been writing very much, I have been thinking about you and what you're eating these days. I'm going to try to write up some ideas for you to help you plan and manage your weeknight eating. Hang in there, I'm back.

Wednesday, February 4, 2009

Eatchergreensnbeans!

I love greens and beans. When I do know what to make for dinner a "greens 'n' beans pile" usually fits the bill. Ideally, I have fresh greens on hand (1 big bunch per person being served), but if I don't I have no compunction about pulling a big bag of chopped spinach or collards out of the freezer.

I serve "the pile" over rice, quinoa or millet and sprinkle it with grated cheese (if I'm really under the gun, I serve over toasted bread: it's becomes a big, sloppy bruschetta). Depending on the night, I might top the dish with a fried or poached egg. It's a satisfying dinner that is quite good for you too.

This version was made with a bunch of dandelion greens, a bunch of beet greens and chickpeas and topped with some grated aged goat cheese. I served it over quinoa.

Beans 'n' Greens
Serves 2-3
  • Quinoa, rice, millet or any other grain of choice or several slices of hearty bread, toasted
  • 1 onion, peeled, cut in half and sliced into half circles
  • 2 bunches of greens (chard, beet greens, kale, collards, spinach), stemmed and chopped or 1 bag (16 oz.) of chopped spinach or collards
  • 1 can of beans (your choice), drained
  • cheese for sprinkling
Start cooking your grains by whatever method you use (I like a rice cooker).

Saute the onion over medium-high heat in a little oil in a large skillet. When it is golden brown (about 10 minutes), add the chopped greens to the skillet. Using tongs or two spoons, turn the greens over and over as they wilt down (this can take about 10 minutes). If the pan gets too dry, add a little water to keep things "saucy".

Add the beans. Taste for salt and pepper.

When the grain is done, dinner is ready.

Serve the greens and beans on a bed of grain (or over toast), sprinkle the dish with cheese. Provide hot pepper flakes, lemon wedges and a fruity olive oil for garnishing.
Blog Widget by LinkWithin