March 25 is a National Holiday in Greece. It commemorates the start of Greece’s war of independence over the Ottoman Empire. Prior to the start of the revolution, The Ottoman Empire had ruled Greece for nearly 400 years. The revolution lasted from 1821 to 1832, when the treaty of Constantinople was signed.
If you live an area with a Greek population, look for Independence Day parades and celebrations on the 25th or the weekend after it.
This Saturday, with the help of Foodbuzz, I hosted a Greek Independence Day party for friends. Due to the fact that Independence Day falls during the observance of Lent, I decided to [mostly] follow the dietary restrictions that Greeks have to follow when planning my menu. This means that menu shouldn’t contain meat (although certain types of seafood are permitted), dairy or eggs.
Greek Orthodox Lent has very strict dietary restrictions. During Lent, practicing Orthodox Christians must abstain from eating meat, or meat products (so this means no dairy or eggs either) and fish (shrimp, squid, octopus and shellfish are fine). Ultimately, you consume a primarily vegan diet (except for certain types of seafood) for the entire 40 days.
There are fasting exemptions for certain feast days, particularly those celebrating the Virgin Mary (Panagia). On those days, Greeks can also include finfish in their diet. Due to its ease of storage and transport, salt cod (also known as baccala or bacalao) has become traditional on Annunciation Day, March 25th. Annunciation Day is the same date as Independence Day, so we can take advantage of the lifting of certain dietary restrictions.
One of Greece’s greatest culinary traditions is that of mezethes. 
Mezethes are small dishes usually eaten with drinks – ouzo of course. They fall into the same place that tapas or antipasti do in Spanish and Italian cuisine. A great advantage for the party host us that a lot of them can be made ahead and plated up when your guests arrive so there’s less hands on work to do when folks come over.
I made a collection of dishes that would show the variety of dishes that can make up a mezethes table. In true Mediterranean fashion, I made too much to eat and everyone did a great job keeping up with the parade of plates coming out of the kitchen. I tried to keep my Independence Day menu in line with the dietary restrictions outlined by Lent and Annunciation Day. 
I confess there were few dairy items on the table and I’ve noted that in the menu list below.
The Menu
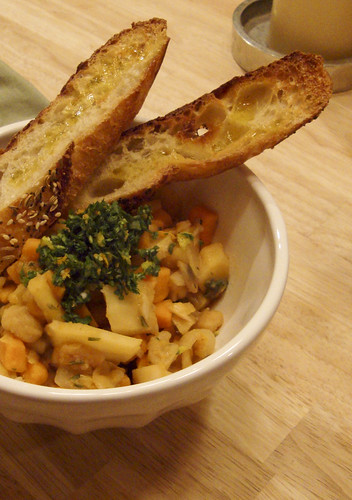
- Salt Cod Fritters with Skordalia (garlic-walnut sauce) - recipe below
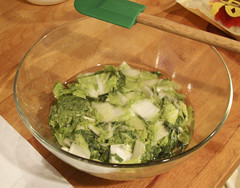
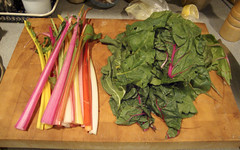
- Hearty Greens Pies
- Olive Pies
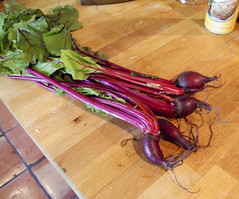
- Beet and Orange Salad
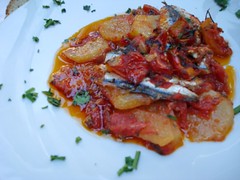
- Grilled Octopus with Roasted Lemon Sauce - recipe below
- Ktipiti (tangy cheese dip) – contains dairy
- Tzatziki (yogurt-cucumber dip) – contains dairy
- Melitzanosalata (eggplant spread)
- Taramasalata (cod roe spread)
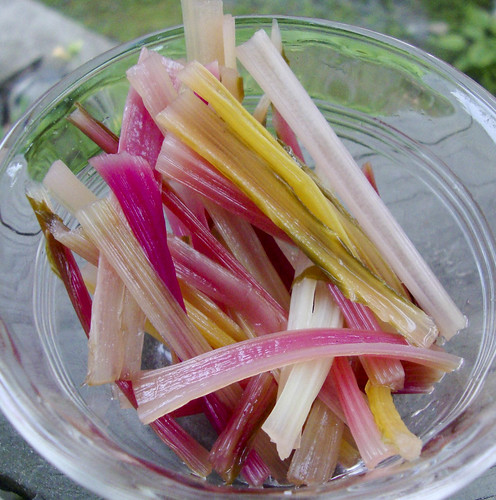
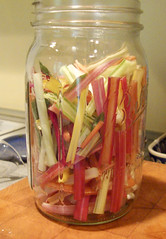
- Pickled Artichoke Hearts
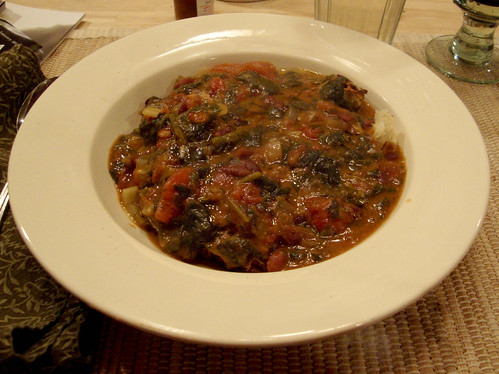
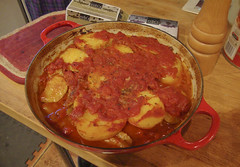
- Fava (yellow split peas) with Tomato-Caper Sauce
- Stuffed Grape Leaves with pistachios and currants
- Tahini Cake with Walnuts, Candied Kumquats and Cherries
- Yogurt Honey Cups – contains dairy
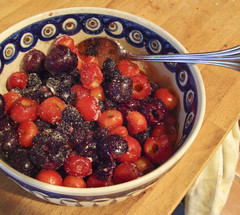
- Fruit
 The Drinks
Ouzos: Barbayianni & Ploumari (both from the island of Lesbos)
Red Wines: Notios (Peleponnese), Argyros (Santorini), Axia (Florina – thanks
Dale!)
White Wines: Amethystos (Drama), San..Torini (Santorini – thanks
Bill!)
Beers: Opa-Opa and Mythos (thanks again
Bill)
Recipes
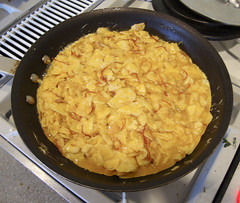
Salt Cod Fritters
You can find salt cod in a lot of supermarkets. It’s usually in the refrigerator case where pre-packaged seafood is sold. It may be in a bag or a little wood box. Store it in your refrigerator until you’re ready to use it. The hardest part of this recipe is remembering to start soaking your cod a day ahead.
- 1 1/2 pounds boneless, dry-salted baccala
- ¼ cup chopped dill
- 1 cup beer, I used a lager
- 1-1½ cups all-purpose flour
- oil, for frying – I like an olive oil / vegetable oil blend
- salt and pepper
In a large bowl, cover the baccala with cold water. Soak, refrigerated, for 24 hours. Changing the water every 6 to 8 hours.
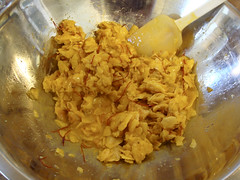
Drain for the last time and pat dry with paper towels. Shred the baccala with your hands (you’ll have to tear it), for a finer texture in the finished dish, use a knife to cut the baccala into short lengths and then shred the pieces apart. Add the dill to the baccala.

In a separate small bowl, whisk the beer into the flour. Stir into baccala until combined. If it seems too stiff add a little more beer, too loose, add flour. You want a batter than will drop off a spoon, but still hold its shape.
Heat the oil in a deep skillet over medium-high heat. When the oil is hot (about 325-350), gently drop small amounts of batter into the oil (about a generous tablespoon). Don’t crowd the pan, you will need to make these in batches. Cook the fritters until golden brown and drain on paper towels. Sprinkle with salt and pepper and serve with skordalia.
Skordalia (Garlic-Walnut Sauce)
This version of this sauce uses stale bread as a thickener. There are also versions that use cooked potatoes, but I prefer this version. I used pita, since I had it on hand – I needed one and a half pieces to make three ounces.
- 4 slices (about 3 ounces) stale white bread
- 1 cup shelled walnuts
- 6 cloves garlic, peeled
- 1/2 cup extra-virgin olive oil
- 1/2 teaspoon kosher salt, plus more to taste
- juice of 1 lemon
- 1 tablespoon red white vinegar
Soak the bread in 1/2 cup water for 2 minutes. Press excess water from the bread so that it is damp.
Put bread, walnuts and garlic in a food processor and pulse until a chunky paste forms. Add the olive oil and salt and process until well blended – it may not get completely smooth. Transfer the mixture to a bowl and stir in the lemon juice and vinegar. Adjust salt to taste.
Braised Octopus with Roasted Lemon Sauce
This dish was real star of the party. It was actually the first time I cooked octopus, and so I was more than little worried about it turning out well. I used the braising method from Michael Psilakis’s fabulous Greek cookbook How to Cook a Lamb and a modification of his roasted lemon purée as a sauce.
I found octopus in the freezer case of the supermarket. A Greek family owns one of our local supermarket chains and some of their locations carry frozen octopus (for local reference, Market Basket in Danvers, MA was where I found mine). Call around your local area, it’s probably easier to find than you think.

My octopi (I bought two) were 2.5 and 1.5 pounds respectively and provided 12 small appetizer portions as part of my meze table. The method is infinitely scalable, so I’m going to give you the technique, but feel free to scale it up or down, depending on how many people you’re feeding. Also great, you can do almost all the cooking a day ahead and just heat it right at mealtime.
- Octopus, thawed if frozen
- Garlic cloves, peeled
- Chili flakes
- Bay leaves
Your octopus will most likely be whole. (I did not cook the head I just used the tentacles.) With a pair of kitchen shears, cut the tentacles from the octopus body. Rinse the tentacles and then dry them with paper towels.
Heat the oven to 375 degrees.
Heat a large skillet over high heat. When the skillet is super hot, lay a few tentacles, sucker-side down into the pan. The tentacles will contract as they hit the pan, don’t be alarmed. Sear the tentacles for about 2 minutes, and then put them into a braising dish (a covered casserole or oven safe dish with the top covered in foil). They will turn red and will curl up a bit. Repeat the process with the remaining tentacles, making sure the pan gets superhot each time and making sure not to crowd the pan. (I seared mine in four batches.)

Add garlic cloves (I used 6 whole cloves), chili flakes (I used about 1 teaspoon) and a bay leaf to the braising dish along with the octopus. Cover the dish and put the pot into the oven. That’s right, do not add any liquid to the pan. Braise, covered for an hour to two hours, depending on the size of your octopus tentacles.

My tentacles were pretty thin, so my octopus was done in one hour. It’s done when you can slide a sharp knife easily into the flesh. If it feels tough at all, return the octopus to the oven to continue braising. (You should be able to cut it with a table knife without any sawing.)
At this point, you can put the octopus into the fridge until it’s time to serve it.
When it’s time to serve, heat a grill pan, or charcoal or gas grill to very hot. Remove the tentacles from their braising liquid (which will likely have formed a rich jelly) and lay them into the pan or onto the grill. Depending on the size of your pan, you should do this in batches. Grill until hot and slightly charred – about 1-2 minutes.
Serve with an oil and lemon salad dressing or the Roasted Lemon Purée.
Roasted Lemon Purée
This is also a method from Michael Psilakis’s fabulous Greek cookbook How to Cook a Lamb. This time I had to use “regular” supermarket lemons, but if you have Meyer lemons on hand do use them in this preparation.
Yields about 2 cups
- 2 lemons, well scrubbed
- 2 cloves garlic
- 2 tablespoons Dijon mustard
- ½ cup olive oil
- sugar, to taste
- salt and pepper to taste
Place a rack (roasting rack or cooling rack) into a baking dish or roasting pan.
Wrap the lemons in foil, place them on the rack and roast in a 325-degree oven for about 90 minutes. The lemons will feel super squishy. Let them cool until you can handle them comfortably
Cut or tear open the lemons and remove the seeds. Remove the lemon pulp and place it into a food processor. Scrape away as much pith as you can from the inside of the lemon and coarsely chop the peel. Add the peel and any juices to the processor. Add the garlic and mustard to the processor and purée until smooth. Continue pureeing as you add olive oil through the feed tube. Taste the puree and add sugar (this amount will vary depending on how much pith you got off your lemon peel). Add salt and pepper to taste.
You can use the puree as is (it packs quite a punch) or thin it out with mayonnaise, more oil or crème fraiche or cream.
For the octopus, I dressed the serving plate with the puree and then drizzled additional oil over its surface. I placed the octopus on top of the puree so people could scoop up a little puree with each tentacle.
More about Foodbuzz and the 24, 24, 24 program: Each month, Foodbuzz sponsors events run by 24 different bloggers. 24 Meals, 24 Hours, 24 Posts is a great way to see what folks are doing all around the world. Check out the Foodbuzz 24, 24, 24 page to see what everyone did this month!


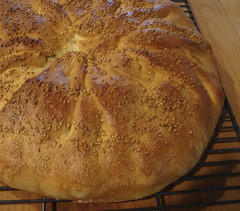


 Jim Lahey is the owner of
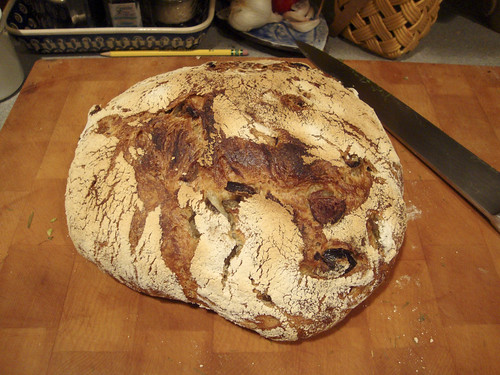
 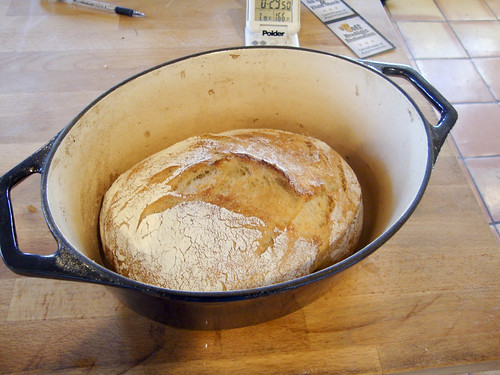 My Bread has really revolutionized the way I'm baking bread these days. That basic principle behind this method is that of hands-off gluten formation. Gluten strength can be developed in one of two ways: by kneading the dough, or by letting the dough rest and letting the yeast do all the work. Letting the bread do the work for you makes a lot of sense.