Showing posts with label recipe. Show all posts

Sunday, January 16, 2011

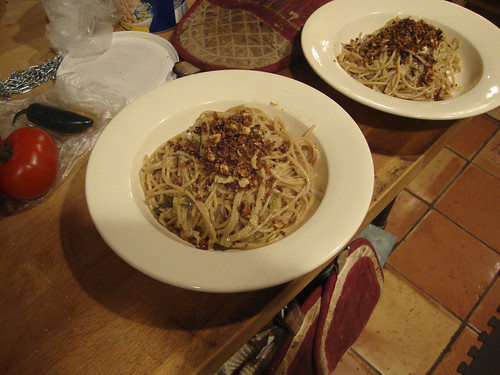
Charcutepalooza: Whole Wheat Pasta with Braised Cabbage & Duck Prosciutto

Pasta with Braised Cabbage and Duck Prosciutto

Trying something new here, since I don't have time to pull together full recipes for you right now, but this dish was so good that I had to share. The hazelnut breadcrumbs are gilding of this lily, but they are quick to make and really add a great textural contrast to this dish.

This was good people, really really good. The whole time we ate we made yummy noises. (There may have been some grunting.)

If you don't have duck prosciutto at hand, sub in a great ham (country ham would be fabulous), cooked bacon, or traditional prosciutto (domestic would ok).

So here you go, step-by-step:

Brown one large onion, sliced thin, in a large skillet.
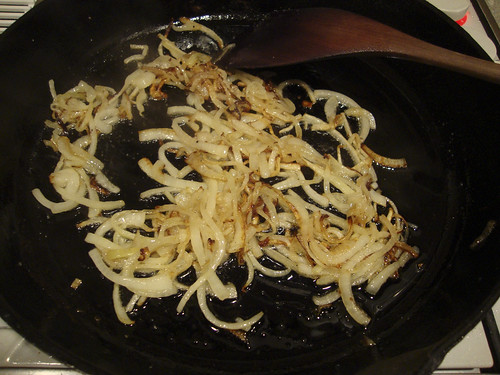
Pasta with Braised Cabbage and Duck Prosciutto

Add about 1/2 of a savoy cabbage, sliced thin, and about 1/2 cup of water. Cook over medium heat until cabbage is softened.
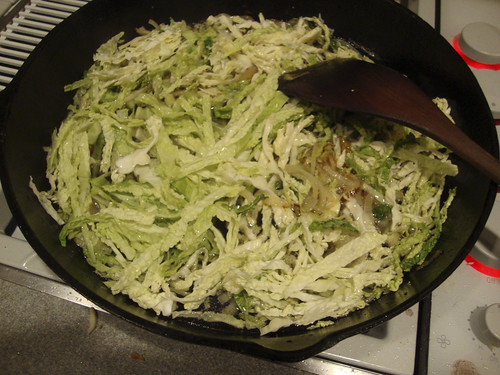
Pasta with Braised Cabbage and Duck Prosciutto

Add two large dollops of creme fraiche and a sprinkle of salt.
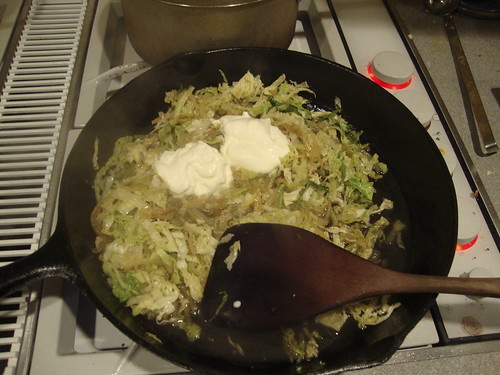
Pasta with Braised Cabbage and Duck Prosciutto

Stir once or twice and cook until it looks like this. Add a little water if the skillet gets too dry; you want things to stay semi-soupy. When it's done to your liking, grind in a crap-ton of black pepper and turn off the heat until the pasta is ready.
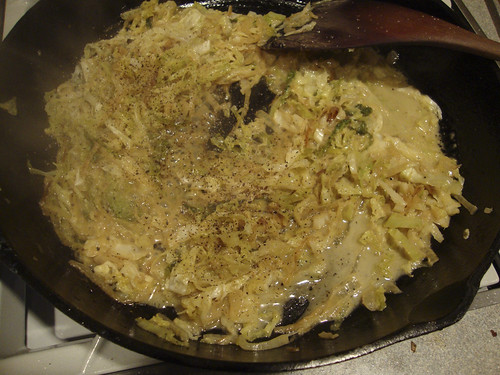
Pasta with Braised Cabbage and Duck Prosciutto

Meanwhile, cook up about half a pound of whole wheat spaghetti.
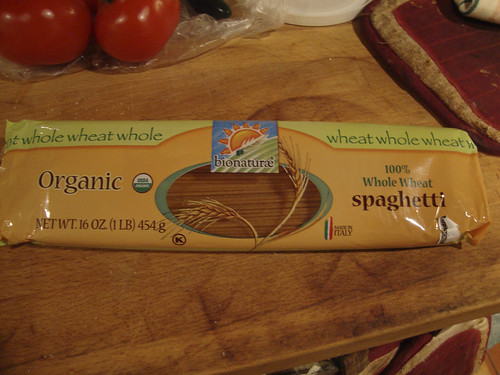
Pasta with Braised Cabbage and Duck Prosciutto

When the pasta is cooked to your taste (I like whole wheat pasta to be just this side of underdone, because it will finish cooking in the skillet *and* because when it overcooks, it gets soggy), reserve a cup of the cooking water (that's the mug is for: to remind me to save some water) and drain the pasta.
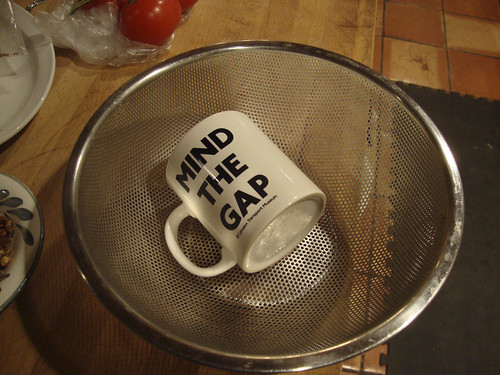
Pasta with Braised Cabbage and Duck Prosciutto

Toss the pasta into the skillet and turn the heat back on. Stir and toss the pasta together with the cabbage, adding some cooking water if it's too dry.
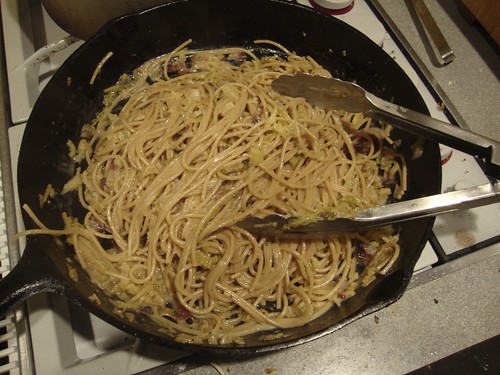
Pasta with Braised Cabbage and Duck Prosciutto

Fold in about 1/2 cup of duck prosciutto, slivered.
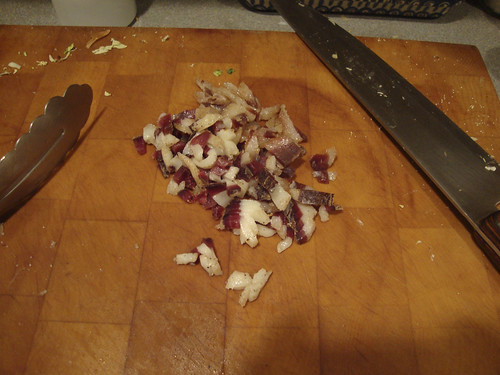
Pasta with Braised Cabbage and Duck Prosciutto

Serve in warmed soup plates, topped with hazelnut breadcrumbs.


To make the breadcrumbs:

Put a handful of hazelnuts into a mortar.
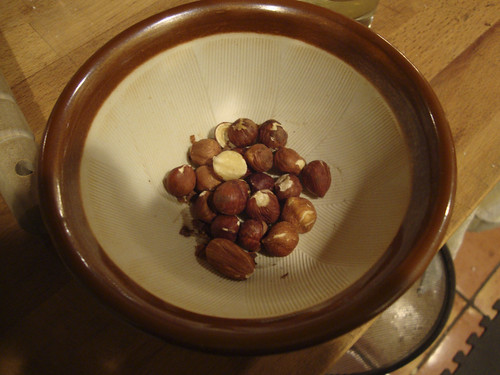
Pasta with Braised Cabbage and Duck Prosciutto

Crush them and toss them into a small pan with an equal portion of panko or fresh breadcrumbs. Drizzle in some olive oil and toast over medium high heat until browned and crispy.
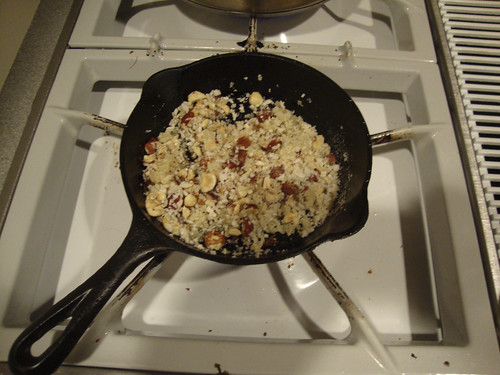
Pasta with Braised Cabbage and Duck Prosciutto

Saturday, September 4, 2010

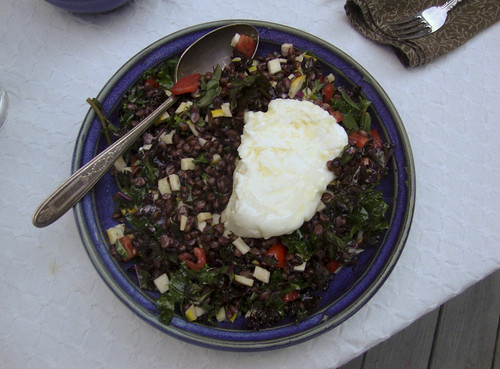
Use Your Booty: Barley Salad with Burrata

Black Barley Salad

I meant to to get this post up before this holiday weekend started. This salad is a great healthy, vegetarian, colorful side dish that goes well alongside grilled meat. It also improves with age - so you can make it a day or two ahead. I fancied it up with a large chunk of burrata cheese - feel free to omit it if you prefer.

Black Barley Salad with Burrata
Serves about 8-10 as a side dish, makes a generous 4-6 main course servings.
I liked the richness added by the burrata - if you don't have any at hand, fresh mozzarella, goat cheese or ricotta salata would be great. Or go dairy-free and toss on slices of hard-boiled egg.
  • 1 cup uncooked black barley or 4 cups cooked barley (or pearl barley or "regular" barley - this salad would also work with farro or wheatberries)
  • 2-3 small zucchini, diced
  • 2 large tomatoes, diced
  • 2 handfuls purslane leaves
  • 1 small onion, sliced into thin rounds
  • red wine vinegar
  • olive oil
  • salt and pepper
  • 8 ounces burrata, left whole (preferred) or torn into shreds
Cook the barley, if needed: pick through the uncooked grains to remove any stones or bits of twig or chaff. Place in saucepan and cover with water by two inches and bring to boil. Reduce heat to a simmer, add a healthy pinch of salt and cook until the grains are tender. This will take from 45 minutes to 2 hours, depending on the grain you're cooking and how old it is. Add more water as needed to keep the barley covered.

When the barley is cooked, drain it in a colander and set aside to cool.

Toss half of the cooked barley with the vegetables. Add more barley until you have the vegetable/grain ratio you like. (You may not use all of the barley. Any leftovers can be frozen for future use.)

Sprinkle the salad with red wine vinegar and a healthy glug or two of olive oil. Season to taste with more vinegar and oil and salt and pepper. Top the salad with burrata and serve.

This Summer, I am chronicling my first CSA (Community Supported Agriculture) experience. My CSA share is from Arrowhead Farm, a farm based in Newburyport, MA. Each week, I am posting about what was in my share and what I'm doing with it. By way of full disclosure, I won my share through a raffle and am not paying for it. However, Arrowhead did not know I was entered in the raffle, and I received no special consideration because of this blog. I paid for my livestock share. A full set of all the photos I've taken of this share is here.

Tuesday, August 3, 2010

Sweet [and Sour] Tomato Chutney


This was, by far, the most loved item on the menu from last week's
Indian cooking class. Many dishes had fans, but everyone thought this was just great. Even better, it's super easy and can be made way ahead. I used canned tomatoes, but you could substitute peeled fresh tomatoes if you wish.

We enjoyed this chutney with chicken and shrimp dishes, but I think it would just fabulous alongside goat cheese on a cheese tray or spread onto roast pork or beef sandwich. This chutney would pair well with multiple flavors (it doesn't necessarily taste "Indian"). The slivered almonds are not something most people expect, but they add a nice contrasting texture. If you're allergic to almonds, pine nuts would be a satisfactory, albeit more expensive, alternative.

Sweet [and Sour] Tomato Chutney
From Madhur Jaffrey's Introduction to Indian Cooking

Makes about 2-3 cups
  • 1 head of garlic, peeled and chopped
  • 2" x 1" x 1" piece of ginger, peeled and coarsely chopped
  • 1 1/2 cups red wine vinegar
  • 1 28 ounce can whole tomatoes (I used Muir Glen tomatoes)
  • 1 1/2 cups sugar
  • 1 1/2 teaspoon salt
  • 1/4 teaspoon cayenne pepper
  • 2 tablespoons golden raisins
  • 2 tablespoons slivered almonds
Purée the garlic, ginger and about a third of the vinegar (enough to keep things moving) in a blender. Blend until smooth.

Put the paste from the blender, and all the other ingredients except the raisins and the almonds into a large saucepan. Bring to a boil and then reduce to a simmer. Simmer for 1 1/2 - 2 hours, stirring occasionally, until the sauce is superthick (Madhur says it should be like honey, mine was chunkier and thicker than honey).

Stir in the almonds and raisins and simmer 5 more minutes.

Taste for salt and sugar and adjust to taste. It may smell like it's too acidic, but give it a taste anyway - add a little sugar if things are too puckery.

Saturday, July 31, 2010

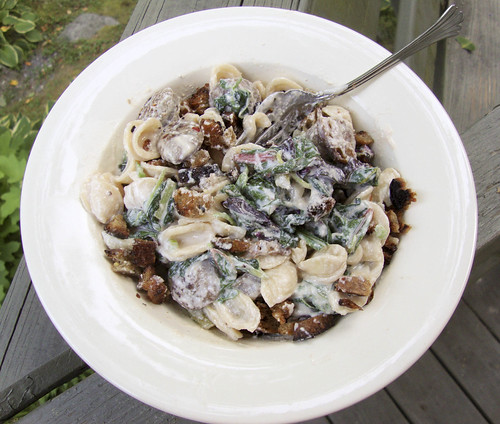
Use Your Booty: Orecchiette with Chard, Sausage and Ricotta

This meal was inspired by a dish I used to make a long, long time ago. It was called Rigatoni alla Buttera. It's a hearty plate of pasta, sauced with ricotta (or cream) and tomato and studded with peas and chunks of sausage.

Dave begged for some meat on the dinner plate (we've been eating a LOT of all-veggie dishes), so I pulled out the last of some pork sausage I made in my last sausage-stuffing binge (time to pull out the grinder again I guess). I also had a half container of ricotta in the fridge, so it was logical to try to pull a dish together using that too. I had to add some vegetables to the pan so I used Swiss chard (you can sub in spinach, kale or any other green you have on hand) and sliced raw onions.

To add a little crunch I made a handful of big breadcrumbs by cubing stale bread and pan frying them in olive oil.

Orecchiette with Chard, Sausage and Ricotta
2-3 servings
  • 8 ounces Italian sausage, cut into bite-sized pieces
  • 8 ounces orecchiette pasta (substitute shells if you can't get your hands on orecchiette)
  • 1 bunch Swiss chard, cut into bite-sized pieces
  • 12 ounces ricotta
  • 1 small onion, sliced into paper-thin rings
  • 1-2 handfuls big breadcrumbs
In a large skillet, sauté the sausage over medium-high heat until cooked through and browned.

While the sausage is cooking, bring a pot of water to a boil and cook the orecchiette to al dente. Right before the pasta is done, add the Swiss chard into the pasta pot to wilt it down. Drain the pasta, reserving a cup of the cooking water to use in the sauce (I usually put a coffee cup in my colander to remind me to save a cup of water.)

Put the pasta and chard back into the pasta pot with the ricotta, sliced onion and sausage. Stir everything together, adding a little pasta water to loosen up the sauce and make it creamy. Taste and add salt & pepper as desired. Just before serving, stir in big breadcrumbs.

This Summer, I am chronicling my first CSA (Community Supported Agriculture) experience. My CSA share is from Arrowhead Farm, a farm based in Newburyport, MA. Each week, I am posting about what was in my share and what I'm doing with it. By way of full disclosure, I won my share through a raffle and am not paying for it. However, Arrowhead did not know I was entered in the raffle, and I received no special consideration because of this blog. I paid for my livestock share. A full set of all the photos I've taken of this share is here.

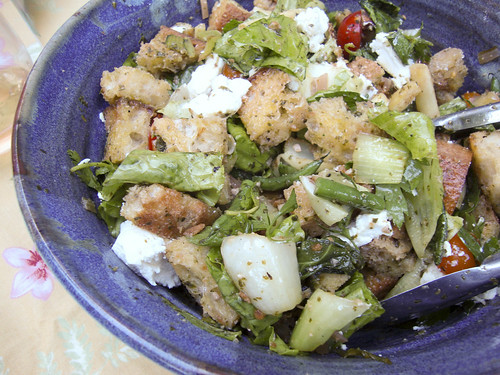
Use Your Booty: Panzanella con Verdure

No recipe, just an idea for you to play with.

Here's another version of Panzanella. This once had bok choy (sautéed), green beans, tomatoes, lettuce and oat cheese. I made a sherry vinaigrette to dress it and showered it with torn basil.

This Summer, I am chronicling my first CSA (Community Supported Agriculture) experience. My CSA share is from Arrowhead Farm, a farm based in Newburyport, MA. Each week, I am posting about what was in my share and what I'm doing with it. By way of full disclosure, I won my share through a raffle and am not paying for it. However, Arrowhead did not know I was entered in the raffle, and I received no special consideration because of this blog. I paid for my livestock share. A full set of all the photos I've taken of this share is here.

Friday, July 30, 2010

Drink of the Week: Sun Gold Tomato Martini

I tried making quite a few variations of a sun gold tomato martini last summer. What challenging research projects I give myself!

Before this most recent attempt, I have made these all as muddled drinks, that is, I've crushed the tomato in with the gin, shaken the drink and then strained the tomato out. Delicious, but sorta bloody Mary-ish. In this version, I made sun gold tomato gin by steeping crushed tomatoes in gin and straining it through a coffee filter. This made for a drink that was the essence of tomato without any of the heaviness of tomato juice.

Even better, I can stockpile bottles of tomatoey sunshine to enjoy in the cold winter.

Sun Gold Tomato Martini

Prepare the gin by steeping crushed sun gold cherry tomatoes (slightly overripe ones are perfect) in gin. Just put the tomatoes in a jar and cover them with gin. Let steep for three-four days. Strain the liquid through a coffee filter into another jar.

To make your cocktail, combine in an iced mixing glass:
  • 3 ounces tomato gin
  • 1 ounce dry vermouth (Dolin is great if you can find it)
  • 2 dashes orange bitters
Stir until very well chilled and strain into a cocktail glass. Garnish with a fresh sun gold cherry
tomato if you have one.

This Summer, I am chronicling my first CSA (Community Supported Agriculture) experience. My CSA share is from Arrowhead Farm, a farm based in Newburyport, MA. Each week, I am posting about what was in my share and what I'm doing with it. By way of full disclosure, I won my share through a raffle and am not paying for it. However, Arrowhead did not know I was entered in the raffle, and I received no special consideration because of this blog. I paid for my livestock share. A full set of all the photos I've taken of this share is here.

Friday, July 23, 2010

Drink of the Week: Flat Tire

I'm a huge fan of the Sidecar and its variations. Traditionally made with lemon juice, brandy and Cointreau, I thought pineapple would be an interesting twist on the recipe.

My pineapple was super sweet, so I needed to add some lemon juice back in to the recipe, but I recommend you hold back the lemon juice until you've tasted the drink without it then add a squeeze if you need it.

I called this cocktail the Flat Tire because I thought that's what your sidecar would have after you hit a spiky pineapple with it.

Flat Tire Cocktail

In the bottom of a mixing glass, muddle 4-5 cubes of pineapple until it looks very juicy. Add ice to the mixing glass and add:
  • 1 ounce brandy
  • 1 ounce Cointreau
Shake well. Taste for acid, if things seem to sweet, add a squeeze of lemon juice. Strain into a coupe or cocktail glass. Garnish with a pineapple slice.

Tuesday, July 20, 2010

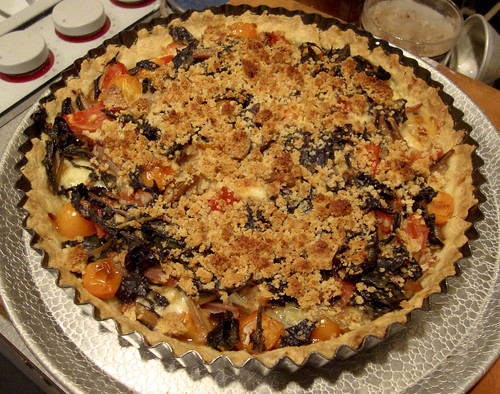
Use Your Booty: Easy Vegetable Tart


So here's a savory tart made with the tart dough recipe that I used to make the fruit tart.

I pulled the filling together while Dave made the crust. He's never made any kind of pastry before, and he put the dough together quickly and pressed it into the tart shell.

I tossed together some CSA tomatoes, cooked Swiss chard and cubed goat cheese (Middletown Tomme) from West River Creamery. I crumbled a leftover savory shortbread over the top of the tart - next time I think I'll use chopped nuts or shredded parmesan over the top.

So nice to have another quick weeknight recipe on hand. In the time it took to preheat the oven, we made the tart crust and put together the filling. The tart takes about 35-40 minutes to bake, so a really delicious, elegant dinner is on the table in about an hour.

This Summer, I am chronicling my first CSA (Community Supported Agriculture) experience. My CSA share is from Arrowhead Farm, a farm based in Newburyport, MA. Each week, I am posting about what was in my share and what I'm doing with it. By way of full disclosure, I won my share through a raffle and am not paying for it. However, Arrowhead did not know I was entered in the raffle, and I received no special consideration because of this blog. I paid for my livestock share. A full set of all the photos I've taken of this share is here.

Monday, July 19, 2010

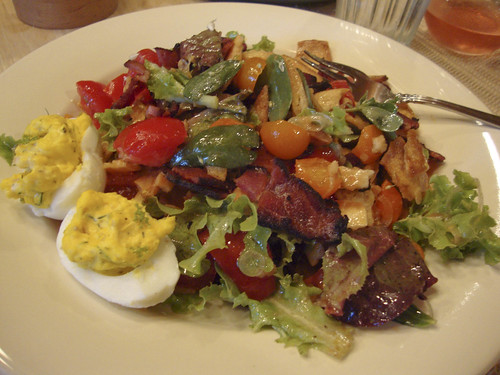
Use Your Booty: BLT Fattoush

I really like bread salads. They're a great way to showcase fresh vegetables. Panzanella is the bread salad that I make most often; it requires a hearty, rustic loaf, which I don't always have on hand. Fattoush is a bread salad made with fried or toasted pita bread. Traditionally fattoush is pita with parsley, tomato, onion and herbs.

I actually wanted to make BLT sandwiches for dinner, but had so sandwich-suitable bread in the kitchen. I did have a bag of pita chips left over from an event earlier in the week, so I decided to use them as the base for a fattoush salad. The devilled eggs are definitely a non-traditional garnish as is the addition of bacon.

The fattoush formula is very adaptable to whatever's in the pantry. It's a great "sponge" for bits of leftover cooked and raw vegetables. I like the pita to be about 1/3 of the total salad, but you should feel free to find your own perfect ratio of pita to vegetables.

No recipe today, just a guide:

BLT Fattoush
For each person you're serving, combine in a large bowl:
  • 2 handfuls of torn lettuce leaves
  • 1/2 cup of coarsely chopped tomato
  • 1-2 slices of cooked bacon
  • a few slices of very thinly sliced onion
  • 1-2 handfuls pita chips, crushed lightly
Dress generously (the chips will soak up a lot of dressing) with a lemon or red wine vinegar-based vinaigrette. Season with salt and pepper.

This Summer, I am chronicling my first CSA (Community Supported Agriculture) experience. My CSA share is from Arrowhead Farm, a farm based in Newburyport, MA. Each week, I am posting about what was in my share and what I'm doing with it. By way of full disclosure, I won my share through a raffle and am not paying for it. However, Arrowhead did not know I was entered in the raffle, and I received no special consideration because of this blog. I paid for my livestock share. A full set of all the photos I've taken of this share is here.

Sunday, July 18, 2010

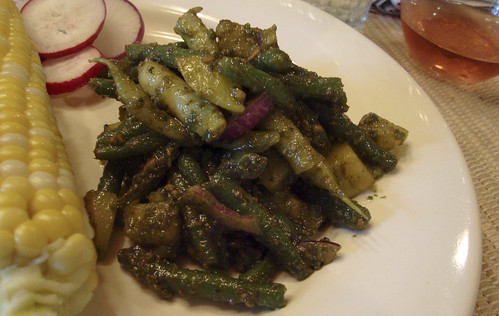
Use Your Booty: Green Bean and Potato Pesto Salad

Yesterday was a red-letter day vegetable-wise: our first green beans of the season and the first corn! The corn needed no embellishment other than a gentle enrobing of butter, and I turned the beans into a salad. I had fresh pesto on hand from last week's basil so I prepared a Genoese-inspired potato and green bean salad.

Green Bean and Potato Pesto Salad
Serves 3-4
I didn't have any on hand, but this salad would even better with the addition of a handful of toasted pine nuts or walnuts added in at the end.
  • 4 handfuls green beans, stem ends cut off, beans cut into 2" lengths (I used both green and yellow beans)
  • 3 medium-sized red-skinned or Yukon gold potatoes cut into 1/2" dice
  • 1/4 red onion sliced thin
  • 1/4 - 1/2 cup pesto
  • salt and pepper
  • red wine or sherry vinegar
This is a little fussy, but you really need to cook the beans and potatoes separately to ensure they are cooked properly.

Fill a large bowl with very cold water.

Put a large saucepan of water on the stove and bring it to a boil. Salt the water well (2-3 healthy pinches). Put the beans in the water and boil for 2-3 minutes until they are bright green and tender. Using a slotted spoon or strainer, transfer the beans out of the boiling water and into the bowl of cold water. When cool, transfer the cooked beans to a mixing bowl.

Since I used yellow beans too, I then repeated this step with the yellow beans.

Bring the water back to a boil and then cook the potatoes until tender, about 7-10 minutes. Transfer the potatoes out of the boiling water and into the bowl of cold water. When cool, transfer them to the bowl with the beans.

Add the onions to the beans and potatoes.

Stir in the pesto, adding enough to sauce the vegetables well. Taste and add salt & pepper to taste. If the salad tastes a little flat, add vinegar, a few drops at a time, until the flavor is right for you.


This Summer, I am chronicling my first CSA (Community Supported Agriculture) experience. My CSA share is from Arrowhead Farm, a farm based in Newburyport, MA. Each week, I am posting about what was in my share and what I'm doing with it. By way of full disclosure, I won my share through a raffle and am not paying for it. However, Arrowhead did not know I was entered in the raffle, and I received no special consideration because of this blog. I paid for my livestock share. A full set of all the photos I've taken of this share is here.

Amanda Hesser's Peach Tart


Except I didn't make a peach tart. Instead, I made a fig and blueberry tart. I was turned on to this recipe by my friend Lynn. She told me how her young son (like 10 years oldish?) made these tarts himself.

See, these are his in the oven:

This is not meant to be intimidating. This recipe is super easy and super adaptable. Use the fruit you have on hand and you'll be fine. It's fast too - I had the tart ready to go in the oven before the end of the oven's preheat cycle.

I'm going to use this tart recipe in a savory application too: I'll fill the tart shell with chopped fresh tomatoes, cooked Swiss chard and goat cheese. Will let you know how it goes.

I don't normally post other people's recipes, especially when I don't own the cookbook (a situation I'm about to remedy), but this recipe is all over the interwebs, so I'm a little more comfortable posting it.

Fruit Tart
Based on Amanda Hesser's recipe for Peach Tart from Cooking for Mr. Latte.
Makes 1 tart (I used an 8" tart pan, but I think you could use a 9" or 10" pan - you can see my crust was sorta thick, which I prefer)
  • 1 1/2 cups (6.75 ounces) flour
  • 1/2 tsp salt
  • 1 tsp sugar
  • 1/2 cup (4 ounces) olive oil
  • 2 tbs (1 ounce) milk
  • Fruit or other filling of your choice - I used about 3 cups of fruit but a lot depends on the size of your tart pan
  • 3/4 cup (5.25 ounces) sugar
  • 2 tbs flour
  • 1/4 tsp salt
  • 2 tbs (1 ounce) cold butter
Preheat the oven to 425.

Mix the dry ingredients together. Mix the wet ingredients together. Combine the dry with the wet. It'll become a dough, right under your fingertips - I promise. When the tart dough has come together, press it into the tart pan. Make sure you press it in evenly, so the crust is evenly distributed across the bottom and sides.

Fill your tart with the fruit or other vegetables you've prepared.

In a small bowl, use your fingers to combine the sugar, salt and butter. Pinch and rub until you have a crumbly sugar mixture. Sprinkle the mixture over the top of the tart. (Obviously, omit this step if you're making a vegetable tart.)

Bake the tart until crust if well browned and the fruit is cooked and bubbly. This took me about 40 minutes in my oven.

Enjoy!

Friday, July 9, 2010

Use Your Booty: Kale Spectacular


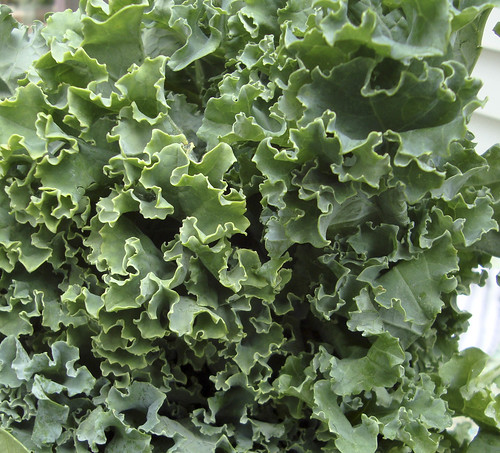
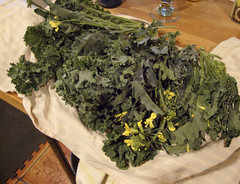
As a service to my blog readers and fellow CSA members, here's a wrapup of the ten kale recipes I've got on this blog.

This Summer, I am chronicling my first CSA (Community Supported Agriculture) experience. My CSA share is from Arrowhead Farm, a farm based in Newburyport, MA. Each week, I am posting about what was in my share and what I'm doing with it. By way of full disclosure, I won my share through a raffle and am not paying for it. However, Arrowhead did not know I was entered in the raffle, and I received no special consideration because of this blog. I paid for my livestock share. A full set of all the photos I've taken of this share is here.

Use Your Booty: Pasta with Kale and Pancetta

What a great way to use up kale. Plus, put enough crispy pancetta on top and you've got a chance at winning over kale-haters. From start to finish, this dish took less than half an hour to pull together.

Pasta with Kale & Pancetta
Serves 6-8
  • 1 pound whole wheat spaghetti
  • 2 bunches kale, leaves pulled from the stems and cut into thin strips
  • 4 ounces thinly sliced pancetta (if you only have thick-cut pancetta, cut it into small cubes)
  • 1/2 of a small onion, sliced into super-thin strips
  • 1 egg, beaten, optional
  • parmesan cheese
  • salt & pepper
  • sherry vinegar
Boil the spaghetti in a large pot of salted water. When the pasta is almost cooked through (just still a tiny bit chewy) add the kale to the pasta pot. When the pasta is cooked to your taste, drain the pasta and kale, reserving a cup of the cooking water (to make sure you don't forget this part, put a coffee mug in the colander to remind you to scoop out some pasta water).

In the meantime, sauté the pancetta in a skillet until it's crisp. Set aside.

When the pasta ia cooked, dump it back into the pot, add in the sliced onion, and stir in a little pasta water. Add in the beaten egg, if using, and keep stirring, adding more pasta water if needed to make a saucier consistency. Stir in a handful or so of parmesan cheese. Taste and add salt and pepper to taste (I like this dish peppery).

Portion the pasta into soup plates and top with crispy pancetta. Drizzle a few drops of vinegar over the top. Enjoy!

This Summer, I am chronicling my first CSA (Community Supported Agriculture) experience. My CSA share is from Arrowhead Farm, a farm based in Newburyport, MA. Each week, I am posting about what was in my share and what I'm doing with it. By way of full disclosure, I won my share through a raffle and am not paying for it. However, Arrowhead did not know I was entered in the raffle, and I received no special consideration because of this blog. I paid for my livestock share. A full set of all the photos I've taken of this share is here.

Monday, July 5, 2010

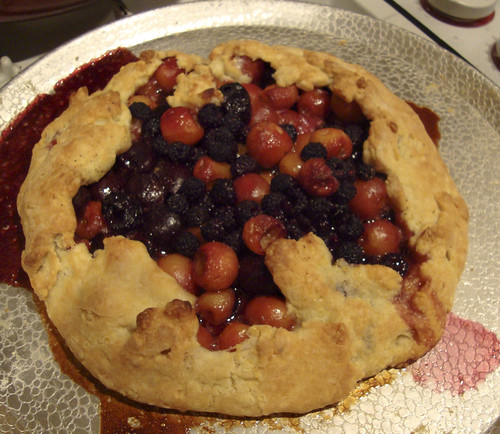
Fresh Fruit Galette

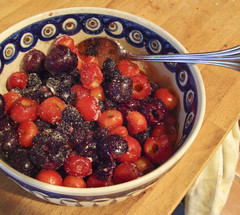
I do a ton of baking for my clients, but recently I feel like I'm been too busy to do any baking for us! Last night I wanted a tart for dessert and I had some gorgeous cherries from Arrowhead Family Farm and some black raspberries from our yard.

The crust in this recipe is a Flo Braker recipe from Baking With Julia. It's a great addition to your baking repertoire and works well in sweet and savory applications. Make sure you give yourself time to let the dough chill - I didn't and pushed it: the results were fine, but the dough was a lot more challenging to work with than it should have been.

Substitute any mixture of fresh fruit that you have on hand. You can layer the fruit daintily into the crust or just tumble it in like I did. If your fruit is super juicy, you can put a tablespoon or two of breadcrumbs or cookie crumbles into the crust before you add the fruit.

Fresh Fruit Galette
Serves 4-6
  • 1 recipe cornmeal galette dough (below)
  • 1 1/2 - 2 cups cut up fresh fruit - I used a mixture of yellow and red cherries and black raspberries
  • 1-3 tablespoons sugar (depending on the sweetness of your fruit)
  • 1 tablespoon butter
On a lightly floured surface, roll the galette dough into a 12" circle (it's okay if it's not a perfect circle, galettes can be "rustic"). Transfer the round of dough to a parchment-lined or non-stick baking sheet.

Stir the fruit and sugar together and spoon the fruit onto the center of the dough, leaving a 3-4" margin of dough. Dot the fruit with the butter.

Lift the dough up and over the fruit, forming a pleated edge (see the picture up there).

Bake for 20-30 minutes until fruit is juicy and the crust is nicely browned.

Cornmeal Galette Dough
From Flo Braker in Baking with Julia
  • 3 tablespoons yogurt or sour cream
  • 1/4 cup ice water
  • 1 cup flour
  • 1/4 cup cornmeal - I like a coarse-grind cornmeal, but you can use a finer grind if you don't want a crunchier crust
  • 1-2 teaspoons sugar
  • 1/2 teaspoon salt
  • 7 tablespoons butter, cut into 1/2" cubes
Whisk together the yogurt and water, set aside in the fridge so it stays cold.

Whisk the flour, cornmeal, sugar and salt together. Toss in the butter and cut the butter in (with your fingers, 2 knives, a pastry cutter or in the food processor - your choice) until you have a mixture that looks like like cornmeal with some pea-sized pieces in it.

With a rubber spatula, fold in the water/yogurt mixture. If the dough seems too dry, add more water, a tablespoon at a time until the dough holds together. Wrap in plastic and chill in the fridge for 2 hours or so at a minimum. The dough freezes really well, so make a double or triple batch and freeze the dough for later.

Friday, July 2, 2010

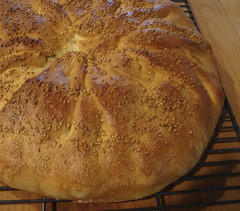
Use Your Booty: Torta d'Erbe

In Italian cuisine, a torta is a pie or tart. This one is a greens pie with a yeasted dough crust. For those of you afraid of pie crust, a yeasted dough might be a nice gateway pastry: you can't overwork the dough like you can with a short crust, the dough provides a firm case for the filling and doesn't get soggy like a pastry crust can.

To make for easy assembly, make the dough when it's convenient for you and after it rises, punch it down and refrigerate until you're ready to assemble the tart. Make your filling ahead as well - a warm filling will make the dough harder to work with. I made my tart in a free-form gallette style with a pleated top but you could easily make your tart in a tart, cake or pie pan if you wish.

Torta d'Erbe
Makes 1 large tart, 6-8 entrée servings
  • 1 recipe yeasted tart dough, below
  • 4-6 cups cooked, chopped greens (I used kale and Swiss chard in this tart)
  • 4 ounces mozzarella, cubed
  • 1 ounce parmesan cheese
  • 1/4 cup chopped pitted Kalamata olives
  • salt and pepper to taste
  • red wine vinegar
  • 2 eggs, beaten
  • 1 egg for egg wash
  • sesame seeds for garnish
Combine the greens, cheeses, and olives. Combine well and taste. Add salt & pepper to taste. If you think the greens need more acidic brightness stir in a few drops of red wine vinegar. When you're happy with the seasoning, stir in the 2 eggs.

On a lightly flour surface, roll the tart dough into a large circle (about 18"), sprinkling with more flour as needed to keep the dough from sticking. Transfer the dough onto a greased baking sheet or into an 11" tart pan.

Evenly spread the filling onto the dough, leaving a 4" margin if you're using a baking sheet and over the entire tart pan if using a tart pan. Lift the dough up and over the filling, pleating the dough to layer it evenly across the top of the tart.

Beat the other egg with a tablespoon of water and brush the egg wash over the tart. Sprinkle the tart with sesame seeds.

Bake at 375 for 30-40 minutes until the crust is well browned. Check the underside of the tart - if it's not browned well, bake the tart for another 10 minutes or so. Serve warm or at room temperature.

Yeasted Tart Dough
Makes enough for one large tart
  • 2 teaspoons active dry yeast
  • 1/2 teaspoon sugar
  • 1 cup room temperature water
  • 1 egg, beaten
  • 1/2 teaspoon salt
  • 13.5 - 18 ounces (3-4 cups) flour
  • 3 ounces butter, at room temperature OR 1/3 cup olive oil (I like the butter version best)
Stir together the yeast, sugar and water. When the yeast is dissolved in to the water, stir in the salt, egg and half the flour. Stir well to form a stiff paste (use a mixer with paddle attachment if you wish). Stir in the butter (the dough will soften back up). Keep adding more flour until the dough is dough-like.

Turn the dough out onto the counter and knead, adding more flour as needed to keep it from sticking. Knead until the dough is tender, shiny and smooth, about 10 minutes of contemplative kneading. It shouldn't be sticky. Transfer dough to an oiled bowl and cover bowl with plastic wrap

Let dough rise for about 1 hour, until doubled. Form tart as above, or if you aren't ready to make the tart, press the dough down to deflate it, recover and put the dough in the fridge until you're ready to make the tart.

You can freeze the dough for a week or so: put the dough into a ziploc bag, press out the air and freeze. Let thaw in a cool place for 6-8 hours.

This Summer, I am chronicling my first CSA (Community Supported Agriculture) experience. My CSA share is from Arrowhead Farm, a farm based in Newburyport, MA. Each week, I am posting about what was in my share and what I'm doing with it. By way of full disclosure, I won my share through a raffle and am not paying for it. However, Arrowhead did not know I was entered in the raffle, and I received no special consideration because of this blog. I paid for my livestock share. A full set of all the photos I've taken of this share is here.

Thursday, July 1, 2010

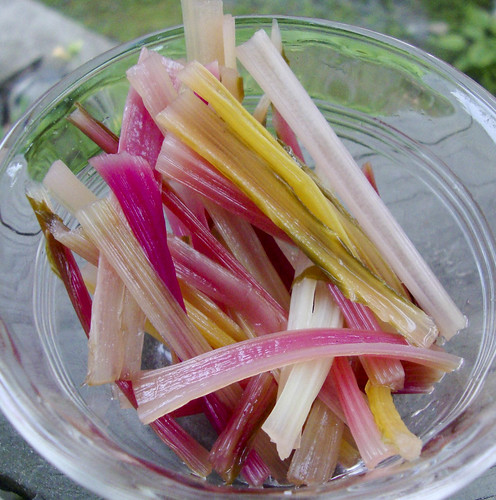
Use Your Booty: Pickled Swiss Chard Stems

Did you know that Swiss chard is two vegetables in one? You're probably very comfortable using the leafy part of the green, but if you're throwing the stems away, you're losing a major part of this vegetable.

I use the stems in soups or quiches. Treat the stems like celery when cooking them - they benefit from a little extra time in the sauté pan and should be cut the short way into thin slices, to reduce stringiness.

I recently found this recipe for pickled chard stems on the NY Times T magazine blog. I'm not generally a fan of sweet pickles (à la bread and butter pickles), but these are just super. Even better, they're ready to eat in a hour or so.

Pickled Chard Stems
Adapted from a recipe by Peter Meehan and the chefs at Gramercy Tavern
Yields about 1 pint
  • The stems from 1 bunch of Swiss chard
  • 1 thyme sprig
  • 2/3 cup sugar
  • 2/3 cup water
  • 2 cups rice wine vinegar
  • 2 tablespoons kosher salt
  • pinch each of fennel seed, peppercorns, mustard seed
  • couple slices of beet
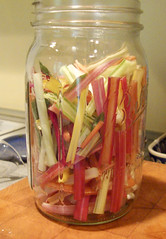
Cut the chard stems into even lengths, cutting any really thick stems in half lengthwise as well. Put the stems and the thyme sprig into a heat safe jar that just holds the stems (I used a quart canning jar, but should have used a pint jar).

Bring the water, sugar, salt, spices and beet to a boil. Reduce heat and simmer for 5 minutes. Strain the hot brine into the canning jar: it should cover the stems completely. If not, boil up a little more.

Let the pickles cool and then refrigerate.

This Summer, I am chronicling my first CSA (Community Supported Agriculture) experience. My CSA share is from Arrowhead Farm, a farm based in Newburyport, MA. Each week, I am posting about what was in my share and what I'm doing with it. By way of full disclosure, I won my share through a raffle and am not paying for it. However, Arrowhead did not know I was entered in the raffle, and I received no special consideration because of this blog. I paid for my livestock share. A full set of all the photos I've taken of this share is here.

Use Your Booty: Sri Lankan Greens


With all the green, leafy bounty I've been getting from my CSA, I'm surprised it's taken this long to get this recipe onto our table and into this blog. The recipe comes from Madhur Jaffrey's World Vegetarian, which, by the way, is a great resource for recipes for vegetables that are new to you.

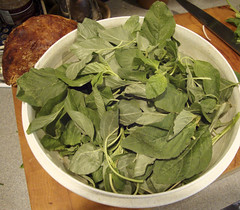
I used amaranth in this version, but you could use cabbage, KALE, chard, KALE, mustard, KALE, spinach - you get the point. The coconut is a nice touch: don't be fearful that your dish will taste like a pina colada, there's just a wee bit.

We enjoyed these greens on a plate (that's them in the top of the picture) with some curried cauliflower, a radish pickle some seriously hot hot sauce and basmati rice.

Sri Lankan Greens
Serves 4
  • olive oil
  • 1 onion, sliced into thin rings
  • 1 jalapeno, sliced into thin rings (for lots of heat) or just slit lengthwise (for a wee bit of heat)
  • 1-2 bunches of greens, leaves stripped from stems and cut into thin strips - enough to yield about 8 cups of greens
  • 1/2 teaspoon salt
  • 1/4 teaspoon turmeric
  • 2-3 tablespoons shredded coconut (I have used unsweetened coconut from the health food store and sweetened flake coconut from the supermarket - both work fine, you can also use fresh coconut if you have it)
Saute the onion and pepper in a large skillet over medium-high heat until the onion starts to brown - about 5 minutes.

Add the greens, salt and turmeric and stir. Let the greens start to wilt down. If the greens appear too dry add a little water to the pan. Cover and turn the heat to low.

Braise the greens for 10 - 20 minutes (softer greens like spinach will be tender sooner than tougher greens like kale).

When the greens are tender, stir in the coconut - taste for salt and adjust seasoning to taste.

This Summer, I am chronicling my first CSA (Community Supported Agriculture) experience. My CSA share is from Arrowhead Farm, a farm based in Newburyport, MA. Each week, I am posting about what was in my share and what I'm doing with it. By way of full disclosure, I won my share through a raffle and am not paying for it. However, Arrowhead did not know I was entered in the raffle, and I received no special consideration because of this blog. I paid for my livestock share. A full set of all the photos I've taken of this share is here.

Friday, June 25, 2010

Use Your Booty: Chickpea, Kale & Butternut Squash with Tahini Dressing

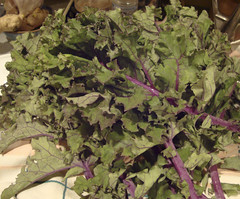
Ah kale, I do love it, but it certainly seems like kale and I are going to have to become good friends for me to survive this CSA. Fortunately, that's not really hard to do: First, my CSA is growing nine types of kale this season. Second, kale is pretty versatile - it can be used in so many different ways: bruschetta, a hearty soup, pesto, etc.

This salad's original recipe did not include kale, but since it's such a natural partner to chickpeas and butternut squash, I thought everyone would play nice together. The tahini dressing is nice on its own over roasted vegetables, lamb burgers, or as a dip for vegetables.

Chickpea, Kale and Butternut Squash Salad with Tahini Dressing
Serves 2-3 as an entrée salad, more as a side.
The original recipe, from Moro Restaurant, is here on Orangette, Molly Wizenberg's lovely blog. The recipe is super adaptable: make it work with what you have in the fridge. If you have leftover cooked squash or sweet potatoes, this is a great way to use it.

Enjoy this salad warm, as we did, or cold. If you're going to have it cold, add the dressing right before serving.
  • olive oil
  • 2 cups of cubed butternut squash or sweet potatoes
  • 1 bunch kale, stripped off stiff stems and cut into bite-sized pieces or thin strips
  • 2 cups cooked chickpeas (1 15 oz. can chickpeas, drained and rinsed)
Dressing
  • 1 garlic clove, pressed or minced
  • 3 tablespoons tahini (sesame paste)
  • 3 tablespoons lemon juice
  • 2 tablespoons water
  • 2-4 tablespoons olive oil
  • salt and pepper
Sauté the squash with a little olive oil in a large skillet over medium-high heat. Cook until the squash is tender. Add the kale to the pan and sauté until wilted, adding a little water to help it steam through. Cook until kale is wilted down, about 5-7 minutes. Add the chickpeas to the pan. Season with salt and pepper to taste.

Make the dressing: Whisk together all the dressing ingredients except the oil and salt & pepper. Whisk until the dressing looks smooth and creamy. Add a little water if it seems too thick. Whisk in the smaller amount of olive oil. Taste the dressing: if it's too sour add more olive oil. Taste again and adjust salt and pepper to your liking. Whisk in a few drops of water if it still seems too thick; it should the consistency of heavy cream.

Divide the salad among plates and drizzle with dressing.

This Summer, I am chronicling my first CSA (Community Supported Agriculture) experience. My CSA share is from Arrowhead Farm, a farm based in Newburyport, MA. Each week, I am posting about what was in my share and what I'm doing with it. By way of full disclosure, I won my share through a raffle and am not paying for it. However, Arrowhead did not know I was entered in the raffle, and I received no special consideration because of this blog. I paid for my livestock share. A full set of all the photos I've taken of this share is here.

Wednesday, June 16, 2010

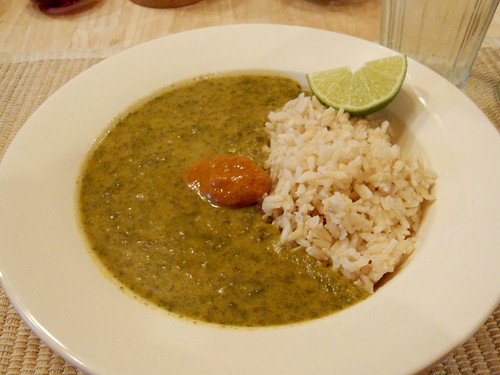
Use Your Booty: [Far From Authentic] Callaloo

I'm slapping all my disclaimers up at the front of this post. I'm sure that if you have ever eaten callaloo, a Trinidadian/Jamaican/Caribbean stew of amaranth leaves you will tell me that my version is just wrong. And I'm sure you are right. I used several recipes I found online as guidelines for this soup and then just threw them all aside and put this together.

Callaloo is also another name for the amaranth plant, so don't get confused when you're poking around online or in your Caribbean cookery books. Amaranth is also a grain - it's the seeds of the plant. Amaranth (the grain) is a really nice side dish and you should seek it out in your local health food store.

Introductions and disclaimers aside, this soup was yummy, regardless of what it's called. If you don't have amaranth greens at hand, baby spinach or chard would be a good substitute.

[Not Quite] Callaloo
Serves 4 to 6, as a main dish if served with rice, as a starter if served solo
  • olive oil
  • 2 onions, chopped
  • 2-3 cloves garlic, pressed or minced
  • 2 sweet potatoes (about 1 pound) or the same amount of butternut squash, cut into small cubes
  • 1 large bunch amaranth greens, about 1 pound - enough to yield 10-12 cups loosely packed leaves, leaves stripped from the stems
  • 1 can (15 oz) coconut milk (NOT light coconut milk)
  • 1 habanero pepper or 1-2 tablespoons of Caribbean-style hot sauce
  • 2-3 sprigs thyme

Sauté the onions over medium-high hear with a little olive oil in a small soup pot or large saucepan until the onion is softened and starting to brown. Add the garlic and continue to sauté for a minute or so, until fragrant.

Add the sweet potatoes and greens to the pot. Pour over the coconut milk and 2 coconut milk cans of water. As the soup starts to simmer, stir the greens into the liquid, add the habanero pepper or hot sauce. Simmer the soup until the sweet potatoes are soft.

Remove the thyme sprigs and habanero (if using). Use an immersion blender to break up the greens and sweet potatoes - don't aim for a smooth purée, leave things a little chunky.

Check for salt and pepper (you'll need fair amount of salt, but add a little at a time to ensure you don't oversalt).

Serve over rice with a few wedges of lime and some hot sauce for folks who like things spicy!

This Summer, I am chronicling my first CSA (Community Supported Agriculture) experience. My CSA share is from Arrowhead Farm, a farm based in Newburyport, MA. Each week, I am posting about what was in my share and what I'm doing with it. By way of full disclosure, I won my share through a raffle and am not paying for it. However, Arrowhead did not know I was entered in the raffle, and I received no special consideration because of this blog. I paid for my livestock share.

Tuesday, June 15, 2010

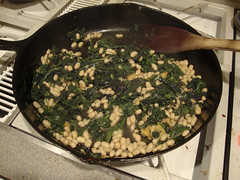
Use Your Booty: Bruschetta with Kale & White Beans

Let's get one thing out the way right up front: broo-SKET-a, not brooshetta. Feel free to tell your waitress.

Ok then, that said, let's move on to the recipe.

Bruschetta is a great way to use up slightly stale rustic-style bread (like this kind of bread). Slice it thickish - I like between 1/2" - 3/4" thick. Grill or broil it, rub with garlic and drizzle with olive oil. Top with sautéed vegetables and eat like an open-faced sandwich. I like this version a lot. You might think beans and bread is a lot of starchiness, but the beans add a lovely creaminess to the dish without adding fat.

Kale & White Bean Bruschetta
Serves 2
This is easily doubled, tripled or quadrupled. We eat it for dinner, but if you cut the bread into smaller pieces it would be a nice first course or nibble for a summer party.
  • 2 ounces pancetta, cubed or bacon, chopped (optional)
  • olive oil
  • 3-4 cloves garlic, sliced thin
  • 1 big bunch kale, leaves removed from the stems and coarsely chopped or torn (you need a lot of kale - it really cooks down)
  • 1 can white beans, drained and rinsed (about 1-1.5 cups cooked beans)
  • 4 slices rustic-style crusty bread (you know what you'll eat, so the number of slices will depend on the size of your loaf)
  • 1 clove garlic
In a large skillet, cook the pancetta or bacon (if using) until it's crisp and browned. Remove the pancetta from the pan and set aside. If the pan is too dry (or if you didn't use the meat, or if you don't want to cook in bacon fat) add enough olive oil to generously film the bottom of the pan.

When the oil is hot, add the garlic. When it just starts to color, add the kale to the pan (it will sputter - watch out for flying oil droplets!). Stir the kale as it wilts and softens. If it starts to stick add a little water to the pan. When the kale is wilted down and softened, add the beans and heat them through. Add salt and pepper to taste, remembering that if you're using pancetta or bacon they will add salt to the dish too.

Meanwhile heat your grill or broiler. Brush the slices of bread with oil and grill or broil, turning once until browned and toasty (I like mine on the brown side of incinerated, whereas Dave prefers his a little more tan/blond). Rub the slices of bread with the other clove of garlic. Place the bread on dinner plates and drizzle with a little more oil. Top the bread slices with the kale & bean mixture and sprinkle the pancetta over the kale. Drizzle with a wee bit more oil (you don't want this plate dripping with oil, so use a teaspoon or two per drizzle).

Mangia!

This Summer, I am chronicling my first CSA (Community Supported Agriculture) experience. My CSA share is from Arrowhead Farm, a farm based in Newburyport, MA. Each week, I am posting about what was in my share and what I'm doing with it. By way of full disclosure, I won my share through a raffle and am not paying for it. However, Arrowhead did not know I was entered in the raffle, and I received no special consideration because of this blog. I paid for my livestock share.
Blog Widget by LinkWithin