 Gobble gobble! Best wishes for a great day.
Thursday, November 26, 2009
Sunday, November 22, 2009
Week of November 22
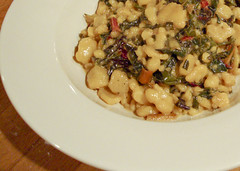
 Oh experiments, how I love them. This dish here is dak galbi, a Korean dish of stir-fried vegetables, chicken and loads of Korean chilies and chili paste. I feel neither qualified nor educated enough to post a recipe for this dish. I refer you to this recipe which I used as a starting point.
 This coming is going to be pretty crazy busy, which is why menu-planning is even more important. When you can't control your schedule, you can at least control what you eat.
Menu for the Week
Sunday
Basmati rice pilaf with green beans and tomatoes
Braised greens (red mustard and mizuna from the market)
Red lentil puree
Monday
Lamb stew (with local lamb from the market)
Tuesday
Bean and tuna pasta dish
Wednesday
Butternut squash and feta pie
Green salad
Thursday
Whaddaya think? :-)
Friday
Out on the town
Mastering the Art of French Cooking Class, November Edition
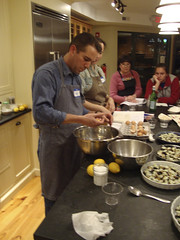
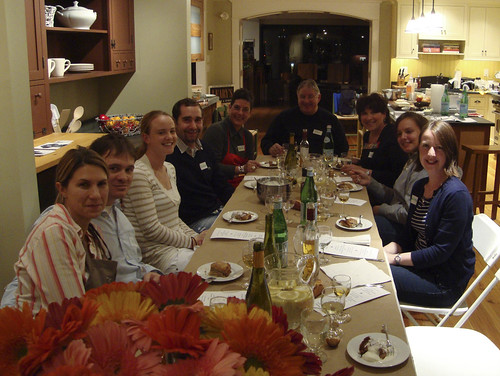
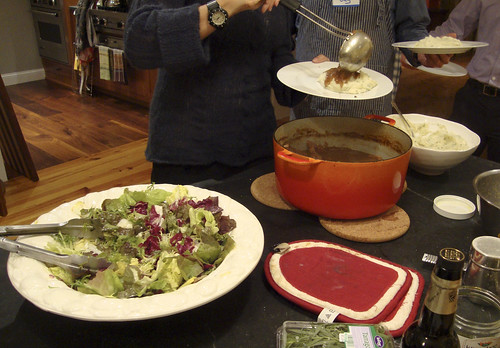 We held our second Cooking With Julia class at Jewett Farms Studio this past Friday. To see what happened at our first class, check this post here. The menu for Friday was centered around Carbonnades a la Flamande: a braise of beef and onions with beer. We started with mussels topped with an escargot-style butter, enjoyed super-creamy mashed potatoes with the stew and had a gorgeous salad alongside. Dessert was a light souffleed lemon tart.
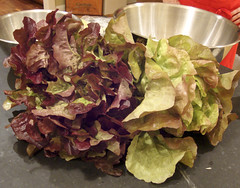
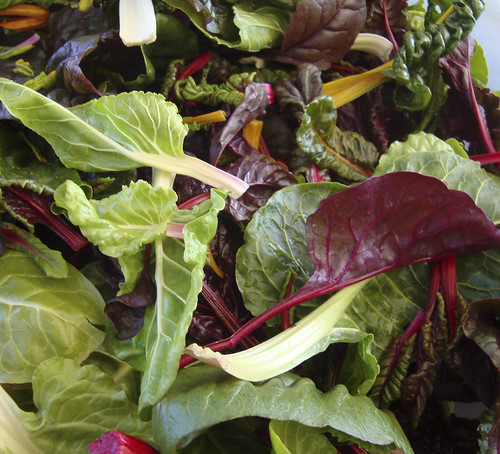
The class had a few returning faces from the first class and a number of new folks joined us as well. It was a great night, made that much more delicious with local meat and produce from Tendercrop Farm (check out those gorgeous lettuces!) and wines selected by our friends at New England Wine and Spirits.
Elena, from Jewett Farms, and I were too busy this time to take many pictures so unfortunately I don't have any pictures of the finished mussel dish or the dessert, but they were delicious.
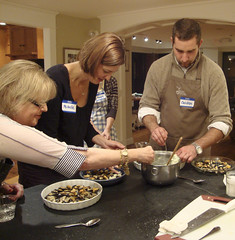
Here's a group of folks putting dollops of escargot butter on the mussels. The mussels were steamed first, then laid back into their shells before getting gratineed with the escargot butter. One nice feature of this dish is that it's composed of multiple make-ahead parts. You can make the butter days ahead (even weeks ahead if you freeze it!), steam the mussels the day of your party, top them with the butter and then keep them in the fridge until it's time to broil them. We made them in large communal dishes, but you could use small individual gratin dishes and they'd make a really nice presentation at a dinner party.
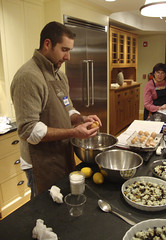
 Greg and Christian both gave their all when it came to separating the eggs we needed for the tart. Michelle showed off her great folding technique on the tart base. The fun thing about this lemon tart is that the filling is actually a lemon souffle. You get a nice lemony hit but without all the richness of a traditional lemon curd-based tart. When the tart came out of the oven it had a perfect (alas, unphotographed) domed top. It sank a little while we ate our dinner, but was still wonderfully creamy and light when we finally got down to the business of eating
 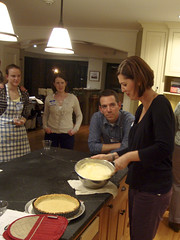 it!
it!Friday, November 20, 2009
Drink of the Week: Yuja Jack
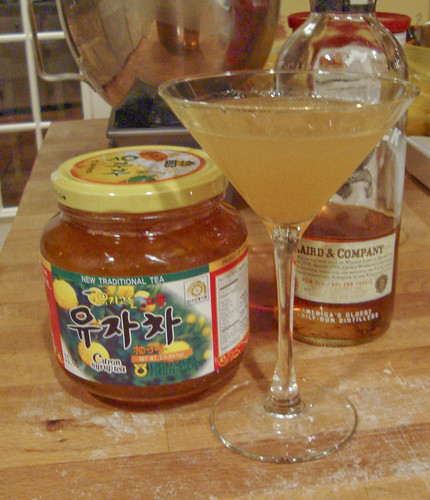 I can't be the first person to have thought of this. Of course, you need to have a jar of yuja-cha, Korean citron tea, on hand. I picked up this jar on a field trip to H-Mart, a new Korean supermarket in Burlington, MA. I read about yuja tea in an article about Korean ingredients so I was on the prowl for a jar.
 To me, yuja-cha is like a thinner version of marmalade, but with more floral notes. (There is no actual tea in citron tea, just fruit and sugar. Traditionally a spoonful is stirred into hot water for sipping.) With its sweetness, I thought it would be an interesting substitute for grenadine in a Jack Rose. I was right.
The Yuja Jack Cocktail
Put into an iced cocktail shaker:
- 1 1/2 ounces Applejack
- 1/2 ounce lemon juice
- 1/2 ounce (1 tablespoon) citron tea
Shake until well chilled. Give the drink a quick taste: depending on the tartness of your lemon or the brand of tea you select, you may need more lemon or tea. Adjust and shake again. Strain (the tea has shreds of peel in it) into a cocktail glass. Cheers!
Wednesday, November 18, 2009
Frascatelli: A Pasta You've Never Heard of Before
 I love Italian food, especially pastas. When I find a new shape or technique, it's like a little gift. When I discover a method as easy as this one, but which produces such delicious pasta, it's like winning the lottery.
I found frascatelli when I was looking for a carbonara recipe. I found this one on Food and Wine's website. The recipe is from
Michael Romano, executive chef of the Union Square Cafe. I didn't use the sauce recipe after all, but th
e pasta method was really intriguing. I looked a little more online and aside from a few more of Chef Romano's recipes, I found an article on the NY Times website. The NY Times article explains that the name comes from the word "frasca" which means branch in Italian.
Additional [limited] research suggested that this pasta may be Roman or Genoese. This is sort of like saying that a dish may come from San Antonio or Boston. I've got the Encyclopedia of Pasta on order and hope to learn more when that arrives. My gut says Roman, but I'm withholding judgement until I find corroboration. One web result suggests that this dish should be served to nursing mothers. I wonder if that's because this pasta is so easy to make that a nursing mother could fit its preparation into her busy schedule.
I sauced our frascatelli with a simple sauce of sauteed swiss chard, shallots, parmigiano reggiano and a tot of cream. Next time I'm going to try it with a ragu. The texture of the frascatelli is very potato gnocchi-esque, so use that to guide your sauce selection. I suggest the sauce be somewhat loose as the frascatelli will absorb liquid and become dumpling-like.
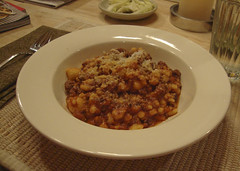
(edited to add picture of Frascatelli with Noney's Meat Sauce - delicious!)
Frascatelli
Serves 4 as a main course, to make more (or less), add about 1/3 cup (100 grams) of semolina flour for each person.
I strongly recommend you watch this video of Chef Romano making frascatelli: a movie is worth ten thousand words. He starts the frascatelli at about 3:10.
- 2 1/2 cups semolina flour
- cold water
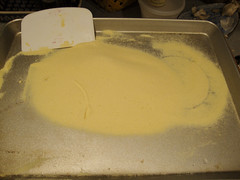
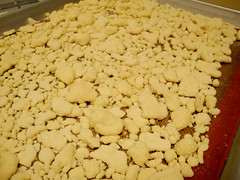
Spread the semolina into an even 1/2" thick layer on a
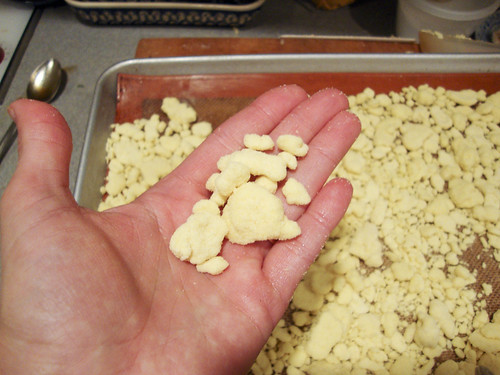
baking sheet. Using your fingers, flick and drip cold water over the surface of the semolina. The semolina should look evenly polka-dotted. Take a dough scraper and lift and toss the semolina flour over itself: it will start to form small pebbles of pasta.
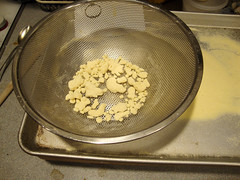
Lift the semolina into a strainer (over the baking sheet) and gently sift out the pebbles. Pour them onto a baking sheet which you have gently dusted with semolina or lined with a Silpat baking sheet. Continue to make the frascatelli: spread the semolina out again, sprinkle with water, strain. Continue doing this until all the semolina has been used up.
Once you get the hang of it, you'll find the process moves along pretty quickly. The trickiest thing is to get the drops of water about the same size. But as you can see from my pictures, my finished product had a range of sizing and they all cooked up just fine.
Once your frascatelli are done you can set them aside for later or cook them right away. If you are going to cook them later, dust them with a little more semolina and cover them with a dishtowel.
Before you cook the frascatelli, get your pasta sauce ready. You want your sauce to be warm and ready to go when the frascatelli are ready. Boil the frascatelli in salted water for about 3-7 minutes. Cooking time will depend on the size of your pasta pieces and how long you've let them wait before cooking. They are done when they are al dente but don't taste of raw flour. Drain the frascatelli, reserving some of the cooking water, and add them directly to the sauce. Add additional cooking water if things get too dry; the pasta can really soak up liquid.
If there are leftovers (unlikely), reheat them in a skillet over medium heat. Add a little extra liquid to keep things from sticking.
Tuesday, November 17, 2009
Gnocchi alla Romana
 Most of us are familiar with potato gnocchi. They are made from a soft dough of potato, egg and flour. Making potato gnocchi is a hard-won skill that takes many of us years and years to master (I am far from mastery - I promise to hold forth on potato gnocchi soon). Gnocchi alla romana (or (Roman gnocchi), on the other hand, are yours to master, right out of the gate.
 The basic recipe is this: semolina flour is cooked in simmering milk, then butter, cheese and egg yolks are added. After the batter cools off it's cut into shapes, sprinkled with cheese and baked/broiled until piping hot. Even better, you can do everything up to a few days ahead and heat it up right before dinner. The hardest thing about it is finding semolina flour. However, many supermarkets carry it now. The brand I see most frequently is Bob's Red Mill. Look for it in the baking supplies section.
Oh, and how do these gnocchi taste, you ask? Holy crap, these are good. I sprinkled ours with Maytag blue cheese and they made a fabulous pairing with the veal scallops I sauteed to go alongside. Do yourself a favor and work this dish into your routine soon. They are a perfect canvas for experimentation: I think my next batch will be laced with thyme, and then sprinkled with gruyere and caramelized onions (sort of a French onion soup vibe). Let me know what you do with yours.
Gnocchi alla Romana
Serves about 4 as a side dish (you don't need a lot for a serving: these are very rich)
adapted from Ratio by Michael Ruhlman and epicurious.
- 2 cups milk
- 2 ounces butter
- 2 teaspoons salt
- 4 ounces semolina flour (about 3/4 cup)
- 1/4 cup parmesan, romano or grana padano cheese
- 2 egg yolks (omit the yolks for a lighter gnocchi)
- Cheese of your choice for gratineeing
Bring the milk, butter and salt to a simmer. Slowly whisk in the semolina flour, ensuring there are no lumps (I didn't whisk, I stirred and I got lumpy semolina. Whisk, whisk, whisk.). With a spoon or rubber spatula, stir the paste, over medium-low heat until the mixture is thickened, about 5-10 minutes. Turn off the heat and whisk in the parmesan cheese. Taste the mixture for salt, and season to taste with pepper, nutmeg, or any other herbs or spices you want to use. Whisk in the egg yolks. Spread the mixture in an even layer into a parchment-lined 9x9 pan. Let the mixture cool and then put it, covered, into the refrigerator.
When you are ready to bake the gnocchi, take the pan out and lift the cooled sheet of gnocchi paste out of the pan. Use a cookie cutter or knife to cut the paste into pieces. Layer them (I shingled them into a baking dish) or lay them in a baking dish and sprinkle them with cheese. Put the pan in a 375 oven until the gnocchi are warmed through. After the gnocchi are hot, run them under the broiler for about 5 minutes until browned and bubbling.
Enjoy them piping hot, although they were great at room temperature too.
Monday, November 16, 2009
Week of November 15
 This week, I am trying to use up a lot of my fridge's backlog of ingredients. Does this happen to you every now and then? You open the refrigerator and it is full, full, full of random ingredients. As a result, this week's is a little, shall we say, loose.
The week ends with my next Julia Child class and I am psyched about it. It's a lot of work, but it's great to be with a group of like-minded food lovers in such a social setting.
My little helper gave me a hand with this week's menu:
Sunday
Sauteed veal scallops (the veal is from Kellie Brook Farm in Greenland, NH - local, humanely-raised and delicious)
Steamed white asparagus (bought this on sale, after eating it I do not see much point in white asparagus - maybe if it was local or fresher?)
Sauteed R.A.G. (random assorted greens from the fridge: kale, napa cabbage, bok choy and cauliflower leaves)
Roman gnocchi (post forthcoming)
Monday
Chickpea soup
Tuesday
Linguine with clams casino sauce
Green salad
Wednesday
Korean rice cake stir fry thing (inspired by this dish, we'll see how it goes)
Thursday
Old-fashioned meat sauce with pasta
Green salad
Garlic bread
Friday
Mastering the Art of French Cooking Class
Mussels gratinee
Carbonnade of beef
Garlic-mashed potatoes
Green salad with French vinaigrette
Souffled lemon tart
Tuesday, November 10, 2009
Mastering the Art of French Cooking Class
 One of the things I've done a lot of this fall is teaching cooking classes. One series of classes is based on Julia Child's classic cookbook Mastering the Art of French Cooking.
The classes are held in conjunction with the lovely folks at Jewett Farms Studio in downtown Newburyport, MA. Their cabinetry showroom has a gorgeous demonstration kitchen, complete with a massive Viking range. So on October 18, twelve of us gathered for the first class, titled "Family Dinner". The menu - with all recipes taken from the cookbook:
Potage Parmentier / Potato-Leek SoupPoulet Roti / Roast ChickenGratin Savoyard / Potato GratinAsperges Hollandaise / Asparagus with HollandaiseGateau de Crepes a la Normande / Flambeed Crepe "Cake" with Apples
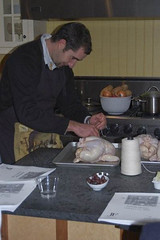
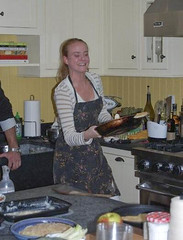
I had decided earlier that these classes would be "hands-on" optional. The idea is that we'd all gather to prepare the meal and eat together and people could help if they wished. This was a nice compromise: folks could sit and chat sip wine, ask about recipes, or dive in or get their hand a little dirty with prep work.
As a group, we trussed chickens (check out Christian showing off his mad trussing skills), flipped crepes (go Annjea!), and assembled the cake. Egged on by my enthusiastic cheering section, I demoed whisking up a batch of hollandaise and flambeed the gateau. A full photo set from the night is here. We dined as a group and everyone was sent home with recipes, wine notes and a full belly.
We had a great night and a great meal. I am really looking forward to our next class on November 20 (Carbonnade, an oniony beef stew, is on the menu). It's already sold out, but there are still spaces available for our
December class (Roast duck, pear tart, remoulade) on December 11. Click here for a PDF flyer with the full menu and registration details.
Bon appetit!
Monday, November 9, 2009
Menu for the Week of November 8
 It's been a while since I've posted one of these, huh? Planning a weekly menu is always a chore, but as I've learned over this past summer, it is a necessity for us. My work schedule has been crazy and irregular, and so I have been blowing off the menu planning. As a result, I've been frequently stressed out at mealtimes.
 So, I'm going to try to buckle back down and plan again. This week I was not selling at my booth at the Newburyport Farmers' Market so I was able to visit it as a customer. I wanted to take advantage of whatever products caught my eye, so my shopping list needed to be written in a very general way.
This was my shopping list:
- Vegetables for Indian-style Sunday dinner
- Vegetables for Tuesday night dinner
- Vegetables for 2 side dishes
- Meat for Wednesday night dinner
- Beef for Monday night dinner (recipe testing)
What was great about this list: I picked up a gorgeous head of romanesco broccoli, beautiful Swiss chard (see above), some delicious fingerling potatoes, more of that awesome purple broccoli, and some goat stew meat and an eye of round roast. All local, all delicious. I got to take advantage of what was available and buy on a whim, as opposed to sticking firmly to a detailed list.
So here's the menu I ended up with for the week:
Sunday
Indian dinner - this meal was inspired by a visit to Shalimar Foods in Cambridge. So many great ingredients and a blog post to come! All the recipes I used were from the new Gourmet cookbook, Gourmet Today.
South Indian Shrimp Curry
Lentil Stew
Romanesco Broccoli and Potatoes (original recipe called for cauliflower, the romanesco was a nice, if non-traditional, change)
Basmati Rice
Monday
Beef Carbonnade (testing this recipe for a series of classes I'm teaching)
Green Salad
Potatoes
Tuesday
Frascatelli (a kind of semolina pasta I read about recently - will let you know how it goes) with Swiss chard saute
Wednesday
Curried Goat Stew
Jasmine Rice
Thursday
Vegetable Fried Rice (using up leftover rice and leftover bits from the fridge)
Friday
Field trip
Sunday, November 8, 2009
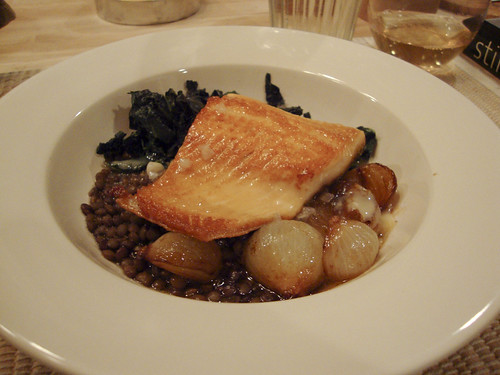
Arctic Char with Lentils and Mustard Beurre Blanc
 This is another recipe (with a lousy picture, sorry) I have been meaning to post for you for a while. Arctic char is not a fish you may think of right off the bat, but it's a great fish to seek out and cook with. Char is similar to trout or salmon (they share a family tree) and can be safely substituted in most recipes calling for either. The char you will find for sale is likely farmed and will be a product of the United States, Canada, Iceland or Norway. Check out the Monterey Bay Aquarium's Seafood Watch site for more info on choosing sustainable seafood options.
This recipe is part of Teach a Man to Fish, an online event focused on drawing attention to the problem of overfishing and to cooking with sustainable seafood. In its third year, Teach a Man to Fish is organized by the lovely Jacqueline Church. Visit her site here for more information and lots of recipes and seafood info.)
This dish has lots of components: the fish, the sauce, lentils, kale and onions. Everything but the fish and the sauce can be made ahead (even a few days ahead), and you can just use a few components instead. For instance, the char and sauce would be nice over pasta or rice. I'm going to to give the components as separate recipes so you can decide what to use.
All recipes serve four people. I plated my dish with lentils in the bottom, kale and onions on the sides. Then I placed the char on top with a healthy dollop of beurre blanc to melt over the plate.
- 1 1/2 pounds Arctic char fillets, cut into four pieces of about 6 oz. each
- salt and pepper
- oil for pan
Heat a 12" skillet, preferably not non-stick, over high heat. While the pan is heating, prepare the fish fillets: lay them skin-side down on a sheet of paper towels to ensure the fillets are really dry. Sprinkle the flesh with salt and pepper. Pour a little oil in the very hot skillet and lay the fillets skin-side down in the skillet. Sear the fillets about 3 minutes, until the skin is browned and crisp. Carefully turn the fillets and cook another 3-4 minutes until the fillets are cooked through.
Mustard Beurre Blanc
- 1/2 cup white wine
- 1 shallot, minced fine
- 1 tablespoon dijon mustard
- 8 ounces (yes, that's two sticks) unsalted butter, cut into small pieces
- salt to taste
Put the wine and shallot in a small saucepan and boil over medium-high heat and reduce to 2 tablespoons. Whisk in the mustard.
Whisk in butter, piece by piece. Don't add all the butter at once, you need to emulsify the sauce with the butter, and you won't succeed if you try to rush it. Whisk vigorously, adding each piece as it's absorbed into the sauce. When all the butter has been added, season sauce with salt to taste.
Keep sauce warm until time to serve.
Lentilles du Puy
- 1 cup lentilles du Puy (see my lentil posts here and here for more info on this type of lentil)
- 1 small onion, diced
- 2 cloves garlic, sliced thin
- sprig thyme
- olive oil
In a medium saucepan (3 quart-ish) over medium heat, saute the onion and garlic until softened and just starting to brown. Add the lentils and stir to coat with oil. Add 2-3 cups water and the thyem and bring to a simmer. Simmer until lentils are cooked through. Depending on the age of your lentils, they will take from 20-45 minutes. Add more water as needed; you want the lentils to stay covered with water while they cook.
When the lentils are tender, remove them from heat. Season with salt and pepper.
The lentils can be made several days ahead and reheated when you need them.
Braised Kale
- 1 bunch kale, leaves pulled from stems, leaves cut into thin strips
- 2 cloves garlic, sliced thin
- oil for sauteing
- sherry vinegar
Saute the garlic until it starts to soften, add the shredded kale and a sprinkle of salt. Saute over medium heat until the kale is wilted and soft. If the kale starts to stick, or the pan seems too dry, add a splash of water. Season to taste with salt and a splash of sherry vinegar.
Caramelized Onions
- 10-30 small onions (cippolini or boiling onions - judge how many you need by their size: they're garnish, not a side dish), peeled and halved through the stem end if large.
- 1 -2 cups chicken broth
- 1/4 cup sherry vinegar
- brown sugar
- olive oil
- salt and pepper
Saute the onions in a skillet large enough to hold them in one layer. Let them brown gently over medium heat, about 10 minutes. Pour enough chicken broth onto the onions to cover them halfway. Partially cover the pan. Simmer until onions are soft all the way through. Remove cover from pan, turn heat up and boil until the broth is reduced to a glaze.
Deglaze the pan with vinegar and add a sprinkle of brown sugar to make a glaze that coats the onions. Taste: if things are too vinegary add a little more sugar. Add salt and pepper to taste.
Pretty in Purple
 Hey Northeasterners, it's getting cold and wintry out there, but there is still fresh produce to be had. Like this gorgeous purple broccoli from Tendercrop Farm in Newbury, MA.
I prepared it simply and the results were so delicious we gobbled it up before I could snap a picture.
Oven-Roasted Broccoli
Thank you The Amateur Gourmet for the recipe.
- Broccoli, cut into bite-sized florets - about 4 cups. I also used those beautiful broccoli leaves, sliced into julienne
- 4 cloves garlic, thinly sliced
- 4 tablespoons olive oil (or enough for a healthy glug or two to pour over the broccoli)
- salt
Set the oven to 425. On a baking sheet, toss the broccoli into an even layer. Scatter the garlic slices over the broccoli and drizzle with oil and a sprinkle of salt. Roast for about 20 minutes, until the broccoli is softened and has started to crisp up a little.
Wow - delicious and super simple. The broccoli leaves got very crispy and added a nice textural contrast to the broccoli.
Saturday, November 7, 2009
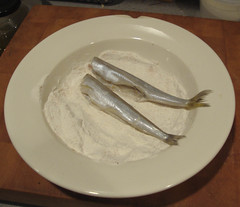
Fried Smelt Po'Boy
 This meal came together as the result of a plan-free shopping trip to Whole Foods. I wandered past the seafood display and saw a tray of fresh smelt (smelts?) on display. I've been trying to cook more sustainable seafood and these seemed like a great option to work with. For some reason, the idea of a smelt po'boy came to me. Inspiration-struck, I hustled through the store and picked up the remainder of what I thought I'd need to make supper: a baguette, a few tangerines (trust me) and a lemon.
The plate would have looked more than a little tan, so I included a salad in my meal's design to keep scurvy at bay.
Fried Smelt Po'Boy with Fennel-Chicory-Tangerine Salad
Disclaimer: I have never eaten a real po'boy, so I make no claims to the authenticity of my sandwich. All I can say is that it was delicious.
This looks like a lot of components, but don't worry: this all came together really fast. Also, there's nothing wrong with using regular tartar sauce, plain butter, skipping the salad, etc.
Makes enough for two servings:
For fish
- 12 ounces gutted, cleaned smelts (don't worry about the bones - they'll soften up during the frying and will be 100% edible)
- Wondra flour, for dredging
- Oil for frying
For fennel-lemon tartar sauce
- 3 tablespoons mayonnaise
- Zest of 1 lemon
- Chopped fennel fronds
- Hot pepper flakes, to taste
For mustard butter
- 2 tablespoons butter
- 2 tablespoons creole mustard
To finish sandwich
- 12" baguette, cut into 2 pieces and sliced lengthwise (like a book)
For salad
- Fennel bulb
- 1 tangerine or clementine
- 2 handfuls shredded chicory
- sherry vinegar
- olive oil
- salt & pepper
Make tartar sauce: Mix all ingredients together and adjust salt, heat and acid to your taste.
Make mustard butter: Blend butter and mustard together.
Make salad: Thinly slice fennel bulb (a mandoline is great for this). Peel and section the tangerine into segments. Toss fennel and tangerine segments with chicory. Sprinkle a few tablespoons of sherry vinegar over the salad and then a few tablespoons of olive oil. Toss to combine, adding salt and pepper to taste.
Fry the fish: Heat 1/2" oil in frying pan. Dredge the smelts in Wondra flour. When oil is hot (sprinkle a little flour into oil - it should sizzle up and brown quickly), fry the fish in batches until lightly browned. Remove fish from pan and drain on paper towels. Let the oil come up to heat again before frying more fish. (I fried mine in two batches.)
Assemble sandwich: heat the baguettes in a 300 oven until warm and crusty. Spread the inside of the bread with mustard butter. Fill each sandwich with fish (leave some tails poking out the ends, for fun). Sprinkle fish with salt and a squeeze of lemon juice. Top with tartar sauce. Serve with salad alongside or stuffed into the sandwich as you prefer. (We kept our salad on the side and stuffed a little in every now and then.)
(Edited to add: This recipe is part of Teach a Man to Fish, an online event focused on drawing attention to the problem of overfishing and to cooking with sustainable seafood. In its third year, Teach a Man to Fish is organized by the lovely Jacqueline Church. Visit her site here for more information and lots of recipes and seafood info.)
Friday, November 6, 2009
T-Minus 30: Deep Dish Polenta Pizza

(Hey all I'm back, for the moment. I'm not making a big deal about it, because for all I know it'll be another 3 months before I post again.)
Thought I'd try introducing a new category on this site "T-Minus 30": Dinners that should be ready to go in about 30 minutes. This assumes you have the ingredients on hand and will be able to focus your attention on meal prep.
I got an email recently from a representative at Real Simple offering me a copy of their new cookbook Real Simple Best Recipes: Easy, Delicious Meals. A lot of the dishes are good one-dish options. For me, most of the mains could be rounded out with a salad and a loaf of good bread. A lot of the recipes can be easily adapted to sue what you have on hand.
The first recipe I tried was for Deep-Dish Polenta Pizza. The recipe itself called for a topping of sun-dried tomatoes, radicchio and mozzarella. It also called for you to make polenta from scratch. I had none of those things on hand, but I did have some premade polenta (Fra Mani brand, from Costco!), stewed tomatoes and shallots (and mozzarella).
Deep-Dish Polenta Pizza
This is more of a method or idea than a recipe, so I'm going to give you the gist and you can take it from there.
- Heat the oven to 400.
- Prepare about 3 cups of polenta (either from scratch, by whisking 1 cup of polenta meal in 2 cups of boiling water for about 5 minutes*, or whisking premade polenta to loosen it up) and stir in about 1/4 cup of parmesan cheese.
- Spread polenta in the bottom of an oiled baking dish (a 9" pie pan works perfectly).
- Top polenta with ingredients of your choice. The recipe called for sun-dried tomatoes, shredded radicchio and mozzarella. I used stewed tomatoes, thinly sliced shallots and fresh mozzarella.
- Bake for about 20 minutes, until toppings are melting and softened and the edges of polenta are starting to crisp.
Try this recipe with whatever ingredients you have on hand. I think this would be fabulous with cooked sausage, fennel and asiago cheese.
* I know that true polenta needs to be cooked slowly and low, for at least 30 minutes. What we're doing here is cooking the polenta just enough to hydrate it.
Subscribe to:
Posts (Atom)

