Showing posts with label pasta. Show all posts

Sunday, January 16, 2011

Charcutepalooza: Whole Wheat Pasta with Braised Cabbage & Duck Prosciutto

Pasta with Braised Cabbage and Duck Prosciutto

Trying something new here, since I don't have time to pull together full recipes for you right now, but this dish was so good that I had to share. The hazelnut breadcrumbs are gilding of this lily, but they are quick to make and really add a great textural contrast to this dish.

This was good people, really really good. The whole time we ate we made yummy noises. (There may have been some grunting.)

If you don't have duck prosciutto at hand, sub in a great ham (country ham would be fabulous), cooked bacon, or traditional prosciutto (domestic would ok).

So here you go, step-by-step:

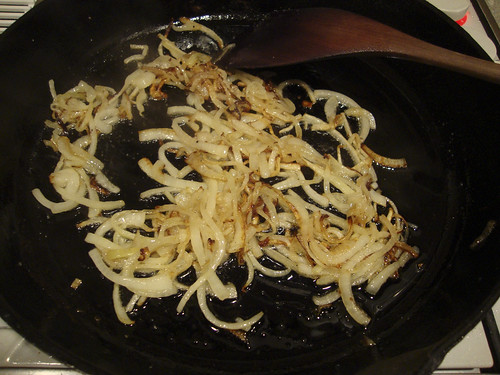
Brown one large onion, sliced thin, in a large skillet.

Pasta with Braised Cabbage and Duck Prosciutto

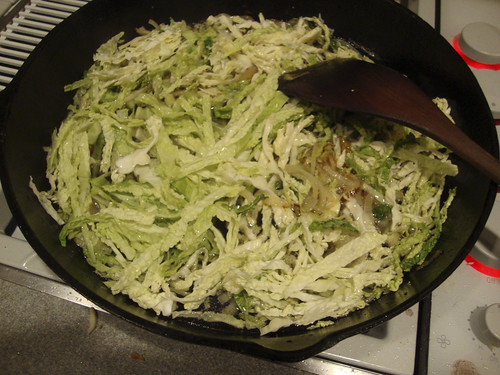
Add about 1/2 of a savoy cabbage, sliced thin, and about 1/2 cup of water. Cook over medium heat until cabbage is softened.

Pasta with Braised Cabbage and Duck Prosciutto

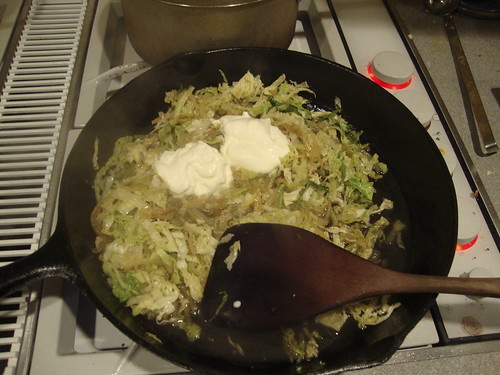
Add two large dollops of creme fraiche and a sprinkle of salt.

Pasta with Braised Cabbage and Duck Prosciutto

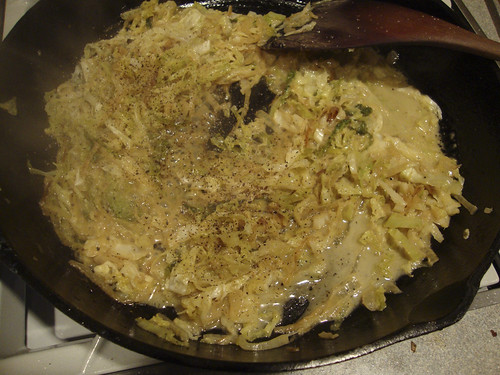
Stir once or twice and cook until it looks like this. Add a little water if the skillet gets too dry; you want things to stay semi-soupy. When it's done to your liking, grind in a crap-ton of black pepper and turn off the heat until the pasta is ready.

Pasta with Braised Cabbage and Duck Prosciutto

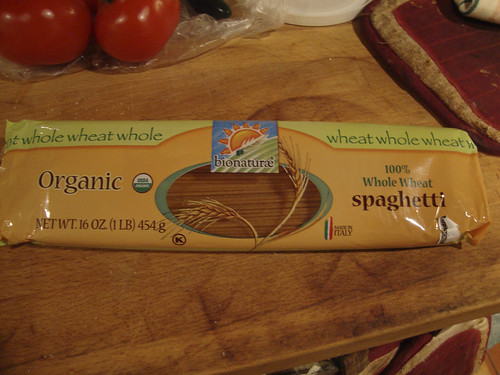
Meanwhile, cook up about half a pound of whole wheat spaghetti.

Pasta with Braised Cabbage and Duck Prosciutto

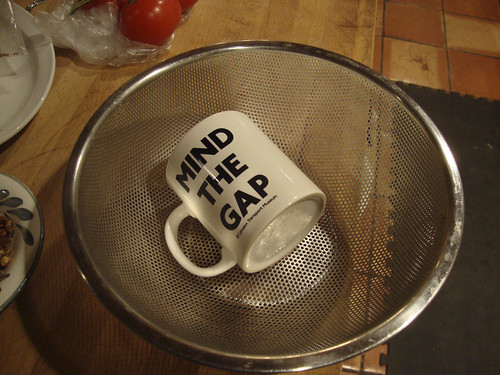
When the pasta is cooked to your taste (I like whole wheat pasta to be just this side of underdone, because it will finish cooking in the skillet *and* because when it overcooks, it gets soggy), reserve a cup of the cooking water (that's the mug is for: to remind me to save some water) and drain the pasta.

Pasta with Braised Cabbage and Duck Prosciutto

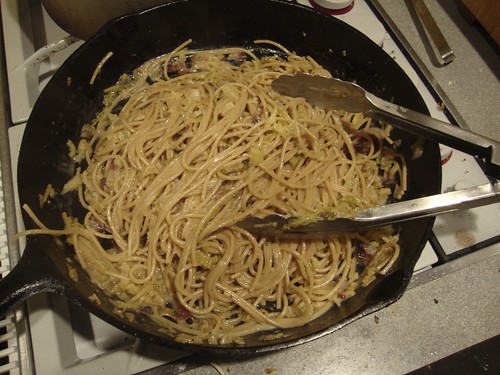
Toss the pasta into the skillet and turn the heat back on. Stir and toss the pasta together with the cabbage, adding some cooking water if it's too dry.

Pasta with Braised Cabbage and Duck Prosciutto

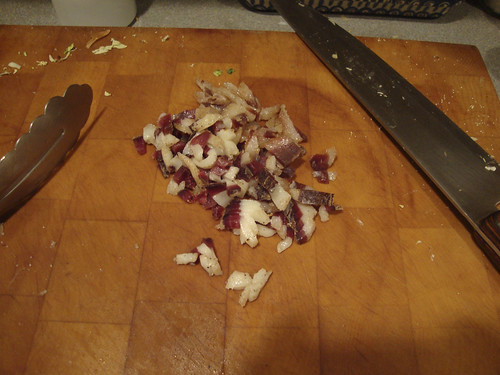
Fold in about 1/2 cup of duck prosciutto, slivered.

Pasta with Braised Cabbage and Duck Prosciutto

Serve in warmed soup plates, topped with hazelnut breadcrumbs.


To make the breadcrumbs:

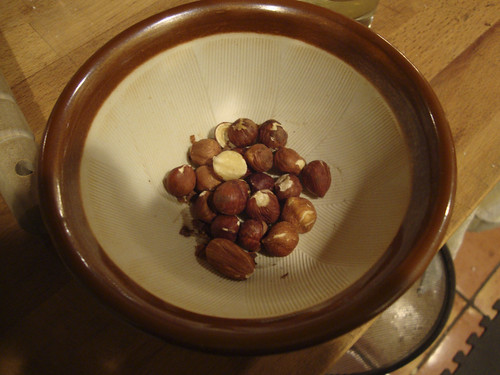
Put a handful of hazelnuts into a mortar.

Pasta with Braised Cabbage and Duck Prosciutto

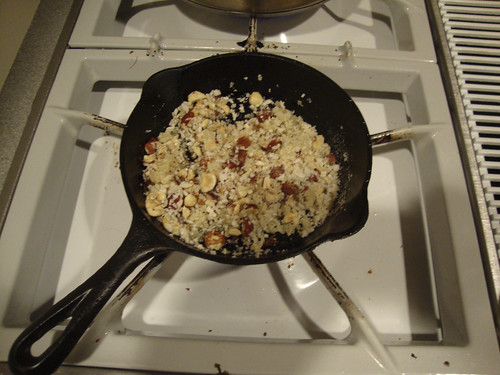
Crush them and toss them into a small pan with an equal portion of panko or fresh breadcrumbs. Drizzle in some olive oil and toast over medium high heat until browned and crispy.

Pasta with Braised Cabbage and Duck Prosciutto

Friday, August 6, 2010

Use Your Booty: Pasta Verde with Tomato Sauce and Burrata


After making that green lasagna on Tuesday I still had some leftover pasta dough. So I wrapped it up and left in the fridge to await future use (or the compost bin). Tonight I made a quick tomato sauce with the remainder of our CSA tomatoes (mostly cherry tomatoes) and decided to roll the rest of the pasta and have it for supper.

As an aside: I got this Kitchen Pasta Rolling dingus for Christmas (thanks Mom!). If you like fresh pasta I can't recommend the purchase (or gifting, if you are so lucky) of of these more highly. A hand cranked machine isn't that hard to use, but this motorized roller makes pasta making so much faster.

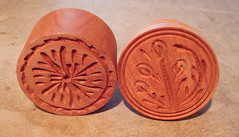
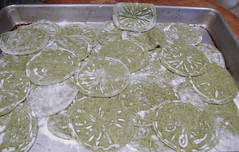
I rolled the pasta and turned it into corzetti (or croxetti), a hand-stamped round pasta from Genoa, Italy. That there is my corzetti stamp, purchased on our trip to Genoa a few years ago. And down there, is a tray of corzetti ready for boiling. For those playing along at home, I rolled my to "6" on the pasta roller - this is a thicker setting (the thinning setting is "8") about what I would use for linguine.

Burrata is a cheese made of mozzarella wrapped around fresh cheese curd. If you can't find it, a few slices of fresh mozzarella and/or a scoop of fresh ricotta would be a satisfactory substitute.

So, no recipe today, just the idea for you:

Make a fresh tomato sauce: I used about 1 pound of tomatoes (coarsely chopped) and 2 cloves of garlic, sautéed together until the tomatoes broke down and got saucy. I didn't seed or skin my tomatoes, but probably should have (the cherry tomatoes seeds and skins were a little tough). Season to taste with salt & pepper.

Boil up some fresh pasta (about 3-4 ounces per person).

Sauce the pasta with the sauce and top the dish with a few slices of burrata.


This Summer, I am chronicling my first CSA (Community Supported Agriculture) experience. My CSA share is from Arrowhead Farm, a farm based in Newburyport, MA. Each week, I am posting about what was in my share and what I'm doing with it. By way of full disclosure, I won my share through a raffle and am not paying for it. However, Arrowhead did not know I was entered in the raffle, and I received no special consideration because of this blog. I paid for my livestock share. A full set of all the photos I've taken of this share is here.

Saturday, July 31, 2010

Use Your Booty: Orecchiette with Chard, Sausage and Ricotta

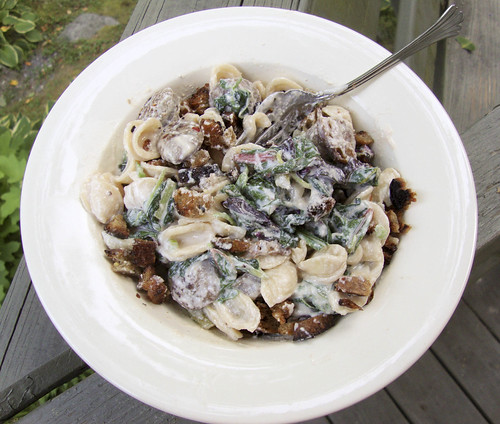
This meal was inspired by a dish I used to make a long, long time ago. It was called Rigatoni alla Buttera. It's a hearty plate of pasta, sauced with ricotta (or cream) and tomato and studded with peas and chunks of sausage.

Dave begged for some meat on the dinner plate (we've been eating a LOT of all-veggie dishes), so I pulled out the last of some pork sausage I made in my last sausage-stuffing binge (time to pull out the grinder again I guess). I also had a half container of ricotta in the fridge, so it was logical to try to pull a dish together using that too. I had to add some vegetables to the pan so I used Swiss chard (you can sub in spinach, kale or any other green you have on hand) and sliced raw onions.

To add a little crunch I made a handful of big breadcrumbs by cubing stale bread and pan frying them in olive oil.

Orecchiette with Chard, Sausage and Ricotta
2-3 servings
  • 8 ounces Italian sausage, cut into bite-sized pieces
  • 8 ounces orecchiette pasta (substitute shells if you can't get your hands on orecchiette)
  • 1 bunch Swiss chard, cut into bite-sized pieces
  • 12 ounces ricotta
  • 1 small onion, sliced into paper-thin rings
  • 1-2 handfuls big breadcrumbs
In a large skillet, sauté the sausage over medium-high heat until cooked through and browned.

While the sausage is cooking, bring a pot of water to a boil and cook the orecchiette to al dente. Right before the pasta is done, add the Swiss chard into the pasta pot to wilt it down. Drain the pasta, reserving a cup of the cooking water to use in the sauce (I usually put a coffee cup in my colander to remind me to save a cup of water.)

Put the pasta and chard back into the pasta pot with the ricotta, sliced onion and sausage. Stir everything together, adding a little pasta water to loosen up the sauce and make it creamy. Taste and add salt & pepper as desired. Just before serving, stir in big breadcrumbs.

This Summer, I am chronicling my first CSA (Community Supported Agriculture) experience. My CSA share is from Arrowhead Farm, a farm based in Newburyport, MA. Each week, I am posting about what was in my share and what I'm doing with it. By way of full disclosure, I won my share through a raffle and am not paying for it. However, Arrowhead did not know I was entered in the raffle, and I received no special consideration because of this blog. I paid for my livestock share. A full set of all the photos I've taken of this share is here.

Friday, July 9, 2010

Use Your Booty: Pasta with Kale and Pancetta

What a great way to use up kale. Plus, put enough crispy pancetta on top and you've got a chance at winning over kale-haters. From start to finish, this dish took less than half an hour to pull together.

Pasta with Kale & Pancetta
Serves 6-8
  • 1 pound whole wheat spaghetti
  • 2 bunches kale, leaves pulled from the stems and cut into thin strips
  • 4 ounces thinly sliced pancetta (if you only have thick-cut pancetta, cut it into small cubes)
  • 1/2 of a small onion, sliced into super-thin strips
  • 1 egg, beaten, optional
  • parmesan cheese
  • salt & pepper
  • sherry vinegar
Boil the spaghetti in a large pot of salted water. When the pasta is almost cooked through (just still a tiny bit chewy) add the kale to the pasta pot. When the pasta is cooked to your taste, drain the pasta and kale, reserving a cup of the cooking water (to make sure you don't forget this part, put a coffee mug in the colander to remind you to scoop out some pasta water).

In the meantime, sauté the pancetta in a skillet until it's crisp. Set aside.

When the pasta ia cooked, dump it back into the pot, add in the sliced onion, and stir in a little pasta water. Add in the beaten egg, if using, and keep stirring, adding more pasta water if needed to make a saucier consistency. Stir in a handful or so of parmesan cheese. Taste and add salt and pepper to taste (I like this dish peppery).

Portion the pasta into soup plates and top with crispy pancetta. Drizzle a few drops of vinegar over the top. Enjoy!

This Summer, I am chronicling my first CSA (Community Supported Agriculture) experience. My CSA share is from Arrowhead Farm, a farm based in Newburyport, MA. Each week, I am posting about what was in my share and what I'm doing with it. By way of full disclosure, I won my share through a raffle and am not paying for it. However, Arrowhead did not know I was entered in the raffle, and I received no special consideration because of this blog. I paid for my livestock share. A full set of all the photos I've taken of this share is here.

Thursday, June 17, 2010

Use Your Booty: The Big Pink Pasta

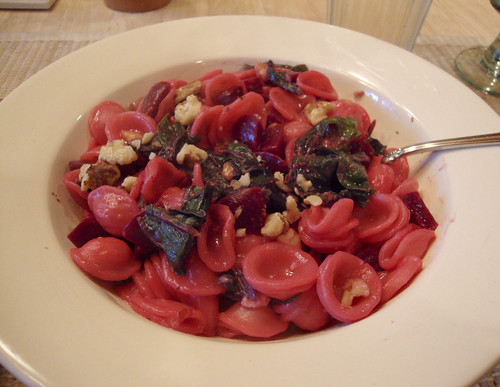
There's a restaurant near my mom's house in New Jersey called The Big Pink Pasta. I am certain that this dish has never been on their menu. The orecchiette turns this gorgeous lurid pink from the cooked beets. I wanted to put pine nuts on this dish, but ended up using walnuts because my brand new very expensive bag of pine nuts was rancid. Gak.

Orecchiette with Beets
Serves 3-4
When I have nice fresh bunch of beets handy I like to use both the beetroot and the greens in same dish if I can. If you don't have beet greens, use spinach or Swiss chard. I use this method to cook my beets. I cut them into small cubes before cooking.
  • 12 oz orecchiette pasta (shells make a good substitute)
  • 6-8 cups beet greens, cut into strips
  • 2 cups cooked, cubed beets
  • 4 oz feta cheese
  • olive oil
  • 1/2 cup toasted walnuts (or pine nuts)
Boil the pasta in salted water. Put the cooked beets into a colander in the sink.

When the pasta is almost done, use a coffee mug to scoop out some of the starchy pasta water. Drop in the beet greens and they'll wilt down. Strain the pasta and greens into the colander (over the beet cubes - see you heat them up this way. Clever, ya?)

Dump the pasta and beets back into the cooking pot. Stir in the feta cheese and drizzle a little oil in to the pasta. Add a little cooking water and stir gently. If the pasta seems too dry add a little more water. Sprinkle in most of the nuts, reserving a few for garnish.

Taste for salt and pepper and adjust the seasoning to your taste. Spoon the pasta into soup plates and sprinkle the remaining nuts over the top.

This Summer, I am chronicling my first CSA (Community Supported Agriculture) experience. My CSA share is from Arrowhead Farm, a farm based in Newburyport, MA. Each week, I am posting about what was in my share and what I'm doing with it. By way of full disclosure, I won my share through a raffle and am not paying for it. However, Arrowhead did not know I was entered in the raffle, and I received no special consideration because of this blog. I paid for my livestock share.

Thursday, June 3, 2010

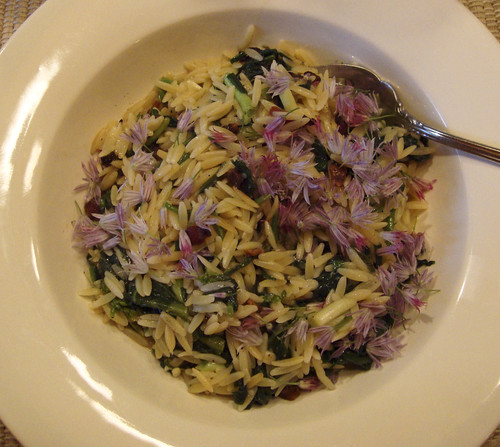
Use Your Booty: Orzo with Arugula and Chive Blossoms

This is another non-recipe recipe, but that's the way market meals tend to go, isn't it?

We ate this dish hot, like a pasta main course, but it would be pretty great at room temperature as a pasta salad too. Don't skimp on the chive blossoms: they're pretty and they taste great!

Orzo with Arugula and Chive Blossoms
Serves four as an entrée and six as a side dish
  • 1 pound orzo pasta (substitute another small pasta shape if you can't find orzo)
  • 2 bunches arugula, rabe, chard, mizuna, spinach (after the leaves are stripped off the stems you should have 6-8 cups of loosely packed leaves - I used some finely chopped Swiss chard stems too - those are the reddish bits you see)
  • a dozen chive blossoms (or 1/4 cup of mined chives)
  • 1/4 ounce parmesan cheese, finely grated
  • high quality extra virgin olive oil
Strip the greens leaves from their stems and then chop the leaves. In a large skillet over medium-high heat, sauté the greens in a little olive oil until they are wilted and softened - about 5 minutes or so. Turn off the heat.

Meanwhile, boil the pasta in plenty of salted water until it's cooked to your preferred doneness. before draining the pasta, reserve about a cup of cooking water.

In the skillet, combine the drained pasta, the parmesan cheese and enough pasta water to sauce things up. Stir in the chive blossoms and taste for salt and pepper. Drizzle some olive oil over the top of the pasta and serve.


This Summer, I am chronicling my first CSA (Community Supported Agriculture) experience. My CSA share is from Arrowhead Farm, a farm based in Newburyport, MA. Each week, I am posting about what was in my share and what I'm doing with it. By way of full disclosure, I won my share through a raffle and am not paying for it. However, Arrowhead did not know I was entered in the raffle, and I received no special consideration because of this blog.

Thursday, January 28, 2010

Gnudi, or Ravioli With Their Clothes Off

Call them what you like: gnudi, ricotta gnocchi or naked ravioli, I have tried to make these little dumplings many times and have not met with much, if any, success.

However, when I saw Jennifer Hess's recipe for Gnudi (in the issue of Edible Rhody that I picked up this weekend) I felt like I'd give them another try.

Her recipe is now up online here and you can read her post about them (and see her much more attractive picture) here. From her picture, you can also see that my portion size is about twice hers. Jen's recipe says it will feed 4-6, and I think that's appropriate - fill out your meal with vegetables, bread and salad. The gnudi will feel light (like little clouds) and you'll want to keep eating them, but as they are pretty much straight ricotta, they are rather rich.

I have tried to make similar recipes before and failed. The trick is to get your ricotta dry and well-drained. The fresh ricotta I purchased was very dry - even after 3 hours in a strainer, it had only released a tablespoon of liquid. In the past, I used ricotta I made myself and even after a long draining period I never got it dry enough and my gnudi always fell apart. This time, they held together beautifully and each made it to the plate in one piece.

If you look at Jen's picture you'll also see that my breadcrumbs were much larger than hers - that's me being lazy. Grind your breadcrumbs up nice and fine and they'll make for a nice crispy contrast to the gnudi's lightness. I used beet tops as the greens in these gnudi and they worked really well. We ate the beets as a salad course, topped with fennel and white anchovies.

Wednesday, November 18, 2009

Frascatelli: A Pasta You've Never Heard of Before

I love Italian food, especially pastas. When I find a new shape or technique, it's like a little gift. When I discover a method as easy as this one, but which produces such delicious pasta, it's like winning the lottery.

I found frascatelli when I was looking for a carbonara recipe. I found this one on Food and Wine's website. The recipe is from
Michael Romano, executive chef of the Union Square Cafe. I didn't use the sauce recipe after all, but th
e pasta method was really intriguing. I looked a little more online and aside from a few more of Chef Romano's recipes, I found an article on the NY Times website. The NY Times article explains that the name comes from the word "frasca" which means branch in Italian.

Additional [limited] research suggested that this pasta may be Roman or Genoese. This is sort of like saying that a dish may come from San Antonio or Boston. I've got the Encyclopedia of Pasta on order and hope to learn more when that arrives. My gut says Roman, but I'm withholding judgement until I find corroboration. One web result suggests that this dish should be served to nursing mothers. I wonder if that's because this pasta is so easy to make that a nursing mother could fit its preparation into her busy schedule.

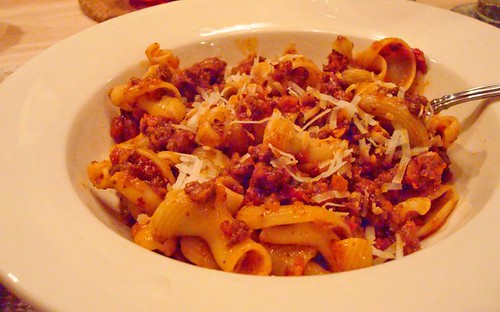
I sauced our frascatelli with a simple sauce of sauteed swiss chard, shallots, parmigiano reggiano and a tot of cream. Next time I'm going to try it with a ragu. The texture of the frascatelli is very potato gnocchi-esque, so use that to guide your sauce selection. I suggest the sauce be somewhat loose as the frascatelli will absorb liquid and become dumpling-like.

(edited to add picture of Frascatelli with Noney's Meat Sauce - delicious!)

Frascatelli
Serves 4 as a main course, to make more (or less), add about 1/3 cup (100 grams) of semolina flour for each person.

I strongly recommend you watch this video of Chef Romano making frascatelli: a movie is worth ten thousand words. He starts the frascatelli at about 3:10.
  • 2 1/2 cups semolina flour
  • cold water
Spread the semolina into an even 1/2" thick layer on a
baking sheet. Using your fingers, flick and drip cold water over the surface of the semolina. The semolina should look evenly polka-dotted. Take a dough scraper and lift and toss the semolina flour over itself: it will start to form small pebbles of pasta.

Lift the semolina into a strainer (over the baking sheet) and gently sift out the pebbles. Pour them onto a baking sheet which you have gently dusted with semolina or lined with a Silpat baking sheet. Continue to make the frascatelli: spread the semolina out again, sprinkle with water, strain. Continue doing this until all the semolina has been used up.

Once you get the hang of it, you'll find the process moves along pretty quickly. The trickiest thing is to get the drops of water about the same size. But as you can see from my pictures, my finished product had a range of sizing and they all cooked up just fine.

Once your frascatelli are done you can set them aside for later or cook them right away. If you are going to cook them later, dust them with a little more semolina and cover them with a dishtowel.

Before you cook the frascatelli, get your pasta sauce ready. You want your sauce to be warm and ready to go when the frascatelli are ready. Boil the frascatelli in salted water for about 3-7 minutes. Cooking time will depend on the size of your pasta pieces and how long you've let them wait before cooking. They are done when they are al dente but don't taste of raw flour. Drain the frascatelli, reserving some of the cooking water, and add them directly to the sauce. Add additional cooking water if things get too dry; the pasta can really soak up liquid.

If there are leftovers (unlikely), reheat them in a skillet over medium heat. Add a little extra liquid to keep things from sticking.

Friday, March 27, 2009

Daring Bakers March: The Lasagna of Emlia Romagna

The March 2009 challenge is hosted by Mary of Beans and Caviar, Melinda of Melbourne Larder and Enza of Io Da Grande. They have chosen Lasagne of Emilia-Romagna from The Splendid Table by Lynne Rossetto Kasper as the challenge.

I'm a pretty recent Daring Bakers member, so it was a pleasant surprise to me to see a savory item go onto the challenge roster. We were to make a ragu, a bechamel sauce, and most importantly, fresh spinach pasta.

The recipes were taken directly from Lynne Rossetto Kasper's glorious book The Splendid Table. The recipes are challenging, but doable, and I strongly recommend you give this dish a try. The ragu can be made ahead and frozen and the pasta can be done earlier in the day and held before assembly.

Lasagne of Emilia-Romagna (Lasagne Verdi al Forno)
(Serves 8 to 10 as a first course, 6 to 8 as a main dish)

  • 1 recipe Spinach Pasta cut for lasagna (recipe follows)
  • 1 recipe Bechamel Sauce (recipe follows)
  • 1 recipe Country Style Ragu (recipe follows)
  • 4 ounces freshly grated Parmigiano-Reggiano

Working Ahead:
The ragu and the béchamel sauce can be made up to three days ahead. The ragu can also be frozen for up to one month. The pasta can be rolled out, cut and dried up to 24 hours before cooking. The assembled lasagne can wait at room temperature about 1 hour before baking. Do not refrigerate it before baking, as the topping of béchamel and cheese will overcook by the time the center is hot.

Assembling the Ingredients:
Have all the sauces, rewarmed gently over a medium heat, and the pasta at hand. Have a large perforated skimmer and a large bowl of cold water next to the stove. Spread a double thickness of paper towels over a large counter space. Preheat the oven to 350 degrees Fahrenheit. Oil or butter a 3 quart shallow baking dish.

Cooking the Pasta:
Bring the salted water to a boil. Drop about four pieces of pasta in the water at a time. Cook about 2 minutes. If you are using dried pasta, cook about 4 minutes, taste, and cook longer if necessary. The pasta will continue cooking during baking, so make sure it is only barely tender. Lift the lasagne from the water with a skimmer, drain, and then slip into the bowl of cold water to stop cooking. When cool, lift out and dry on the paper towels. Repeat until all the pasta is cooked.
Assembling the Lasagne:
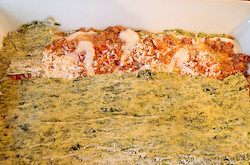
Spread a thin layer of béchamel over the bottom of the baking dish. Arrange a layer of about four overlapping sheets of pasta over the béchamel. Spread a thin layer of béchamel (about 3 or 4 spoonfuls) over the pasta, and then an equally thin layer of the ragu. Sprinkle with about 1&1/2 tablespoons of the béchamel and about 1/3 cup of the cheese. Repeat the layers until all ingredients are used, finishing with béchamel sauce and topping with a generous dusting of cheese. (I ended up with about six layers - you may have more or less depending on the thickness of your pasta.)

Baking and Serving the Lasagne:
Cover the baking dish lightly with foil, taking care not to let it touch the top of the lasagne. Bake 40 minutes, or until almost heated through. Remove the foil and bake another 10 minutes, or until hot in the center (test by inserting a knife – if it comes out very warm, the dish is ready). Take care not to brown the cheese topping. It should be melted, creamy looking and barely tinged with a little gold. Turn off the oven, leave the door ajar and let the lasagne rest for about 10 minutes. Then serve. This is not a solid lasagne, but a moist one that slips a bit when it is cut and served.

Spinach Egg Pasta (Pasta Verde)
Makes enough for 6 to 8 first course servings or 4 to 6 main course servings, equivalent to 1 pound (450g) dried boxed pasta.

  • 2 jumbo eggs (2 ounces/60g or more
  • 10 ounces (300g) fresh spinach, rinsed dry, and finely chopped; or 6 ounces (170g) frozen chopped spinach, defrosted and squeezed dry
  • 3&1/2 cups (14 ounces/400g) all purpose unbleached (plain) flour (organic stone ground preferred)

Mound the flour in the center of your work surface and make a well in the middle. Add the eggs and spinach. Use a wooden spoon to beat together the eggs and spinach. Then gradually start incorporating shallow scrapings of flour from the sides of the well into the liquid. As you work more and more flour into the liquid, the well’s sides may collapse. Use a pastry scraper to keep the liquids from running off and to incorporate the last bits of flour into the dough. Don’t worry if it looks like a hopelessly rough and messy lump.

With the aid of the scraper to scoop up unruly pieces, start kneading the dough. Once it becomes a cohesive mass, use the scraper to remove any bits of hard flour on the work surface – these will make the dough lumpy. Knead the dough for about 3 minutes. Its consistency should be elastic and a little sticky. If it is too sticky to move easily, knead in a few more tablespoons of flour. Continue kneading about 10 minutes, or until the dough has become satiny, smooth, and very elastic. It will feel alive under your hands. Do not shortcut this step. Wrap the dough in plastic wrap, and let it relax at room temperature 30 minutes to 3 hours.

If using an extra-long rolling pin work with half the dough at a time. With a regular-length rolling pin, roll out a quarter of the dough at a time and keep the rest of the dough wrapped. Lightly sprinkle a large work surface with flour. The idea is to stretch the dough rather than press down and push it. Shape it into a ball and begin rolling out to form a circle, frequently turning the disc of dough a quarter turn. As it thins outs, start rolling the disc back on the pin a quarter of the way toward the center and stretching it gently sideways by running the palms of your hands over the rolled-up dough from the center of the pin outward. Unroll, turn the disc a quarter turn, and repeat. Do twice more.

Stretch and even out the center of the disc by rolling the dough a quarter of the way back on the pin. Then gently push the rolling pin away from you with one hand while holding the sheet in place on the work surface with the other hand. Repeat three more times, turning the dough a quarter turn each time.

Repeat the two processes as the disc becomes larger and thinner. The goal is a sheet of even thickness. For lasagne, the sheet should be so thin that you can clearly see your hand through it and see colours. Cut into rectangles about 4 by 8 inches (10 x 20 cm).

Dry the pasta at room temperature and store in a sealed container or bag.

Bechamel

  • 4 tablespoons (2 ounces/60g) unsalted butter
  • 4 tablespoons (2 ounces/60g) all purpose unbleached (plain) flour, organic stone ground preferred
  • 2&2/3 cups (approx 570ml) milk
  • Salt and freshly ground pepper to taste
  • Freshly grated nutmeg to taste

Using a medium-sized saucepan, melt the butter over low to medium heat. Sift over the flour, whisk until smooth, and then stir (without stopping) for about 3 minutes. Whisk in the milk a little at a time and keep the mixture smooth. Bring to a slow simmer, and stir 3 to 4 minutes, or until the sauce thickens. Cook, stirring, for about 5 minutes, until the sauce thickens. Season with salt, pepper, and a hint of nutmeg.

Country Style Ragu’ (Ragu alla Contadina)
Makes enough sauce for 1 recipe fresh pasta or 1 pound/450g dried pasta).
I made mine batch of this in my crockpot - it worked perfectly for the slow simmer this sauce needs.

  • 3 tablespoons extra virgin olive oil (45 mL)
  • 2 ounces/60g pancetta, finely chopped
  • 1 medium onion, minced
  • 1 medium stalk celery with leaves, minced
  • 1 small carrot, minced
  • 4 ounces/125g boneless veal shoulder or round
  • 4 ounces/125g pork loin, trimmed of fat, or 4 ounces/125g mild Italian sausage (made without fennel)
  • 8 ounces/250g beef skirt steak, hanging tender, or boneless chuck blade or chuck center cut (in order of preference)
  • 1 ounce/30g thinly sliced Prosciutto di Parma
  • 2/3 cup (5 ounces/160ml) dry red wine
  • 1 &1/2 cups (12 ounces/375ml) chicken or beef stock (homemade if possible)
  • 2 cups (16 ounces/500ml) milk
  • 3 canned plum tomatoes, drained
  • Salt and freshly ground black pepper to taste

The ragu can be made 3 days ahead. Cover and refrigerate. It also freezes well for up to 1 month. Skim the fat from the ragu’ before using it.

Heat the olive oil in a 12 inch (30cm) skillet (frying pan) over medium-high heat. Have a large saucepan handy to use once browning is complete. Add the pancetta and minced vegetables and sauté, stirring frequently with a wooden spoon, 10 minutes, or until the onions barely begin to color. Coarsely grind all the meats together, including the prosciutto, in a food processor or meat grinder. Stir into the pan and slowly brown over medium heat. First the meats will give off a liquid and turn dull grey but, as the liquid evaporates, browning will begin. Stir often, scooping under the meats with the wooden spatula. Protect the brown glaze forming on the bottom of the pan by turning the heat down. Cook 15 minutes, or until the meats are a deep brown. Turn the contents of the skillet into a strainer and shake out the fat. Turn them into the saucepan and set over medium heat.

Reducing and Simmering: Add the wine to the skillet, lowering the heat so the sauce bubbles quietly. Stir occasionally until the wine has reduced by half, about 3 minutes. Scrape up the brown glaze as the wine bubbles. Then pour the reduced wine into the saucepan and set the skillet aside.

Stir ½ cup stock into the saucepan and let it bubble slowly, 10 minutes, or until totally evaporated. Repeat with another ½ cup stock. Stir in the last 1/2 cup stock along with the milk. Adjust heat so the liquid bubbles very slowly. Partially cover the pot, and cook 1 hour. Stir frequently to check for sticking.

Add the tomatoes, crushing them as they go into the pot. Cook uncovered, at a very slow bubble for another 45 minutes, or until the sauce resembles a thick, meaty stew. Season with salt and pepper.
Tuesday, January 27, 2009

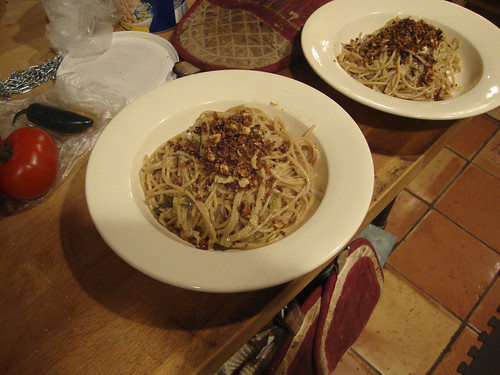
A Pantry Pasta

Another pantry-staple pasta dish. You can pull this together using what you have in the pantry and refrigerator. The only have-to-haves are some kind of pasta (shells or orchiette are preferred - stay in the short and chunky family), canned beans and tuna (I used ultra fancypants Italian oil-packed tuna last night, but a can of Starkist is fine too).

For crunch, I used some celery (you could use fresh bell peppers or turnip or jicama or what have you ...) and I had some scallions and dill in the fridge, so they got thrown in for freshness. Finally, I tossed in some capers for tang (try olives, giardinera or pickled onions) and chopped almonds (sub in breadcrumbs or toasted pinenuts) for crunch.
This recipe is a common fall-back for me: it's easy to adjust based on what I have on hand, and it's fast (by the time the pasta ia cooked it's just about finished). I looked back through my archive and found this tuna and bean salad (which is basically this dish, sans pasta). Here's a version where I used orzo (violating my chunky pasta rule).

So, at the risk of repeating myself, here's how you do it:

Pasta with Tuna and Beans
Serves four
  • 1 pound pasta
  • 1 8 ounce jar of oil-packed tuna, or 2 cans of tuna (olive-oil packed is best, but water-packed is ok)
  • 4 ribs celery, chopped
  • 1 can of beans
  • 3 tablespoons capers
  • 4 scallions, chopped
  • 2 handfuls chopped dill
  • 1 handful chopped toasted almonds
  • olive oil
  • salt and pepper
Boil the pasta.

While the pasta is cooking, make the sauce: Saute the celery until a little softened. Add the beans, capers and scallions. When the pasta is cooked, drain it (reserving about a cup of cooking water) and add two-thirds of the pasta to the skillet (you may not need it all - add more until you have a pleasing combination of pasta and the other ingredients). Toss in the dill and almonds. Heat everything together, drizzling in a little cooking water to make the dish saucier if needed.

Season to taste with salt and pepper. Serve hot or warm.

Any leftover pasta can be used in a frittata.

Wednesday, January 21, 2009

Quick Creamy Pasta

This was inspired by a post at Apartment Therapy (not that I live in an apartment) and I was reminded of a pasta dish I used to make often. It's a pasta with a cream sauce, but the sauce is pulled together from ricotta and a little pasta cooking water. It comes together right on the pasta and is super easy. If you use part-skim ricotta it's also much lighter than an alfredo or other cream sauce.

I used orchiette (little "ear" shaped pasta), but this would be good with any sauce-catching pasta like fusilli, gemelli or pennette. I had garlic confit, kalamata olives and sun-dried tomatoes in the fridge - so that's what went in. I also used the beet greens from a bunch of beets I'm putting in borscht tonight.

You could use any combination of vegetables and pickled thing - just use whatever you've got in the fridge. I listed a few suggestions for you at the end of the recipe.

Pasta with Olives, Tomatoes, Beet Greens and Garlic
serves 4
  • 1 pound of orchiette, fusilli, gemelli or pennette
  • 2 cups of chopped beet greens
  • 1/2 cup sun-dried tomatoes
  • 1/4 cup garlic confit (about 1 head of roasted garlic)
  • 1/4 cup kalamata olives, pitted and torn into pieces
  • 2 cups part-skim ricotta cheese
  • parmesan cheese, for serving
Boil the pasta until al dente.

While the pasta is cooking, make the sauce: In a large skillet, saute the beet greens in a little olive oil until wilted. Add the tomatoes, garlic and olives. Saute until everything is warmed through and fragrant. Add the ricotta to the pan and stir it in to make a sauce-like mixture. The sauce will stay a little grainy because it's ricotta. (If you want a smooth sauce, you can blend the ricotta in a food processor to smooth it out - to me, that's a but much for a weeknight dish.)

Reserve about one coffee mug's worth of water from the pasta pot. When the pasta is done, add the pasta directly to the pan with the sauce. Add pasta water to the pan as needed, to make the mixture "saucy". Taste for salt (you may not need any because of the olives).

Serve topped with a little parmesan cheese and freshly ground pepper.

Other flavor pairings:
  • Shredded radicchio, capers, caramelized onions
  • Baby spinach, crumbled bacon, cherry tomatoes
  • Roasted butternut squash, chopped fresh sage, sauteed red onion
  • Cooked sausage, roasted peppers, capers

Tuesday, November 18, 2008

A Tale of Two Ragus

The "The Way We Eat" section of the New York Times' Sunday Magazine can be a hit or miss proposition for me. That's not say that I don't the stories aren't interesting or compelling. But often I find myself reading the article saying to myself "well I'll never make this ... interesting though." (The recent story on curried pork katsu being a prime example.)

In February though, Christine Muhlke's story on ragus sent most of the foodie blogosphere, myself included, scurrying for their kitchens. I've now made two of the ragus (the beef and the lamb) in the story twice and encourage you to jump on the ragu-makin' wagon.

The benefits: These recipes yield sauces with incredible deep flavor and richness. Just a cupful or two makes for a decandent and satisfying pasta dish. They freeze *very* well so you can double or triple the recipe and stockpile these glorious sauces in your freezer.

The negatives: If you double the recipe (as I have), it takes a long time to make. The sauce should simmer for at least 3 hours to develop the full flavors and silky texture you want in a ragu. However, once you double the recipe, you should extend that simmer time to at least four hours, if not longer. But before you even get that far, everything needs to be browned, and reduced and browned again. That takes time, a lot of time. Use two frying pans to speed up the browning step, deglaze with the wine called for in the recipe, and then chuck everything into a big stockpot. Worth it though.

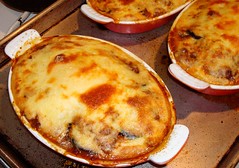
I have used these ragus to sauce homemade fresh pasta, artisan-quality dried pasta and regular old Barilla from a box. Each has resulted in a gorgeous meal. My finest moment was when I took lamb ragu, layered it between slices of roasted eggplant and then topped it with bechamel: a moussaka to please the gods (and since the sauce came from the freezer, it took about half and hour to pull together).

The link to the recipes is here. As the weather chills down and you start to shiver, go and try these sauces out, you won't be sorry.

Thursday, September 4, 2008

Weeknight Pasta with Vegetables

Nothing special last night, just a quick dish of pasta with vegetables. (Crappy food styling again - I swear there's basil in this dish. I was hungry.)

A few tips for when you're in a hurry for dinner and pasta's on the menu:
  • Use small pasta shapes. It's sorta logical: smaller, thinner pastas will cook faster. Think angel hair instead of spaghetti, orzo instead of penne.
  • Set the water to boil as soon as you think about dinner. Water always takes ages to boil. Get it going.
  • Cut your veggies into small pieces. See pasta size logic above. Small, even-sized pieces are best.
  • Give your dish a baked pasta feeling without the oven: toast some breadcrumbs to sprinkle over the top of the dish.
Fast Weeknight Dinner Pasta
Serves two
  • 8 ounces pasta
  • 2 cups chopped eggplant, zucchini or summer squash
  • 1 onion, thinly sliced
  • 2 cloves garlic, sliced
  • 2 cups chopped tomato
  • handful of basil or parsley, coarsely chopped
  • 1/4 - 1/2 cup breadcrumbs
  • grated Parmesan
Set your pasta water on the stove to boil and cook the pasta. While the pasta is boiling, saute the eggplant, squash, what-have-you, with the onion and garlic until browned and cooked through. Toss in the chopped tomatoes and set aside.

Toast the breadcrumbs in a hot skillet with a little oil until golden brown. Set aside.

When the pasta is done, drain it, reserving one cup of water. Over heat, toss the pasta with the vegetables, adding pasta water as need to make a slightly saucy dish. Toss in the basil or parsley, grated cheese and salt and pepper.

Before serving, sprinkle with toasted breadcrumbs.

Monday, April 28, 2008

Week of April 27: Monday Night Supper

Okay, so this is shaping up to be another "cooking by the seat of my pants" kind of week. But this time I don't even have a gorgeous panoply of produce to work with. So, no meal plan for the week again, and I am cooking from the pantry yet again. Thank goodness I have a well-stocked pantry!

So, Monday night I pulled together the pantry cook's greatest tools: dry pasta and canned beans. If you have those two items in the larder, you have nothing to worry about. Then I rooted around in the fridge and freezer and to see what else I could find. I am also fortunate that the chives in my herb garden are taking off.

I ended up with a box of orzo, a can of chickpeas, a half jar of tuna packed in oil, a bag of frozen artichoke hearts (great product to have on hand), a lemon, parsley (keeps a long time in the fridge) and thyme from the vegetable drawer and chives from the garden.

Making dinner was pretty simple. Cook the pasta (orzo doesn't take long to cook). When you drain it, save about 1 cup of the cooking water.

While it's cooking, make the sauce: Cut the artichokes in half (the long way). Saute them with a little olive oil in a large skillet over medium-high heat. When the artichokes are browned and warmed through (I threw them in straight from the freezer), add in one can of drained chickpeas. When they are warm, add in the tuna (with its oil). Break up any large pieces, but leave the tuna chunky. Toss in the zest from one lemon, the juice of one lemon, some thyme, and finely chopped parsley and chives. Stir and season with salt and lots of black pepper.

Add your cooked pasta to the pan - you may not want to add all of it. The amount of sauce I made was enough for about 1/2 pound of pasta (before cooking). If the pasta and sauce seem too dry, add 1/4-1/2 cup pasta cooking water and stir. Add more water and a little olive oil if it's still too dry. Done.

Note: This is a very adaptable dish: I could have gone a different way and made it with dried mushrooms, sun dried tomatoes, black olives and anchovies (keeping the chickpeas, chives and parsley in the dish). I prefer little shell pasta when I'm cooking with chickpeas (the beans nestle into the shells), but I didn't have any.

Now what am I making for dinner tonight?

Thursday, March 13, 2008

Manicotti Molto Facile

That means "very easy manicotti" (I think). This was a super easy weeknight dinner, but impressive enough for company. I followed the basic technique from Cook's Illustrated's January 2007 issue, with a few minor modifications.

The time-saver and company-impresser is the ingenious use of no-boil lasagna sheets for the noodles. Using sheets instead of the traditional tubes accomplishes two things: you don't have to boil big floppy pasta tubes, and the sheets are really easy to fill - just spread them with the filling and roll them up.

This whole dish took no more than 20 minutes of hands-on time: perfect for a weeknight. The filling I used this time was a very simple ricotta and parmesan (with some shredded radicchio and chopped scallions stirred in). I think this would be great with a spinach filling with red sauce or a baked butternut squash and sage filling, topped with a bechamel.

Manicotti MF
  • 12 sheets of no-boil lasagna noodles (Barilla brand - 1 box)
  • 28 ounces pasta sauce (I used a marinara from Trader Joe's)
  • 2 cups ricotta cheese
  • 1/2 cup grated parmesan, plus extra for topping the casserole
  • 4 ounces shredded mozzarella
  • herbs or seasoning of your choice
  • 1 egg
Put the noodles in a baking dish or roasting pan. Pour two inches of boiling water over them and soak them for 15 minutes (You will need to nudge them a little every now and then to make sure they don't stick together. If they do, just pull them apart gently.).

Stir together the ricotta, parmesan and mozzarella and other seasonings. Taste for salt and pepper. Stir in the egg.

Take the noodles out of the hot water and lay them flat in a single layer on dishtowels or paper towels. Spread an equal amount of filling on the bottom two-thirds of each sheet of pasta. Loosely roll the noodle up to enclose the filling.

Put one third of the pasta sauce into an oiled 9"x9" baking dish. Lay the tubes into the dish and cover them with the remaining sauce (you may not need all of the sauce). Sprinkle the top of the casserole with extra parmesan cheese.

Bake at 375 for 40 minutes. Let the dish rest for 5-10 minutes before serving.

Wednesday, February 27, 2008

Pasta Bolognese

Like the rest of the foodie blogosphere, I was hooked by the NY Times Magazine story on bolognese sauce. I made the beef bolognese version and it was extremely good.

It takes a long time to make: about 45 minutes of "active" time and another 3 hours of simmering. But, the sauce holds well and improves over time. It's also freezable, so you can stock your freezer for a rainy (or snowy) day.

Click over on the link above for the recipe.

Friday, November 30, 2007

Pasta Inspiration

Got home on Wednesday night, not too excited to make the healthful vegetarian option I had planned for that evening. Then Dave expressed a desire for something a little basic and comforting, like pasta.

So, I jumped into the fray and created this dish for us. I chopped up some butternut squash and sauteed the cubes until they were lightly browned and softened. Then I tossed in a sliced leek, sauteed some more. Threw in the broccoli. Tossed the whole thing over pasta with farmer and parmesan cheeses. Quite a success.

Next time, I will make this so there are more veggies in the sauce, and that's the way I wrote the recipe up for you.

Pasta with Butternut Squash, Leeks and Broccoli
  • 1 1/2 cups cubed butternut squash (little bite-sized cubes, about dice-sized - 1/2 a medium squash)
  • 3/4 cup sliced leek (about 1 medium leek, including some of the green part of the leek - could also use 1/2 scallion, if leeks are unavailable)
  • 3 cloves garlic, minced
  • 1 1/2 cups chopped broccoli
  • 8 oz. pasta (shells, rigatoni, penne)
  • parmesan cheese
  • 1/4 cup crumbled farmer's cheese (or feta)
In a large skillet, heat up a little olive oil. When hot, toss in the squash. Saute over high heat until browning and softened (about 7-10 minutes, depending on the size of your cubes). Add the leeks to the skillet. Saute until softened, about 5 minutes. Add the broccoli and garlic and saute - add a little water (about 1/4 cup) to the skillet if everything seems too dry. The sauce is done when the broccoli is cooked (still crisp-tender).

In the meantime, boil up your pasta. If the sauce is done ahead of the pasta, just hold it on low heat until the pasta is finished. Toss the pasta with the vegetable sauce and the cheeses. Season with salt and pepper.
Serves 3-4.

Friday, November 16, 2007

"Leeky" Pasta

Last night's dinner was inspired by a recipe from December's Bon Appetit (original here). It was already a pretty easy recipe, but I made it even less fiddly (no parsley-walnut pesto, although it does sound nice). It was on the table in less than 20 minutes and was really satisfying.

Angel Hair Pasta with Leeks and Radicchio
  • 2-3 large leeks, washed, large leaves trimmed off
  • olive oil
  • 1 softball-sized head of radicchio
  • 2 tablespoons butter
  • parmesan cheese
  • 1 pound angel hair pasta
  • 1/4 cup toasted pine nuts
  • salt and pepper
Set your pasta water aboilin'.

Cut the leeks into 4" long(ish) pieces and then slice (the long way) into long, thin ribbons. Heat a large skillet over high heat and saute the leeks in olive oil with a prinkle of salt until softened and browning in spots.

While the leeks are cooking, slice the radicchio into long shreds (discard the core sections).

After about 10 minutes, the leeks should be softened. Toss in the radicchio and turn down the heat. Add the butter and grate in some parmesan cheese. Toss everything together and hold over a warm flame.

When the water starts boiling, add your angel hair (it won't take long to cook) and cook to al dente. Drain the pasta and add it to the leek mixture. Toss in the pine nuts.

Serves about 4

This would be really nice with whole wheat spaghetti.

Wednesday, September 26, 2007

Pasta with Tomato-Porcini Cream Sauce

Ooh, check out that action shot! Sorry there is no picture of the finished dish ... imagine if you will, a pinkish sauce, studded with slices of mushrooms, enrobing a hot plate of pasta ... but hey, look how fast my hand is moving. Pretty spiffy.

This is a recipe I created for my in-laws 50th anniversary party. I needed a not-too-fussy recipe that could be made (mostly) ahead, that would satisfy the vegetarians (not vegans) in the group, and that would be deliciously worthy of being served to a fairly discerning crowd of relatives.

This dish ended up filling the bill on all counts: I made the sauce and pasta the day before, I spotted one of the vegetarians taking a third helping, and my (very discerning) mother-in-law took some home as leftovers. All in all, a great success.

A major ingredient in this dish is the marinara sauce. I have had great success with Trader Joe's Sugo de Pomodoro; just be sure to choose a very tomatoey marinara, ideally one you would actually sauce pasta with. I used a "convenience" food for this dish because I needed to make so much of it (enough to sauce six to seven pounds of pasta) and I did not have the time to make a tomato sauce from scratch.

Tomato-Porcini Cream Sauce serves 4 - 6 when used to sauce one pound of pasta
  • 1/4 cup dried porcini (you can find these in speciality stores)
  • 10 oz. fresh mushrooms (cremini, baby bella, or white), sliced thin
  • 3 tablespoons olive oil
  • 1 28 oz. can marinara sauce
  • pinch of dried thyme (or 1 teaspoon fresh)
  • 1/2 cup heavy cream
In a small bowl, soak the dried mushrooms in enough warm water to cover.

Thinly slice the fresh mushrooms. Heat a large skillet or dutch oven and pour in the oil. When hot, put in the fresh mushrooms and saute until browned and most of their liquid has boiled off.

While the mushrooms are sauteing, lift the soaked (now not so dry) dried mushrooms out of the water. Squeeze them (over the bowl) to get a little of the water out of them. Chop the dried mushrooms and add them to the fresh mushrooms in the pan.

Strain the soaking liquid through a coffee filter or a cheesecloth lined strainer and add it to the pan.

Let the liquid boil down until there are only a few tablespoons of liquid left. Add the marinara sauce, thyme and cream. (Depending on the size of your skillet, you may need to move this operation to a larger saucepan.)

Bring the sauce to a simmer. Simmer for 5 minutes or so, then taste for salt and pepper. Correct seasoning if needed.

Recipe notes:

I like this with a short, sauce-catching pasta like pennette, gemelli, fusilli, or campanelle.

To make ahead: Make the sauce and refrigerate. Boil the pasta until it's just underdone (it should be a little tougher than you would like it normally). Drain the pasta and cool it down by running cold water over it. Toss the pasta with a little olive oil.

When ready to serve, heat up the sauce. Put the pasta into the sauce and stir occasionally until heated through (5-10 minutes). The pasta will cook through in the hot sauce and will become tender. The recipe scales easily, just saute the mushrooms in batches (In my enormous skillet, I sauteed six 10 oz. boxes of mushrooms in about 4 batches.)
Blog Widget by LinkWithin