Showing posts with label fast. Show all posts

Monday, August 16, 2010

Use Your Booty: Quick Pasta Dinner

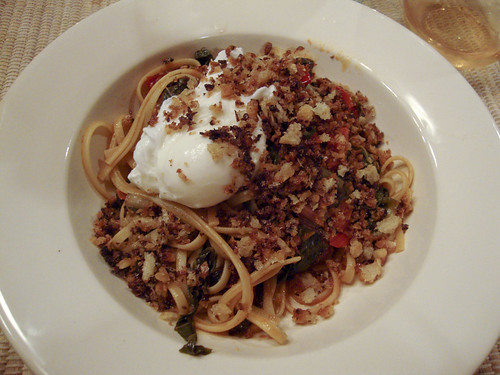
Linguine with Tomato, Chard and Crispy Crumbs

What can I say? I'm a sucker for an egg and some crispy crumbs. If you've been reading this summer's posts, this dish may look a little familiar, but it's a nice go-to for when you don't know what's going on the dinner table. I boil some pasta, make a quick sauce of sautéed vegetables and top the plate with a poached or fried egg and some crispy bits. The crispy crumbs add a nice textural contrast to the plate.

This plate was: linguine and a sauce of bacon, chunks of plum tomato, and shreds of Swiss chard and onion. I drained the pasta (I lifted it out of the pot with tongs), and added it right to the skillet containing the sauce. Then I poached the eggs right in the pasta pot. In the meantime, the crumbs were toasting in the toaster oven with a little olive oil.

Dinner in about 15 minutes!


This Summer, I am chronicling my first CSA (Community Supported Agriculture) experience. My CSA share is from Arrowhead Farm, a farm based in Newburyport, MA. Each week, I am posting about what was in my share and what I'm doing with it. By way of full disclosure, I won my share through a raffle and am not paying for it. However, Arrowhead did not know I was entered in the raffle, and I received no special consideration because of this blog. I paid for my livestock share. A full set of all the photos I've taken of this share is here.

Saturday, July 31, 2010

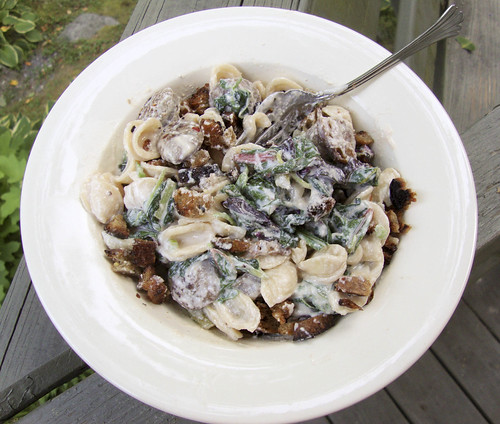
Use Your Booty: Orecchiette with Chard, Sausage and Ricotta

This meal was inspired by a dish I used to make a long, long time ago. It was called Rigatoni alla Buttera. It's a hearty plate of pasta, sauced with ricotta (or cream) and tomato and studded with peas and chunks of sausage.

Dave begged for some meat on the dinner plate (we've been eating a LOT of all-veggie dishes), so I pulled out the last of some pork sausage I made in my last sausage-stuffing binge (time to pull out the grinder again I guess). I also had a half container of ricotta in the fridge, so it was logical to try to pull a dish together using that too. I had to add some vegetables to the pan so I used Swiss chard (you can sub in spinach, kale or any other green you have on hand) and sliced raw onions.

To add a little crunch I made a handful of big breadcrumbs by cubing stale bread and pan frying them in olive oil.

Orecchiette with Chard, Sausage and Ricotta
2-3 servings
  • 8 ounces Italian sausage, cut into bite-sized pieces
  • 8 ounces orecchiette pasta (substitute shells if you can't get your hands on orecchiette)
  • 1 bunch Swiss chard, cut into bite-sized pieces
  • 12 ounces ricotta
  • 1 small onion, sliced into paper-thin rings
  • 1-2 handfuls big breadcrumbs
In a large skillet, sauté the sausage over medium-high heat until cooked through and browned.

While the sausage is cooking, bring a pot of water to a boil and cook the orecchiette to al dente. Right before the pasta is done, add the Swiss chard into the pasta pot to wilt it down. Drain the pasta, reserving a cup of the cooking water to use in the sauce (I usually put a coffee cup in my colander to remind me to save a cup of water.)

Put the pasta and chard back into the pasta pot with the ricotta, sliced onion and sausage. Stir everything together, adding a little pasta water to loosen up the sauce and make it creamy. Taste and add salt & pepper as desired. Just before serving, stir in big breadcrumbs.

This Summer, I am chronicling my first CSA (Community Supported Agriculture) experience. My CSA share is from Arrowhead Farm, a farm based in Newburyport, MA. Each week, I am posting about what was in my share and what I'm doing with it. By way of full disclosure, I won my share through a raffle and am not paying for it. However, Arrowhead did not know I was entered in the raffle, and I received no special consideration because of this blog. I paid for my livestock share. A full set of all the photos I've taken of this share is here.
Monday, July 19, 2010

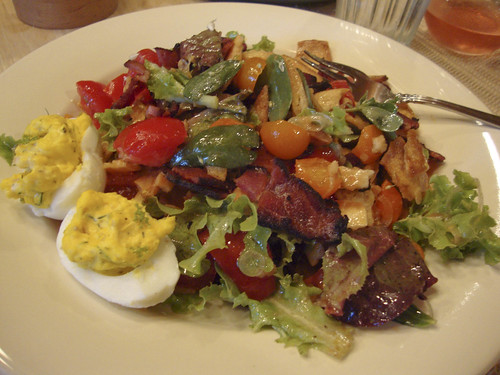
Use Your Booty: BLT Fattoush

I really like bread salads. They're a great way to showcase fresh vegetables. Panzanella is the bread salad that I make most often; it requires a hearty, rustic loaf, which I don't always have on hand. Fattoush is a bread salad made with fried or toasted pita bread. Traditionally fattoush is pita with parsley, tomato, onion and herbs.

I actually wanted to make BLT sandwiches for dinner, but had so sandwich-suitable bread in the kitchen. I did have a bag of pita chips left over from an event earlier in the week, so I decided to use them as the base for a fattoush salad. The devilled eggs are definitely a non-traditional garnish as is the addition of bacon.

The fattoush formula is very adaptable to whatever's in the pantry. It's a great "sponge" for bits of leftover cooked and raw vegetables. I like the pita to be about 1/3 of the total salad, but you should feel free to find your own perfect ratio of pita to vegetables.

No recipe today, just a guide:

BLT Fattoush
For each person you're serving, combine in a large bowl:
  • 2 handfuls of torn lettuce leaves
  • 1/2 cup of coarsely chopped tomato
  • 1-2 slices of cooked bacon
  • a few slices of very thinly sliced onion
  • 1-2 handfuls pita chips, crushed lightly
Dress generously (the chips will soak up a lot of dressing) with a lemon or red wine vinegar-based vinaigrette. Season with salt and pepper.

This Summer, I am chronicling my first CSA (Community Supported Agriculture) experience. My CSA share is from Arrowhead Farm, a farm based in Newburyport, MA. Each week, I am posting about what was in my share and what I'm doing with it. By way of full disclosure, I won my share through a raffle and am not paying for it. However, Arrowhead did not know I was entered in the raffle, and I received no special consideration because of this blog. I paid for my livestock share. A full set of all the photos I've taken of this share is here.
Sunday, July 18, 2010

Amanda Hesser's Peach Tart


Except I didn't make a peach tart. Instead, I made a fig and blueberry tart. I was turned on to this recipe by my friend Lynn. She told me how her young son (like 10 years oldish?) made these tarts himself.

See, these are his in the oven:

This is not meant to be intimidating. This recipe is super easy and super adaptable. Use the fruit you have on hand and you'll be fine. It's fast too - I had the tart ready to go in the oven before the end of the oven's preheat cycle.

I'm going to use this tart recipe in a savory application too: I'll fill the tart shell with chopped fresh tomatoes, cooked Swiss chard and goat cheese. Will let you know how it goes.

I don't normally post other people's recipes, especially when I don't own the cookbook (a situation I'm about to remedy), but this recipe is all over the interwebs, so I'm a little more comfortable posting it.

Fruit Tart
Based on Amanda Hesser's recipe for Peach Tart from Cooking for Mr. Latte.
Makes 1 tart (I used an 8" tart pan, but I think you could use a 9" or 10" pan - you can see my crust was sorta thick, which I prefer)
  • 1 1/2 cups (6.75 ounces) flour
  • 1/2 tsp salt
  • 1 tsp sugar
  • 1/2 cup (4 ounces) olive oil
  • 2 tbs (1 ounce) milk
  • Fruit or other filling of your choice - I used about 3 cups of fruit but a lot depends on the size of your tart pan
  • 3/4 cup (5.25 ounces) sugar
  • 2 tbs flour
  • 1/4 tsp salt
  • 2 tbs (1 ounce) cold butter
Preheat the oven to 425.

Mix the dry ingredients together. Mix the wet ingredients together. Combine the dry with the wet. It'll become a dough, right under your fingertips - I promise. When the tart dough has come together, press it into the tart pan. Make sure you press it in evenly, so the crust is evenly distributed across the bottom and sides.

Fill your tart with the fruit or other vegetables you've prepared.

In a small bowl, use your fingers to combine the sugar, salt and butter. Pinch and rub until you have a crumbly sugar mixture. Sprinkle the mixture over the top of the tart. (Obviously, omit this step if you're making a vegetable tart.)

Bake the tart until crust if well browned and the fruit is cooked and bubbly. This took me about 40 minutes in my oven.

Enjoy!

Friday, July 9, 2010

Use Your Booty: Pasta with Kale and Pancetta

What a great way to use up kale. Plus, put enough crispy pancetta on top and you've got a chance at winning over kale-haters. From start to finish, this dish took less than half an hour to pull together.

Pasta with Kale & Pancetta
Serves 6-8
  • 1 pound whole wheat spaghetti
  • 2 bunches kale, leaves pulled from the stems and cut into thin strips
  • 4 ounces thinly sliced pancetta (if you only have thick-cut pancetta, cut it into small cubes)
  • 1/2 of a small onion, sliced into super-thin strips
  • 1 egg, beaten, optional
  • parmesan cheese
  • salt & pepper
  • sherry vinegar
Boil the spaghetti in a large pot of salted water. When the pasta is almost cooked through (just still a tiny bit chewy) add the kale to the pasta pot. When the pasta is cooked to your taste, drain the pasta and kale, reserving a cup of the cooking water (to make sure you don't forget this part, put a coffee mug in the colander to remind you to scoop out some pasta water).

In the meantime, sauté the pancetta in a skillet until it's crisp. Set aside.

When the pasta ia cooked, dump it back into the pot, add in the sliced onion, and stir in a little pasta water. Add in the beaten egg, if using, and keep stirring, adding more pasta water if needed to make a saucier consistency. Stir in a handful or so of parmesan cheese. Taste and add salt and pepper to taste (I like this dish peppery).

Portion the pasta into soup plates and top with crispy pancetta. Drizzle a few drops of vinegar over the top. Enjoy!

This Summer, I am chronicling my first CSA (Community Supported Agriculture) experience. My CSA share is from Arrowhead Farm, a farm based in Newburyport, MA. Each week, I am posting about what was in my share and what I'm doing with it. By way of full disclosure, I won my share through a raffle and am not paying for it. However, Arrowhead did not know I was entered in the raffle, and I received no special consideration because of this blog. I paid for my livestock share. A full set of all the photos I've taken of this share is here.

Monday, July 5, 2010

Make This Please: Scallop Roll

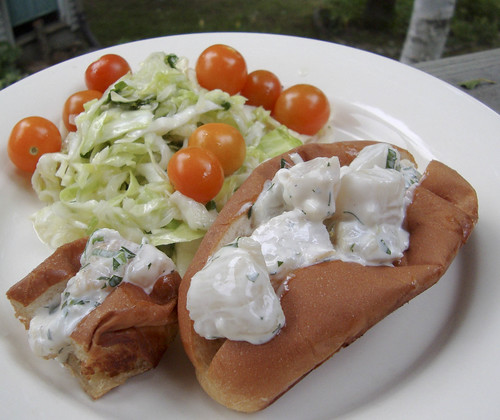
The lobster roll is a staple of the summer dining menu: chunks of lobster meat cloaked in mayonnaise, and accompanied by chopped celery and herbs. When Dave asked for a scallop roll for dinner he was thinking of what we see at the clam shacks around here: deep fried, breaded scallops in a hot dog bun. Somehow I had a brain fade and thought lobster roll instead. Happy accident.

I dressed chunks of cooked scallops with mayonnaise, whisper-thin slices of onion, chopped parsley and scallions and a squeeze of lemon juice. The scallops then got spooned into a butter-grilled hot dog bun.

I cut the richness of the scallop roll by serving it with a lemony slaw and some sun gold tomatoes.

Wednesday, June 30, 2010

Use Your Booty: Beet Carpaccio


This is one of the recipes (barely a recipe) that is great for summer - it's super fast, easily adaptable and is a nice, cooling addition to a meal. Carpaccio is traditionally a dish of very thinly sliced or pounded beef, garnished with olive oil, onion and capers. It's been adapted in recent years, to be a dish of thinly sliced something (scallops, zucchini, seared lamb, etc.).

Fresh beets are a great ingredient to highlight in this way. I thinly sliced two types of beet: Chioggia (those are the bullseye ones) and red beets. I laid the slices [in a somewhat slapdash manner, I'll admit] onto a plate with some thin slices of baby onion, drizzled them with chive vinegar, olive oil, salt & pepper and a few onion flowers.

That's it. I like to dress the vegetable carpaccio dishes a few minutes before we eat them, so the vegetables can soften up a little in the oil and vinegar.

This Summer, I am chronicling my first CSA (Community Supported Agriculture) experience. My CSA share is from Arrowhead Farm, a farm based in Newburyport, MA. Each week, I am posting about what was in my share and what I'm doing with it. By way of full disclosure, I won my share through a raffle and am not paying for it. However, Arrowhead did not know I was entered in the raffle, and I received no special consideration because of this blog. I paid for my livestock share.

Monday, June 21, 2010

Use Your Booty: Grilled Romaine


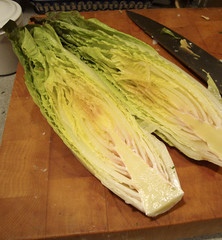
Here's another public service post to help you use up your bountiful basket of lettuce. Did you know you can grill lettuce? Romaine is your best bet for grilling - the floppy looseleaf lettuces just get soggy and well, floppier. Use those in
lettuce soup or salads.

The method is easy. If your romaine head is really large (too much for you and your dining partners to consume in one sitting), peel off the outer leaves, reserving them for salads or sandwiches or some such thing. Then cut the head in half through the core. If the head is large, cut it into quarters.

Drizzle the cut sides of the lettuce with olive oil or a vinaigrette of your choice. Grill, cut side down, over medium-high heat. When the lettuce has grill marks and is gently charred on the edges, it's done. This will take about 3-5 minutes depending on the heat of your grill, the amount of oil you use and the size of the lettuce heads.

Before serving, drizzle the lettuces with a little vinaigrette or just drizzle with olive oil, sprinkle with salt and squeeze lemon over the top.

This is a great side dish for grilled dishes. We enjoy it with grilled meat or seafood and a grain salad on the side.

This Summer, I am chronicling my first CSA (Community Supported Agriculture) experience. My CSA share is from Arrowhead Farm, a farm based in Newburyport, MA. Each week, I am posting about what was in my share and what I'm doing with it. By way of full disclosure, I won my share through a raffle and am not paying for it. However, Arrowhead did not know I was entered in the raffle, and I received no special consideration because of this blog. I paid for my livestock share. A full set of all the photos I've taken of this share is here.

Use Your Booty: Lettuce Soup with Spring Peas


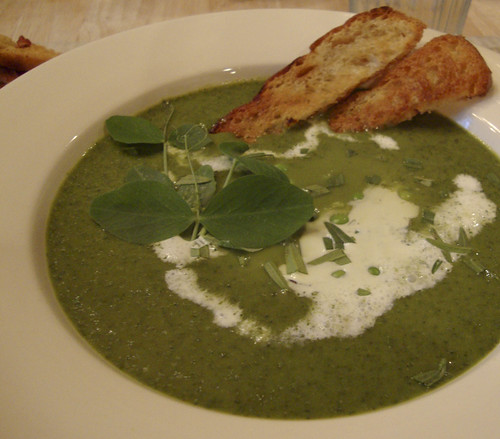
The idea of lettuce soup may make you cock your head to the side and go "huh?" but do give this soup a try. If you're in a CSA you'll probably be buried in lettuces shortly and this is a nice alternative to yet another green salad. I used all green lettuces because I think red lettuce might have turned this soup's color a little muddy.

I garnished the soup with steamed peas, a few pea tendrils and some mint and chives. I served our soup chilled; it was so insanely hot and humid today, the idea of hot soup was painful.

Lettuce Soup
Serves 2-3
A few thoughts on this recipe:
  • Serve it in mugs for sipping - it was super splashy to eat out of a bowl
  • Next time, I'm going to add a potato or two to the pot to provide a little more body to the soup. The version was refreshing but I think a little more richness would be nice.
  • If you're serving this cold - make sure it's super cold: in the fridge overnight is great. I made it the day we ate it, so I poured the soup in to a ziploc bag and left it in the freezer for two hours.
  • 1 onion, diced
  • olive oil and/or butter
  • 1 medium potato, optional (see above), cubed, peeled, if you wish
  • 1-2 large heads of lettuce, ribs and leaves coarsely chopped (14-16 cups - that is NOT a typo) - I used a combination of lettuces: oak leaf, buttercrunch, green leaf and romaine
  • 2 cups chicken broth or water
  • salt and pepper
  • garnishes: herbs of your choice (mint, chives and summer savory would be nice), cooked peas, cream, creme fraiche
Sweat the onion, over medium-low heat, in a stockpot in a little butter or olive oil until softened, about 5-10 minutes.

If using the potato, add it to the pot with the chicken broth or water and simmer until the potato is softened. If you're not using the potato, add the broth or water to the pot.

Add the lettuce to the simmering liquid and cook for 5-10 minutes, until lettuce is wilted down and softened - adding a little water the lettuce needs it to cook down. Purée the soup in a blender in batches, let the blender run for a while to really break down the lettuce as it's more fibrous than you might think. Add cold water to the blender if needed to help the blending along. I strained the soup to get rid of some of the larger fibers that didn't break down. If you don't do that your soup will like be a little chunkier than mine was. It will still taste good though.

Check seasoning and add salt and pepper to taste.

If serving cold chill the soup down until it's super cold. Check the seasoning again and add more salt as needed.

The lettuce will have a little more bitterness than you might expect - add a pinch of sugar and/or a squeeze or lemon to counteract that if needed.

Serve in bowls or mugs and garnish with herbs, fresh peas and/or a drizzle of cream or creme fraiche.

This Summer, I am chronicling my first CSA (Community Supported Agriculture) experience. My CSA share is from Arrowhead Farm, a farm based in Newburyport, MA. Each week, I am posting about what was in my share and what I'm doing with it. By way of full disclosure, I won my share through a raffle and am not paying for it. However, Arrowhead did not know I was entered in the raffle, and I received no special consideration because of this blog. I paid for my livestock share. A full set of all the photos I've taken of this share is here.

Tuesday, June 15, 2010

Use Your Booty: Bruschetta with Kale & White Beans

Let's get one thing out the way right up front: broo-SKET-a, not brooshetta. Feel free to tell your waitress.

Ok then, that said, let's move on to the recipe.

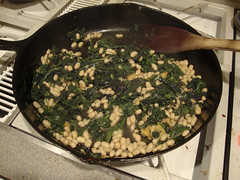
Bruschetta is a great way to use up slightly stale rustic-style bread (like this kind of bread). Slice it thickish - I like between 1/2" - 3/4" thick. Grill or broil it, rub with garlic and drizzle with olive oil. Top with sautéed vegetables and eat like an open-faced sandwich. I like this version a lot. You might think beans and bread is a lot of starchiness, but the beans add a lovely creaminess to the dish without adding fat.

Kale & White Bean Bruschetta
Serves 2
This is easily doubled, tripled or quadrupled. We eat it for dinner, but if you cut the bread into smaller pieces it would be a nice first course or nibble for a summer party.
  • 2 ounces pancetta, cubed or bacon, chopped (optional)
  • olive oil
  • 3-4 cloves garlic, sliced thin
  • 1 big bunch kale, leaves removed from the stems and coarsely chopped or torn (you need a lot of kale - it really cooks down)
  • 1 can white beans, drained and rinsed (about 1-1.5 cups cooked beans)
  • 4 slices rustic-style crusty bread (you know what you'll eat, so the number of slices will depend on the size of your loaf)
  • 1 clove garlic
In a large skillet, cook the pancetta or bacon (if using) until it's crisp and browned. Remove the pancetta from the pan and set aside. If the pan is too dry (or if you didn't use the meat, or if you don't want to cook in bacon fat) add enough olive oil to generously film the bottom of the pan.

When the oil is hot, add the garlic. When it just starts to color, add the kale to the pan (it will sputter - watch out for flying oil droplets!). Stir the kale as it wilts and softens. If it starts to stick add a little water to the pan. When the kale is wilted down and softened, add the beans and heat them through. Add salt and pepper to taste, remembering that if you're using pancetta or bacon they will add salt to the dish too.

Meanwhile heat your grill or broiler. Brush the slices of bread with oil and grill or broil, turning once until browned and toasty (I like mine on the brown side of incinerated, whereas Dave prefers his a little more tan/blond). Rub the slices of bread with the other clove of garlic. Place the bread on dinner plates and drizzle with a little more oil. Top the bread slices with the kale & bean mixture and sprinkle the pancetta over the kale. Drizzle with a wee bit more oil (you don't want this plate dripping with oil, so use a teaspoon or two per drizzle).

Mangia!

This Summer, I am chronicling my first CSA (Community Supported Agriculture) experience. My CSA share is from Arrowhead Farm, a farm based in Newburyport, MA. Each week, I am posting about what was in my share and what I'm doing with it. By way of full disclosure, I won my share through a raffle and am not paying for it. However, Arrowhead did not know I was entered in the raffle, and I received no special consideration because of this blog. I paid for my livestock share.

Tuesday, June 8, 2010

Use Your Booty: Kale Pesto

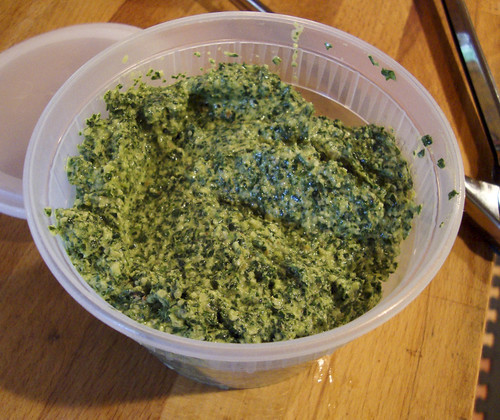
This week's CSA pickup included a smallish bunch of kale. I knew when it cooked down it wouldn't be enough for side dish on its own and I already had soup on the menu. So I thought a pesto would be nice thing to try. I found a few kale pesto recipes on the internet and most of them asked for the kale to be boiled for 10 minutes or so to soften and tame it. That seemed like overkill to me so I decided to just do a quick blanch with a boiling water rinse instead.

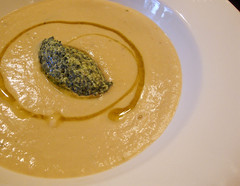
So, this picture above doesn't really really do this pesto justice. You can eat it on crostini, stir it into pasta (with a few spoonfuls of pasta cooking water) or a fritatta or use it as a sandwich spread or dip (thinned with some yogurt perhaps). Or you can use it in a totally swellegant presentation like that one, over there ---> and dazzle your friends and family.

Kale Pesto
Yields about 1 1/2 cups
You can use other nuts (I think pistachios would be great), but I liked the flavor of the walnuts against the kale. I didn't add any cheese to mine, but if you wanted to enrich this pesto with it, I would add a few tablespoons of grated pecorino romano.

This would probably work with collards too, but I wouldn't use chard or spinach - the leaves are too soft for this treatment.
  • 1 small bunch kale (to yield 4-6 cups loosely packed leaves)
  • 1 clove garlic
  • handful of walnuts (about 1/4 cup)
  • salt and pepper
  • red wine vinegar or lemon juice
  • olive oil
Strip the leaves from the kale stems and them in a colander or large strainer (if the leaves are large you can tear them into smaller pieces so they fit into the colander). Bring a quart of water to a boil. Pour the water over the kale leaves.
You'll see their color turn nice and bright and their volume will diminish a lot.

Press the kale to make sure it's not super soggy - a little moisture is okay. Put the kale into your food processor with the garlic and walnuts (leave out the cheese if you're using any). Pulse to form a paste - you might need to add a little water back in to keep things moving.

When the pesto looks nice and pesto-ish taste it and add salt, pepper and vinegar to taste. You can also add cheese now if you're using any. Give the pesto a glug of olive oil to enrich it a little. Pulse and taste again - the pesto will probably need more salt and acid than you might think.

This Summer, I am chronicling my first CSA (Community Supported Agriculture) experience. My CSA share is from Arrowhead Farm, a farm based in Newburyport, MA. Each week, I am posting about what was in my share and what I'm doing with it. By way of full disclosure, I won my share through a raffle and am not paying for it. However, Arrowhead did not know I was entered in the raffle, and I received no special consideration because of this blog.

Thursday, June 3, 2010

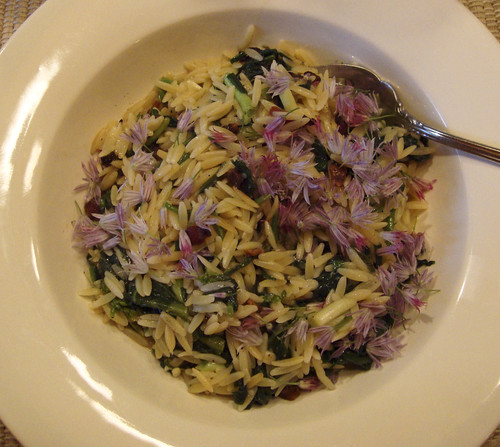
Use Your Booty: Orzo with Arugula and Chive Blossoms

This is another non-recipe recipe, but that's the way market meals tend to go, isn't it?

We ate this dish hot, like a pasta main course, but it would be pretty great at room temperature as a pasta salad too. Don't skimp on the chive blossoms: they're pretty and they taste great!

Orzo with Arugula and Chive Blossoms
Serves four as an entrée and six as a side dish
  • 1 pound orzo pasta (substitute another small pasta shape if you can't find orzo)
  • 2 bunches arugula, rabe, chard, mizuna, spinach (after the leaves are stripped off the stems you should have 6-8 cups of loosely packed leaves - I used some finely chopped Swiss chard stems too - those are the reddish bits you see)
  • a dozen chive blossoms (or 1/4 cup of mined chives)
  • 1/4 ounce parmesan cheese, finely grated
  • high quality extra virgin olive oil
Strip the greens leaves from their stems and then chop the leaves. In a large skillet over medium-high heat, sauté the greens in a little olive oil until they are wilted and softened - about 5 minutes or so. Turn off the heat.

Meanwhile, boil the pasta in plenty of salted water until it's cooked to your preferred doneness. before draining the pasta, reserve about a cup of cooking water.

In the skillet, combine the drained pasta, the parmesan cheese and enough pasta water to sauce things up. Stir in the chive blossoms and taste for salt and pepper. Drizzle some olive oil over the top of the pasta and serve.


This Summer, I am chronicling my first CSA (Community Supported Agriculture) experience. My CSA share is from Arrowhead Farm, a farm based in Newburyport, MA. Each week, I am posting about what was in my share and what I'm doing with it. By way of full disclosure, I won my share through a raffle and am not paying for it. However, Arrowhead did not know I was entered in the raffle, and I received no special consideration because of this blog.

Monday, May 24, 2010

Grill-Roasted Mussels with Green Garlic and Sorrel

My Sundays are spent at the Newburyport Farmers' Market, selling my bakery items. While it's great to be outside and meeting people, one real drawback to selling at the market is that I don't get to shop at all. So imagine my pleasure at the end of last day's market when a boy ran up to me and handed me a bag of wild mussels (what a gift!). They were from Eastman's Fish Market, a fisherman-owned and operated seafood market in Seabrook, NH. Eastman's offer a CSF (Community Supported Fishery) program. They are a fantastic addition to our market.


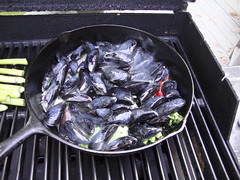
Anyhoo, back to the mussels. It was such a beautiful day yesterday that I wanted to stay outside; so I decided to grill-roast the mussels. Grill-roasting is a great option for seafood in that the seafood can pick up the smokiness from the grill, but you're never in any danger of losing your meal through the grill grates.

My garden is loaded with sorrel and green garlic (immature garlic plants) so I decided I would use them as my primary flavorings. With a loaf of [my] olive bread from the market and a green salad it made a great dinner.

Grill-Roasted Mussels with Green Garlic and Sorrel
Two generous servings
  • 2 lbs mussels, prepared for cooking: rinsed well, any beards removed, dead mussels discarded
  • 3 tablespoons butter
  • 1/2 cup chopped green garlic (or 1 bunch scallions, chopped and 2 cloves minced garlic)
  • 1 dried chile pod (optional)
  • 1 cup sorrel, cut into thin strips (or minced herbs like parsley, dill, chives, and/or fennel)
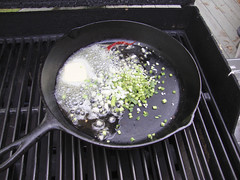
Place a large cast iron skillet (12" or more) on a hot grill (I use a gas grill set on high). Let the skillet get super hot - leave it on the grill for 5-10 minutes.

Add the butter, green garlic and chile pod to the pan. The butter should sizzle up and start to melt very fast. Add the mussels to the skillet. Cover the grill. Let the mussels cook, giving them a stir every few minutes or so. My mussels were cooked through in a little less than 10 minutes. Yours may take more or less time depending on their size, their temperature when you started cooking, etc. Toss the sorrel over the cooked mussels and give it all a stir.

Serve the mussels in deep bowls with bread for dipping. These won't be super-soupy mussels because a lot of the liquid will simmer off on the grill, but the liquid that's left will be concentrated and very flavorful. You might want to add a sprinkle of salt if your mussels aren't briny enough.

Saturday, May 22, 2010

Use Your Booty: Green Soup 1

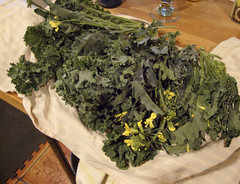
If you're getting a spring share from your CSA, or if you're tempted by the mountains of springtime vegetables at the farmers' market, there will come a time when you have to face down a MOUNTAIN of leafy greens (you know the ones: those huge bundles of flowering leafy lovelies like mizuna, arugula, rabe, kale, etc.). You could do what most people do: throw them in a bag in the back of your refrigerator and then throw the soggy mess out in a week or so. Or, you could make this soup. (Sorry, I know this picture is just awful - the soup is really a gorgeous emerald green.)

I don't really have a recipe: use what you've got on hand, cook it down and blend it up. But for those who would like a little more direction than that, here you go:

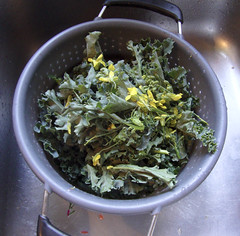
For each person you will need one - two bunches of greens (those four bunches down there made enough soup for two to three servings). Pick the leaves from the stems. You 'll end up with about 4 cups of greens per bunch. Take 1 medium potato per person and slice it super thin. Put the potato in your soup pot and cover it with water. Simmer until the potato is soft and starts to fall apart. Stuff the greens into the pot and add 1-2 cups water (more or less depending on how many you're feeding).

You will think to yourself "this is an obscene amount of vegetation No way in hell can I eat all this." etc. etc. etc. Within 5 minutes that bunch of greens will be cooked down to almost 1/4 of its original mass and you'll start to understand why I had you start with so much.

Keep turning the greens, so the cooked ones come up to the top and the unwilted greens get pushed down into the simmering liquid at the bottom of the bottom. The idea is to get the greens all wilted down and cooking.

Now puree that mess. I like an immersion (or stick) blender because I can do the whole process right in the pot, but if you want the best results use your blender. You'll have to do it in batches, but the blender gives a much finer puree than the hand blender. Either way, puree until very smooth. Then, one step to gild this lily: strain the soup through a medium or fine strainer (you'll find a rubber spatula is helpful to push the soup through. This is a good idea if you've used tougher greens with strong stems; those fibers can be unpleasant to find in your finished soup.

Adjust the soupiness by adding more water if needed. Season with salt and pepper to taste. Serve hot or very cold, topped with a drizzle of cream or a dollop of yogurt. If your greens had them, the little yellow or white flowers are a lovely garnish. They are a great addition to a green salad too. Keep them in a glass of water, bouquet-style, until you use them up.

Note: for a chance, saute some curry powder or other Indian spices in a little oil first, then add the potato to the pot and proceed as above. Top the soup with yogurt and more spices that you've toasted in oil. The Indian flavors are really nice with the strong green flavor of this soup.
This Summer, I am chronicling my first CSA (Community Supported Agriculture) experience. My CSA share is from Arrowhead Farm, a farm based in Newburyport, MA. Each week, I am posting about what was in my share and what I'm doing with it. By way of full disclosure, I won my share through a raffle and am not paying for it. However, Arrowhead did not know I was entered int he raffle, and I received no special consideration because of this blog.

Tuesday, March 2, 2010

Quinoa Salad with Feta, Mint and Blood Oranges

This salad is being entered in one of this week's Food 52 contests: Your best recipe with feta, blood oranges and mint. You can check out all the entries in the contest here.

I used a mix of red and "regular" quinoa and chose to use pine nuts. I think pistachios would be really nice too. Another nice combo would use goat cheese and toasted hazelnuts and parsley instead of mint.

Quinoa Salad with Feta, Mint and Blood Oranges
Serves 4-6 as a side dish
Make this a main dish by topping it with a fried egg or topping it with some grilled chicken or sea scallops.
  • 1 cup quinoa
  • 1 1/4 cups water
  • 3 blood oranges
  • 1 shallot, finely chopped
  • 1/3 cup pine nuts, toasted
  • 1/4 cup chopped mint
  • olive oil
  • 3 ounces feta cheese, crumbled
  • salt and pepper to taste
Make the quinoa: Rinse the quinoa in a mesh strainer. Bring the water and a pinch of salt to a boil in a small saucepan. Add the quinoa and reduce heat to a simmer. Cover and simmer for 15 minutes until quinoa is tender.
While the quinoa is cooking, prepare the oranges. Cut the peel off of two of the oranges and then cut them into bite-sized sections, removing any really fibrous bits. (If you know how to supreme an orange - do that.)

Combine the cooked quinoa, chopped or supremed oranges, shallots, pine nuts, and mint. Squeeze the juice of the other orange over the salad and drizzle it with olive oil (about 2-3 tablespoons). Gently stir in the feta cheese. Taste the salad and add salt and pepper to taste.

Friday, November 6, 2009

T-Minus 30: Deep Dish Polenta Pizza


(Hey all I'm back, for the moment. I'm not making a big deal about it, because for all I know it'll be another 3 months before I post again.)

Thought I'd try introducing a new category on this site "T-Minus 30": Dinners that should be ready to go in about 30 minutes. This assumes you have the ingredients on hand and will be able to focus your attention on meal prep.

I got an email recently from a representative at Real Simple offering me a copy of their new cookbook Real Simple Best Recipes: Easy, Delicious Meals. A lot of the dishes are good one-dish options. For me, most of the mains could be rounded out with a salad and a loaf of good bread. A lot of the recipes can be easily adapted to sue what you have on hand.

The first recipe I tried was for Deep-Dish Polenta Pizza. The recipe itself called for a topping of sun-dried tomatoes, radicchio and mozzarella. It also called for you to make polenta from scratch. I had none of those things on hand, but I did have some premade polenta (Fra Mani brand, from Costco!), stewed tomatoes and shallots (and mozzarella).

Deep-Dish Polenta Pizza
This is more of a method or idea than a recipe, so I'm going to give you the gist and you can take it from there.
  • Heat the oven to 400.
  • Prepare about 3 cups of polenta (either from scratch, by whisking 1 cup of polenta meal in 2 cups of boiling water for about 5 minutes*, or whisking premade polenta to loosen it up) and stir in about 1/4 cup of parmesan cheese.
  • Spread polenta in the bottom of an oiled baking dish (a 9" pie pan works perfectly).
  • Top polenta with ingredients of your choice. The recipe called for sun-dried tomatoes, shredded radicchio and mozzarella. I used stewed tomatoes, thinly sliced shallots and fresh mozzarella.
  • Bake for about 20 minutes, until toppings are melting and softened and the edges of polenta are starting to crisp.
Try this recipe with whatever ingredients you have on hand. I think this would be fabulous with cooked sausage, fennel and asiago cheese.

* I know that true polenta needs to be cooked slowly and low, for at least 30 minutes. What we're doing here is cooking the polenta just enough to hydrate it.

Saturday, May 9, 2009

I'm A Hero!

Hey all! Here's my first instructional video: filmed and produced by the great folks at How 2 Heroes, it's my first foray into film. Agua frescas are really easy to make and are super for summer. Cheers!


Monday, May 4, 2009

Easy Eating: White Bean Salad

I put this salad together for the Encased Meats Festival that Linsey over at Cake and Commerce hosted a few weeks ago. I wanted something to provide a contrast to a gyro-style sausage that I'd made. The creaminess of the white beans is set off really nicely by chunks of cherry tomatoes, Kalamata olives and dill. I used a simple red wine vinaigrette as a dressing but a lemon-based dressing would be great too.

I recommend that you cook your own beans for the salad if you can: they'll be a little creamier than canned and you'll be able to control the saltiness a little better. That said, if you want to use canned beans, go right ahead and feel no guilt about it. Of course, feel free to vary the ingredients based on what you have on hand.

This salad is best if you make it a few hours ahead. It makes a great side with grilled meat or vegetables. For an easy vegan dinner pair it with a green salad and a grilled portobello mushroom.

White Bean Salad
Serves 4-6
  • 4 cups cooked white beans (about 1 1/2 cups dry beans cooked or 2 large cans of beans, rinsed and drained)
  • 1 pint cherry tomatoes, sliced in quarters
  • 3/4 cup Kalamata olives, pitted and torn in halves
  • 1 bunch of scallions, sliced
  • handful of dill, chopped
  • red wine or sherry vinegar
  • olive oil
  • salt and pepper
In a bowl, toss together the beans, tomatoes, olives, scallions and dill. Drizzle about 2 tablespoons vinegar and 3 tablespoons olive oil over the salad. Toss the salad and taste. Add salt and pepper as needed (if you're using canned beans, you might not need much salt). Add more vinegar or oil as needed to ensure the beans are well flavored and moistened with oil and vinegar.

Friday, May 1, 2009

Two Quick Sauces for Summer

The summer grilling season approacheth. It's a good time to (re)introduce chimichurri to everyone. Traditionally, chimichurri from Argentina and Uruguay and is a sauce for grilled meats. What I love about chimchurri sauces is that they can be made ahead and kept as an insurance policy against boring food. You can also stir the sauces into a pasta salad or cole slaw or bean salad to jazz them up.

A parsley-based chimichurri is the version most people are familiar with. I just found a recipe for the red version of chimichurri. I can tell it's going to become a go-to condiment for me this summer: it's super easy to make and will keep in the fridge for a while.

Chimichurri (Green)
Yields about 2 cups
This is the version you're most likely be served. My version results in pesto-like version. If you prefer a looser consistency, adjust the sauce with more vinegar and oil.
  • 4 cloves garlic, minced or pressed
  • 1 bunch of parsley, leaves only
  • 1/4 cup red wine vinegar
  • 1/4 cup fresh oregano leaves(substitute 2 teaspoons dried oregano, or omit oregano entirely)
  • 2 teaspoons crushed red pepper
  • Kosher salt and freshly ground pepper to taste
  • 1/2-3/4 cup extra-virgin olive oil
In a food processor, blend all the ingredients except the olive oil, until you have a fine paste. Add olive oil to get the consistency you want. Add salt and pepper to taste.

Red Chimichurri (Chimichurri Rojo)
Yields about 1 cup
This yield a very liquid sauce, more like a salad dressing. I keep it in a squeeze bottle and give a squirt to dishes that need jazzing up.
Adapted from Norman van Aken.
  • 1/2 cup sherry vinegar or red wine vinegar (the sherry vinegar results in a much more interesting sauce, but use a good red wine vinegar if that's what you have on hand)
  • 1/4 cup virgin olive oil
  • 1 1/2 tablespoons hot paprika (use half hot paprika and half smoked paprika for an interesting version)
  • 2 teaspoons cayenne pepper (leave out if you don't want it to be too spicy)
  • 4 cloves garlic, minced
  • 1 teaspoon freshly ground black pepper
  • 1/2 teaspoon kosher salt, or to taste
Shake everything together in a squeeze bottle or jar. Taste for salt and adjust it if needed. This keeps for a while (at least two weeks) in the refrigerator.

Tuesday, April 21, 2009

Turkey Tacos

This is a multi-stage recipe (for which I only have one picture, unfortunately), but I thought it was worth sharing with you.

Way back when in November, I bought a locally-raised turkey. Since we didn't need a whole bird just for our little Thanksgiving, I carved off the leg pieces and wings and put them in the freezer until later ...

... many months later ... I found my bag of turkey bits in the deep freeze. I had read about confiting turkey legs and was hoping to save up enough chicken fat to try that technique with these. Despairing of that ever happening I decided to jump start the process by using olive oil and some pork fatback.

I seasoned the pieces with salt and pepper and let them rest in the fridge overnight. The next day, I put the turkey pieces, peppercorns, a head of garlic, and several bay leaves into my crockpot and covered them with oil. After eight hours of slow cooking, the pieces were cooked through and silky. The result was as unctuous as a duck confit and the legs were way too big to fry up in a pan. I pulled the meat off the bones and covered it in the oil.

Now, how to use up this bounty (about three pounds of meat) ? A few pieces got sauteed and served over a salad with a poached egg. A few more went into an omelet. A few more onto a sandwich. Oy, that's a lot of turkey meat I still have in the fridge. So, tonight the rest went into tacos.

Finally, a recipe. Here you go:

Turkey Tacos
serves 4
  • 1 onion, chopped
  • 3 tablespoons chili powder
  • 1/4 cup tomato sauce (or not, I had it in the fridge)
  • 3 cups cooked turkey meat
  • Juice of 1 lime
  • For serving: tortillas, sour cream, shredded cheese, shredded cabbage, sliced chilies, etc.
Saute onion over medium high heat until translucent. Add the chili powder to the onions and saute a few more minutes. Add tomato sauce, turkey and about 1/4 cup water (1/2 cup if you aren't using tomato sauce). Simmer until turkey is hot, pressing on the meat with a wooden spoon to shred the meat (alternatively, use two forks to shred the meat). Add the lime juice. Adjust seasoning with salt and pepper if necessary.

Serve with accompaniments of your choice.
Blog Widget by LinkWithin