Showing posts with label meat. Show all posts

Friday, August 27, 2010

The Porchetta Project

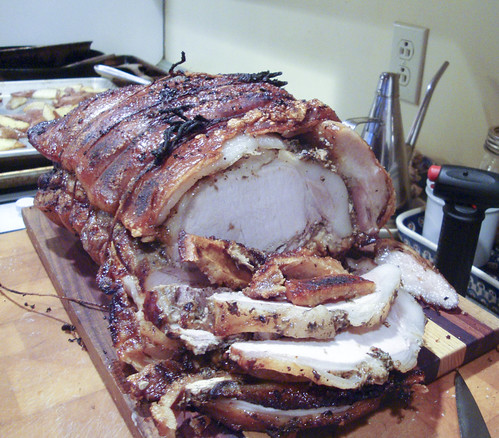
Porchetta - Carved Up
I have been dreaming of porchetta lately: a big roast of pork, redolent of rosemary and garlic and wrapped in crispy, crackly pork skin. This is a dish that's easy to get if you live in Italy, or near the eponymous shop in NYC, but up in my neck of the woods, not so much.

So what's a girl to do but take this porky problem into her own hands? Technically I needed what's called a "long middle" (a pork loin with the belly still attached), but my favorite pork supplier Tim Rocha at Kellie Brook Farm let me know that might be a tough cut for him to get. So, I decided to cobble together Frankenpig from a loin, some fatback and a skin-on belly.

Porchetta - 1st layer - belly with rub
I made a rub of rosemary, garlic, black pepper and salt to use for seasoning the roast and got to work assembling the beast: I laid the belly out and rubbed it liberally with half of the seasoning. I laid the loin over it and rubbed on the other half of the seasoning. I took the fatback (I did trim it down as it was really thick, so it ended up with a piece that was about 1/3 inch thick ) and laid it over the top.
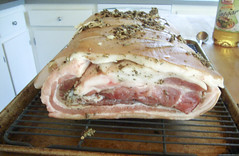
Porchetta - ready to roast
I then did a ridiculously poor job of trussing this amalgam into a cylinder. I put it onto a rack on a sheet pan and left it in the fridge for for a day, to let the rub's herbiness perfume the meat.

Since the roast was so thick (almost 10 inches) I took it out of the fridge an hour before I started roasting it. I followed the basic instructions that Molly Stevens used in her
porchetta project. Porchetta - first 30 minutesI put the roast into a 475-degree oven on a roasting rack on a sheet pan and let it crackle away for 30 minutes (this will create A LOT of smoke; turn off the smoke detectors first). Then the oven went down to 325-degrees and the porchetta roasted away for another 3 hours.
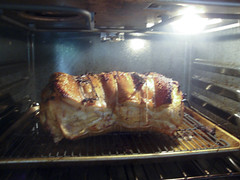
I popped into the oven every now and then and basted the skin with the fat that was accumulating in the pan. I also siphoned off a lot of this fat as it rendered. This was a necessary chore as a lot of fat rendered off: nearly 2 cups.

While this wasn't my perfect porchetta: it was a little too fatty, the loin on the ends was a little dry and the skin wasn't crispy all the way around. But, holy moly, it was a delicious. The skin that was crisped up was super crunchy and toothsome. The rosemary and garlic flavor permeated the meat and made for a great flavor. While the roast was resting, I roasted potatoes on a sheet pan with some of the rendered fat. We enjoyed our porchetta and potatoes with a fennel salad.
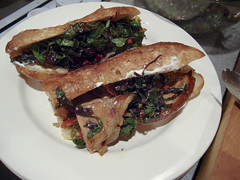
Porchetta SandwichTwo days later, we had an amazing sandwiches of gently-warmed porchetta, tomatoes and Swiss chard salad for dinner. Nom nom.

Changes for next time:
  • Remember to score the skin before you truss the roast - very very hard to score skin without cutting through the trussing twine.
  • Don't put the rub on the outside of the roast. I did and it started scorching up right off the bat.
  • Trim back a little more fat from the roast: a had a double layer of fat on the top (the loin fat against the back fat was too thick a layer).
  • Roll the roast during the skin-crisping stage to make sure that all the skin gets exposed to the heat.

Monday, August 16, 2010

Use Your Booty: Grilled Sausage Sub Platter

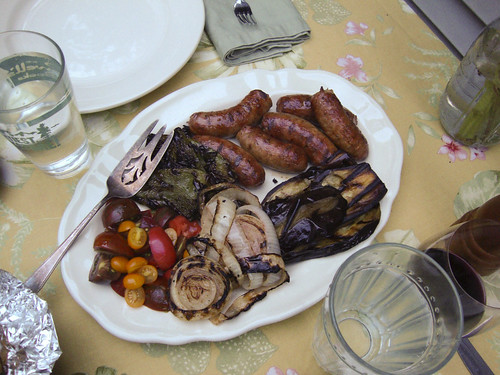
Grilled Sausage Dinner
Yesterday I asked Dave what he wanted for dinner and he sheepishly asked for sausage and pepper subs. I'm not a huge fan of this type of sandwich (and he knows it): the roll is always too big and fluffy, overshadowing the filling; the filling needs to be inserted perfectly, otherwise everything slithers out the back end when you take a bite; and frankly, I like to eat with a knife and fork most of the time.

So this was a great compromise: we took the traditional insides threw them all on the grill and served it all on a platter with fresh tomatoes, olive focaccia and some spicy kale (not in the picture) on the side.

I made garlic oil and brushed it on the peppers, onions and eggplant prior to grilling. I'll admit the eggplant is not traditional, but I love grilled eggplant and it stretched the sausage so we had enough left over for another meal. The peppers and kale came from my CSA and the eggplant from the farmstand down the road. The tomatoes were a gift from the lovely ladies at The Herb Farmacy (a fellow farmer's market vendor).

A note about the sausage: This sausage was INCREDIBLE. I got it from Tim Rocha at Kellie Brook Farm. His booth is two over from mine at the farmers' market, so I was able to do some shopping in between customers. I bought a pound each of his hot Italian and chorizo sausages. Last night we grilled the hot Italian sausage. It was everything you want sausage to be: fatty enough so it didn't try out on the grill (even though we had a fiery flareup or two), good seasoning (not too salty, just enough heat), and deep porky flavor. Seriously, we sat at the table, chewing the meat and saying over and over how good it was.

Tim raises Berkshire hogs and the flavor is just great: rich and porky with just enough fat (although it is a leaner breed than some other heritage breeds). In addition to Newburyport, MA, Tim also sells his meat (pork, chicken, veal) at markets in Portsmouth, Exeter and Hampton, NH.

This Summer, I am chronicling my first CSA (Community Supported Agriculture) experience. My CSA share is from Arrowhead Farm, a farm based in Newburyport, MA. Each week, I am posting about what was in my share and what I'm doing with it. By way of full disclosure, I won my share through a raffle and am not paying for it. However, Arrowhead did not know I was entered in the raffle, and I received no special consideration because of this blog. I paid for my livestock share. A full set of all the photos I've taken of this share is here.

Saturday, August 14, 2010

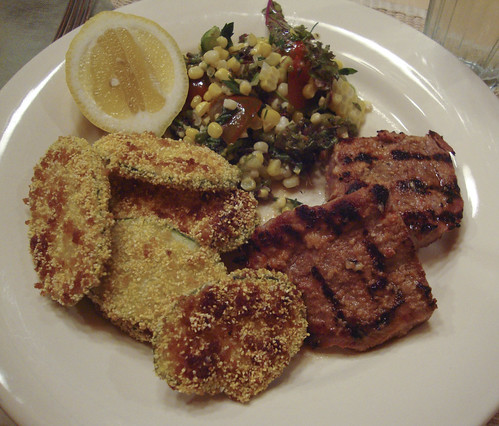
Grilled Goat Striploin

Last Sunday, the farmers' market was hopping! So much so, that I sold out of all of my baked goods with 30 minutes left to go before the closing bell. I took the opportunity to do a little shopping.

Riverslea Farm sells lamb and goat meat as well as wool products. I picked up two pieces of what they called goat "strips". After looking at the meat I figured out, I think, that this was the same cut as tenderloin: the muscle fibers ran the long way along the meat and the cut was shrouded in silverskin, line a tenderloin.

I trimmed the silverskin from the meat and then rubbed the meat with a spice paste made from:
  • 3 cloves garlic
  • 15 fenugreek seeds, toasted and ground
  • 1/4 tsp cayenne pepper
  • 1 tablespoon red wine vinegar
  • 1/2 teaspoon salt
We let the paste flavor the meat while the grill heated. We grilled the meat for about 4 minutes a side and dinner was done.

I made sure we cut the meat across the grain and it was wonderfully tender. Surprisingly, the flavor of the meat wasn't as strong as I expected it to be. I'm not sure if that was a function of the cut, the age of the goat at slaughter, or both.

Monday, March 1, 2010

Vietnamese Caramelized Grilled Pork

Ok, I know what some of you are thinking: "Caramel? On a piece of pork? I dunno Mary."

But think about barbecue sauce for a second: it's got
brown sugar and molasses in it and we slather it on anything from chicken, to salmon, to beef.

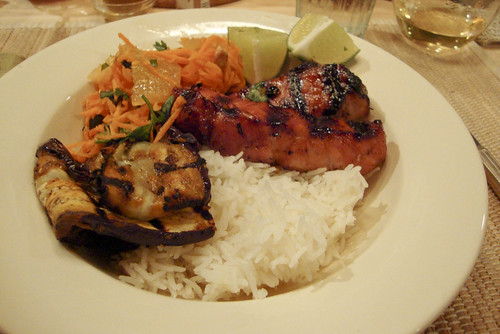
The marinade for this pork is made from a simple caramel cooked with lime juice, fish sauce and shallots. The pork is left to marinate in the caramel for 30 minutes or so and then grilled. I've used this marinade on pork tenderloin and boneless country ribs (pictured). You want to use a cut that is thin and will cook relatively quickly, otherwise the sugar may burn and blacken before the pork is cooked through.

I served this with steamed jasmine rice, grilled eggplant and a carrot salad.

Vietnamese Caramelized Grilled Pork
Try this with chicken or jumbo shrimp too. This is fabulous the next day, sliced thin on a sandwich.
  • 3/4 cup sugar
  • 4 tablespoons lime juice
  • 4 tablespoons fish sauce
  • 3 shallots, finely chopped
  • 2 pounds pork tenderloin, sliced into medallions, or boneless country ribs
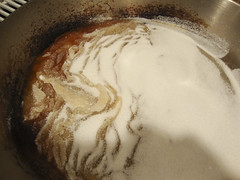
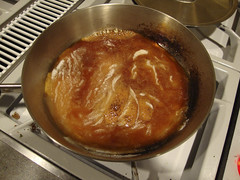
Make the caramel: In a heavy skillet (preferably one that's light colored metal, so you can gauge the color of the caramel - this is hard to do in cast iron or in a non-stick pan) spread the sugar into an even layer. Turn the heat to medium high and watch the pan. In a few minutes, you'll start to see a little smoking and the sugar around the edge of the pan should start to melt. Shake the pan occasionally to keep the sugar melting evenly (the sugar will wrinkle, do not be concerned).

When the sugar is dark toasty brown, turn off the heat add the shallots, lime juice and fish sauce - the caramel will bubble up and sputter: watch your arms and fingers! With a wooden spoon, stir the liquid and shallots into the caramel. Turn the heat back on and stir gently until the liquid is incorporated into the sauce.

Turn off the heat and let the sauce cool to room temperature, about 30 minutes.

Pour the marinade over the pork in a ziploc bag. Seal the bag and rub the marinade over the meat. Set aside for 30 minutes while you preheat the grill.

Remove the pork from the marinade. Grill the pork over medium-high heat until cooked through, about 3 minutes a side for thin medallions and about 4 minutes for thicker rib pieces. Cut in and check the doneness to be sure. Let the pork rest for 10 minutes before serving. Enjoy!

Monday, December 7, 2009

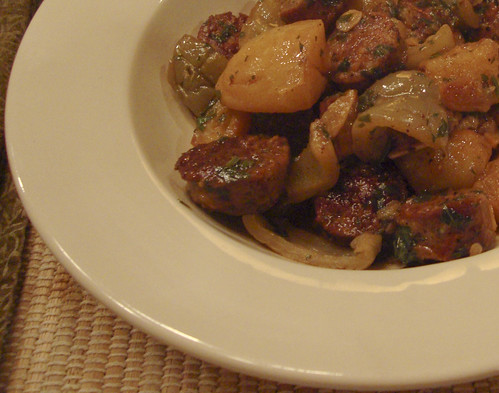
Sausage with Vinegar Peppers and Potatoes

This is a dish I ate many, many years ago at Artu Restaurant in Boston's North End. I had it on two different visits and really enjoyed it. I am guessing this is a traditional "rustic" preparation not deemed worthy of inclusion in cookbooks. I don't see it on many menus in our area, and I can't find it referenced many places on the web either. So I figured I should share my rendition with you.

The only ingredient that might be hard to find is the vinegar peppers. I think you should be able to find them in jars at the supermarket with other Italian ingredients. They should be labeled "vinegar peppers" not cherry peppers. They are bell peppers (red, yellow and/or green) not spicy ones. If you can, go to a great Italian market and buy them there if you can; the vinegar won't be as strong and the peppers will be juicier.

To me a key component of this dish is using good (homemade if possible) chicken broth in the final assembly of the dish. The broth mingles the puckery vinegar with the richness of the sausage and then gets all of that lusciousness to absorb into the potatoes.

Sausage with Vinegar Peppers and Potatoes
Serves 2-3
Note: This recipe looks more complicated than it is. All you're doing is combining cooked sausage, potatoes and peppers, simmering them with broth and seasoning to taste. My ideal proportions are equal amount of potato and sausage and half that amount of peppers (eg. 2 cup potato, 2 cups sausage, 1 cup peppers).
  • 1.25 pounds Italian sausage (hot or sweet, your choice)
  • 3-4 vinegar peppers, seeded and cut into bite-sized pieces, to yield about 1-1.5 cups
  • 1.25 pounds potatoes (about 2 large russets), cut into bite-sized chunks and roasted until cooked through and browned (you can use left-over roasted potatoes - left over potatoes will need a little more broth)
  • 2-4 cups low-sodium chicken broth, preferably homemade (you will need the greater amount if you are using left-over potatoes)
  • 2-4 cloves garlic (your choice), sliced thin
  • handful of chopped parsley
  • salt and pepper to taste
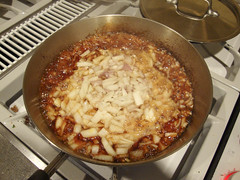
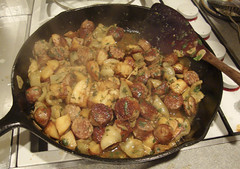
Start by searing off the sausage on all sides in a large skillet, then cut the sausage into bite-size pieces (Searing off the sides lets you cut the sausage into neat pieces. If you did this without searing the casing, the sausage would shred.). Cook the sausage pieces until they are cooked nearly all the way through. Add oil if needed to lubricate the pan - most sausage will release enough fat so this won't be necessary.

Add the cooked potatoes, peppers and garlic to the skillet. Saute them together until they are all heated through. Add about 2 cups of chicken broth and bring it to a lively simmer. Simmer until the liquid is reduced by about half and the potatoes are starting to break down a little. Add more broth if needed (if your potatoes are left-over from another meal, you'll need more broth to rehydrate them through).

Sprinkle the parsley into the skillet. Add salt and pepper to taste (I like this to be pretty peppery). Depending on the kind of vinegar peppers you use, you may not need much salt.

It's nice to serve this with some great bread to soak up the juices in the bottom of the bowl.

Tuesday, April 21, 2009

Turkey Tacos

This is a multi-stage recipe (for which I only have one picture, unfortunately), but I thought it was worth sharing with you.

Way back when in November, I bought a locally-raised turkey. Since we didn't need a whole bird just for our little Thanksgiving, I carved off the leg pieces and wings and put them in the freezer until later ...

... many months later ... I found my bag of turkey bits in the deep freeze. I had read about confiting turkey legs and was hoping to save up enough chicken fat to try that technique with these. Despairing of that ever happening I decided to jump start the process by using olive oil and some pork fatback.

I seasoned the pieces with salt and pepper and let them rest in the fridge overnight. The next day, I put the turkey pieces, peppercorns, a head of garlic, and several bay leaves into my crockpot and covered them with oil. After eight hours of slow cooking, the pieces were cooked through and silky. The result was as unctuous as a duck confit and the legs were way too big to fry up in a pan. I pulled the meat off the bones and covered it in the oil.

Now, how to use up this bounty (about three pounds of meat) ? A few pieces got sauteed and served over a salad with a poached egg. A few more went into an omelet. A few more onto a sandwich. Oy, that's a lot of turkey meat I still have in the fridge. So, tonight the rest went into tacos.

Finally, a recipe. Here you go:

Turkey Tacos
serves 4
  • 1 onion, chopped
  • 3 tablespoons chili powder
  • 1/4 cup tomato sauce (or not, I had it in the fridge)
  • 3 cups cooked turkey meat
  • Juice of 1 lime
  • For serving: tortillas, sour cream, shredded cheese, shredded cabbage, sliced chilies, etc.
Saute onion over medium high heat until translucent. Add the chili powder to the onions and saute a few more minutes. Add tomato sauce, turkey and about 1/4 cup water (1/2 cup if you aren't using tomato sauce). Simmer until turkey is hot, pressing on the meat with a wooden spoon to shred the meat (alternatively, use two forks to shred the meat). Add the lime juice. Adjust seasoning with salt and pepper if necessary.

Serve with accompaniments of your choice.

Tuesday, November 18, 2008

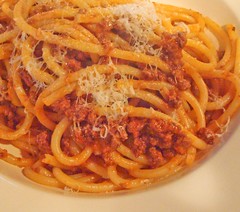
A Tale of Two Ragus

The "The Way We Eat" section of the New York Times' Sunday Magazine can be a hit or miss proposition for me. That's not say that I don't the stories aren't interesting or compelling. But often I find myself reading the article saying to myself "well I'll never make this ... interesting though." (The recent story on curried pork katsu being a prime example.)

In February though, Christine Muhlke's story on ragus sent most of the foodie blogosphere, myself included, scurrying for their kitchens. I've now made two of the ragus (the beef and the lamb) in the story twice and encourage you to jump on the ragu-makin' wagon.

The benefits: These recipes yield sauces with incredible deep flavor and richness. Just a cupful or two makes for a decandent and satisfying pasta dish. They freeze *very* well so you can double or triple the recipe and stockpile these glorious sauces in your freezer.

The negatives: If you double the recipe (as I have), it takes a long time to make. The sauce should simmer for at least 3 hours to develop the full flavors and silky texture you want in a ragu. However, once you double the recipe, you should extend that simmer time to at least four hours, if not longer. But before you even get that far, everything needs to be browned, and reduced and browned again. That takes time, a lot of time. Use two frying pans to speed up the browning step, deglaze with the wine called for in the recipe, and then chuck everything into a big stockpot. Worth it though.

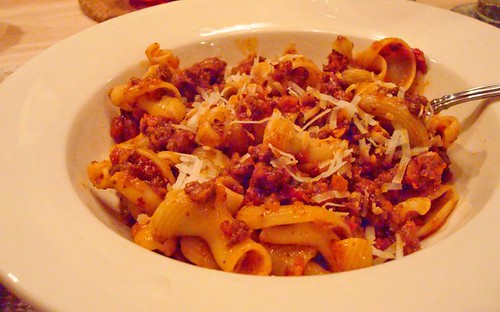
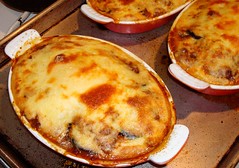
I have used these ragus to sauce homemade fresh pasta, artisan-quality dried pasta and regular old Barilla from a box. Each has resulted in a gorgeous meal. My finest moment was when I took lamb ragu, layered it between slices of roasted eggplant and then topped it with bechamel: a moussaka to please the gods (and since the sauce came from the freezer, it took about half and hour to pull together).

The link to the recipes is here. As the weather chills down and you start to shiver, go and try these sauces out, you won't be sorry.

Tuesday, November 4, 2008

A Taste of Philadelphia

Full disclaimer: I have never eaten one of these sandwiches in its natural habitat of Philadelphia. But the combo of roast pork, provolone, broccoli rabe and garlic sounded so great, I couldn't wait for a trip to the city of brotherly love.

The sandwich is pretty easy to make, though I make no claims to its authenticity. You take a split roll or baguette, top it with slices of roast pork loin (great way to use leftovers), melt some provolone over it. Then you put a big ol' pile of sauteed broccoli rabe (with garlic) over the whole shebang. Fold and eat.

We scarfed these sandwiches with a side of sweet potato fries. Not Philly-traditional, but pretty darn delicious.

Wednesday, September 17, 2008

Thai-Spiced Meatballs with Chili Sauce

I read about these meatballs a few weeks ago and thought they sounded interesting and delicious. I made them as a part of a pseudo-Thai dinner we had on Sunday night and I am looking forward to serving them again. I'm not going to post the recipe because you can get it over here at Serious Eats.

First off, the sauce is great. It's not too spicy and I think it would be great as a dipping sauce for spring rolls (both fried and fresh). I did not have any scallions on hand so I used very thinly sliced shallots instead.

I also used shallots in the meatballs and they turned out well. (I think these would be really great with ground pork instead). I did not have any Thai basil either, so I wrapped the meatballs in a basil leaf with a little cilantro tucked inside; a very nice substitution indeed.

One other recipe note: we grilled these on a grill rack. The recipe called for skewering the meatballs and putting them right onto the grill, but since they are sorta log-shaped, they spun around the skewer and I felt we'd risk losing them to flames without a grill rack.

Wednesday, August 6, 2008

Grilled Pork Belly

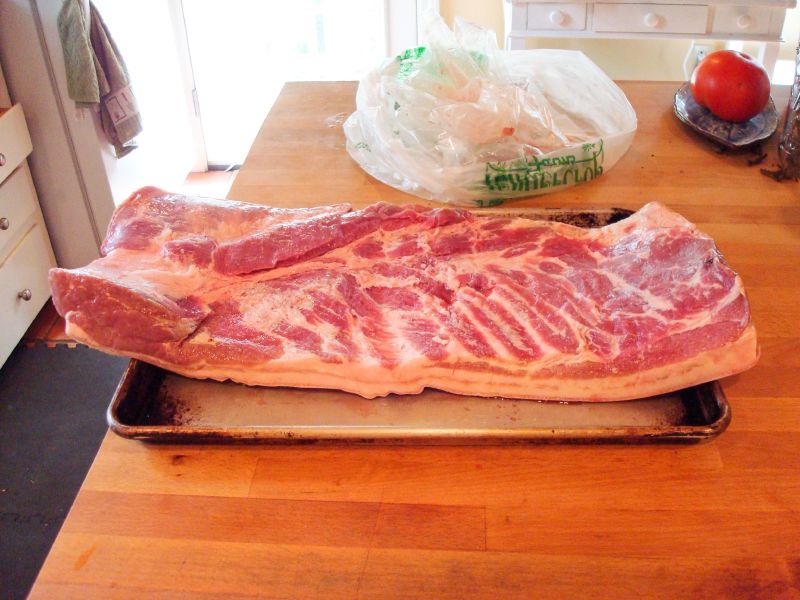
So, I'm curing some bacon. But that's a post for another time (like when the bacon is done). I procured my pork belly from my local farmstand. A whole pork belly is about 10 pounds of meaty, fatty porkiness (see below). I decided to use the center section for my bacon experiment as it was about the same thickness throughout. I cut out about 5 pounds for curing and that left me with another 5 pounds to play with.

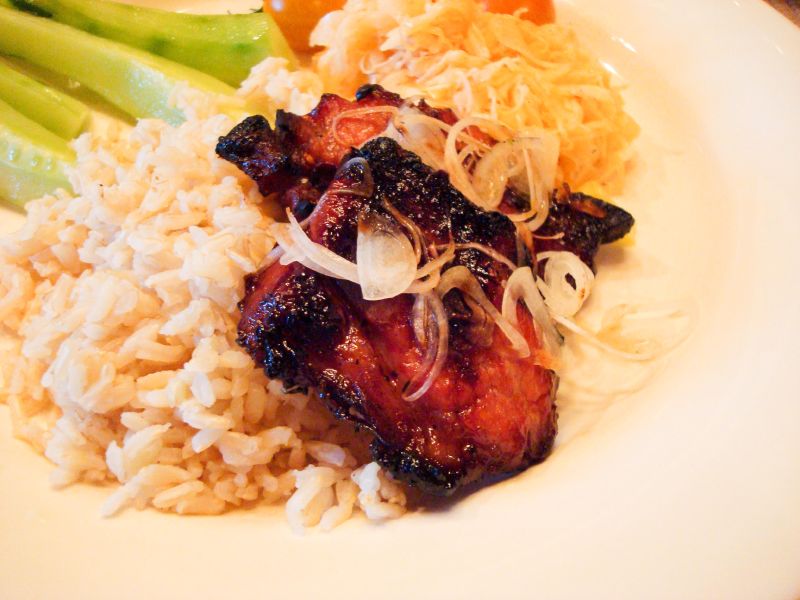
For my first foray into home-cooked pork belly I tried grilling. Whoa Nelly! What a success. We ended up with thick-cut, crunchy/chewy slices of pork meat laced with crispy strips of fattiness (even though almost all of the fat was rendered off).

I cut 8 3/4 inch slices off the pork belly and marinated them in fish sauce, brown sugar, crushed garlic and chile flakes. I didn't really measure; I used enough sugar and fish sauce to make a paste and then tossed in the 4 crushed garlic cloves and a few pinches of red pepper. I let that sit in the fridge for about 3 hours.

I grilled the slices over medium heat for about 30 minutes, and turned them occasionally. When they looked "done" (well-caramelized, most fat rendered off, sorta crispy) we ate them. I tossed some very thinly sliced shallot over the slices first. We ate the belly with brown rice, a vinegar-based cole slaw and tomatoes and cucumbers. (With that cut of meat, I need something healthy on our plates!)

Wednesday, September 5, 2007

Steak, Caveman Style

For those who like a steakhouse-style piece of ribeye or sirloin, Dirty Steak is a revelation. The technique is basic, if dramatic: Build up a charcoal fire and let it burn down to coals. When it is "honkin' hot" (in the words of my grillmaster) you lay your sirloin or ribeye directly on the coals. I kid you not. Have faith and be rewarded.

I first heard of this style of cooking steak on Julia Child's Cooking with Master Chefs program. The chefs at Al Forno in Providence, RI developed the technique and dubbed it "Dirty" (I have seen this style elsewhere as "Terrorized" - I think Dirty Steak sounds more fun). Go here to find a link to the original video with George Germon, Johanne Killeen and Julia Child (scroll down to the bottom of the page).

Dirty Steak (adapted from Al Forno's technique)

Take your steaks out of the fridge at least 30 minutes before cooking to help them lose their chill. I recommend ribeyes or sirloin/strip-type steaks, cut an inch thick. Use good-quality beef. (My local Shaw's supermarket carries Prime beef and you can really taste the difference.)
Make a charcoal fire (do not use briquettes, please use real hardwood charcoal which you can find easily at any Trader Joe's or Whole Foods. For charcoal ratings, take a look at the Naked Whiz's Lump Charcoal Reviews).

Let the fire burn down until the coals are red hot and covered in grey ash. (If you put you hand a foot over the fire, the fire should be so hot that you need to pull your back within a second.)
Dry the steaks well with paper towels and then salt and pepper them generously. Using tongs, put the steaks directly on the hot coals. You will have left all the fat on the steaks so they will smoke a lot, this is a fine thing unless you get a snootful of smoke.
After about 3-4 minutes turn the steaks over. Knock off any charcoal that sticks. Cook the steaks for another 3-4 minutes or so.

3 minutes a side will give you rare, 4 minutes a side will be medium-rare. (See below for a medium-well/well variation.) Let the steaks rest, uncovered for about 5-10 minutes, slice and serve. The exterior of the steak will be crusty and charred and the interior will have a great smoky flavor. What's amazing about this technique to me is that considering what it's just gone through, the steak does not taste burned at all.

For well-er done temps: Take the steaks off after 4 minutes per side. Put them in an oven safe pan or skillet and place them in a 400 oven for about 5-10 minutes, depending the thickness of the steaks and your desired doneness.

Thursday, July 12, 2007

Brisket Update

We made the Texas-Style Brisket for our Fourth of July dinner. For the full recipe you should check out the recent issue of Cook's Illustrated
as this is just an update.

First, it did not take six hours. It took a little over four hours. Perfect for a weeknight. Ha!

The only brisket I could find at my supermarket was 2 1/2 pounds and the recipe called for a 4-5 pound brisket. I followed the recipe pretty much as it was outlined. I halved the amount of dry rub I made (due to the smaller roast) and used the foil shield the recipe recommended because we were cooking on a gas grill. Liberal use of wood chips kept everything nice and smoky throughout.

We ate the brisket with potato salad, pickles, and sliced tomatoes. It was quite good. We didn't get the nice crust on the meat because I was too hungry to leave the meat in the oven (yes, the recipe uses the oven and the grill) to crust up.

Leftovers were eaten at the East Coast Classic (go Cadets!) in wrap sandwiches with sliced cucumber, cheese and tomato.

Monday, May 28, 2007

Fast Grilled Ribs

I'll say up front: "fast" is a relative term. These will take 45 minutes or so, but compared to hours of smoking or slow barbecuing, 45 minutes is fast.

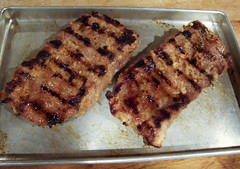
The original method for these ribs came our friends John and Lynn. The idea is simple: rub the ribs with salt, pepper, garlic and lime juice and then grill them bone side down over medium heat for about 30 minutes, flip once and grill 15 minutes longer. The bones insulate the meat so it cooks through and doesn't dry out. As the fat renders, it bastes the meat and drips off. You're left with porky, meaty ribs. This method won't yield the fall apart texture you'd get after hours of smoking, but you get nice, meaty ribs to gnaw on. Very satisfying.

This time, instead of the simple lime, salt and pepper rub, I used an adobo paste, inspired by one in the most recent issue of Gourmet magazine. T'was toothsome.

Grilled Ribs
  • 1 slab babyback or St. Louis ribs (I have found the baby backs are easier to prepare, but the St. Louis are meatier and better on the grill.)
  • Dry rub or flavoring paste (see below)
If you are using St. Louis-style ribs (SLR), cut off the flaps of meat on the front and back of the slab of ribs. My ribs usually have two flaps of meat - one on the bone side, and one on the meat side. You want an even slab of ribs.

Cut off most of the external fat. Rub the slab with your paste or rub. If using SLR, trim the pieces you cut off, rub them with the seasoning and follow the instructions below, putting them on the coolest part of the grill.

Place the ribs over medium heat. Cook bone-side down for about 30-40 minutes. The meat will be cooked almost through at the 30 minute mark (take a peek, you shouldn't see raw meat). Flip the slab over to brown the top. At 45 minutes, they should be browned across the entire slab. Set aside to rest for about 5-10 minutes. Cut the meat apart between the ribs and serve. If you have SLR, slice the little pieces of flap meat into thin slices and serve alongside the ribs. I like a little lime juice sprinkled over the top of everything.

Adobo Paste (adapted from Doc Willoughby's recipe in the June Gourmet)

This is the paste I used this time. In the past, I have found a simple rub of salt and pepper, lime juice and finely minced garlic works well too. You do not need to let the ribs soak this stuff up ahead - just rub and go.


Mix together:
  • 2 tablespoons olive oil
  • 2 tablespoons paprika
  • 1 teaspoon cayenne
  • 1 teaspoon ground cumin
  • 2 teaspoons oregano
  • 1 teaspoon lime zest
  • 1 1/2 teaspoons salt
  • 3 garlic cloves, pressed or minced
Use as a flavor rub for chicken or pork.
Blog Widget by LinkWithin