Showing posts with label Daring Bakers. Show all posts

Monday, April 27, 2009

Daring Bakers April: Cheesecake Centerpiece

The April 2009 challenge is hosted by Jenny from Jenny Bakes. She has chosen Abbey's Infamous Cheesecake as the challenge.

This month's Daring Bakers post was centered on cheesecake. We were given a free hand to flavor and decorate the cheesecake as we desired. I have to confess to not being a huge cheesecake fan, so I decided to highlight what I really enjoy about cheesecake: its tanginess and the contrast of the crust against the creamy cheese cake.

I've posted the recipe below for those who want to try it at home. I wasn't 100% happy with the recipe; I thought the result was too sticky and didn't cut cleanly, but based on the other cheesecakes I've seen posted others didn't have the problems I did (I'm still adjusting to my new oven and that may have been a factor.). My taste testers were extremely happy with the results however, so I consider the whole operation to be a success.

I did not make many changes to the recipe other than adding 3 lemons' worth of zest to the cheesecake batter.

I topped the cheesecake with a thick layer of lemon curd and then piped meringue over the top. I pulled out my handy-dandy bruleeing torch and toasted the top for a lemon meringue pie look.

Here are all recipes I used:

Abbey's Infamous Cheesecake
crust:
  • 2 cups / 180 g graham cracker crumbs
  • 1 stick / 4 oz butter, melted
  • 2 tbsp. / 24 g sugar
  • 1 tsp. vanilla extract

cheesecake:

  • 3 sticks of cream cheese, 8 oz each (total of 24 oz) room temperature
  • 1 cup / 210 g sugar
  • 3 large eggs
  • 1 cup / 8 oz heavy cream
  • 1 tbsp. lemon juice
  • 1 tbsp. vanilla extract (or the innards of a vanilla bean)
  • 1 tbsp liqueur, optional, but choose what will work well with your cheesecake

1. Preheat oven to 350 degrees F (Gas Mark 4 = 180C = Moderate heat). Begin to boil a large pot of water for the water bath.

2. Mix together the crust ingredients and press into your preferred pan. You can press the crust just into the bottom, or up the sides of the pan too - baker's choice. Set crust aside. (My note: TRIPLE wrap the pan with foil with save it from encroachment by the water bath.)

3. Combine cream cheese and sugar in the bowl of a stand-mixer (or in a large bowl if using a hand-mixer) and cream together until smooth. Add eggs, one at a time, fully incorporating each before adding the next. Make sure to scrape down the bowl in between each egg. Add heavy cream, vanilla, lemon juice, and alcohol and blend until smooth and creamy.

4. Pour batter into prepared crust and tap the pan on the counter a few times to bring all air bubbles to the surface. Place pan into a larger pan and pour boiling water into the larger pan until halfway up the side of the cheesecake pan. If cheesecake pan is not airtight, cover bottom securely with foil before adding water.

5. Bake 45 to 55 minutes, until it is almost done - this can be hard to judge, but you're looking for the cake to hold together, but still have a lot of jiggle to it in the center. You don't want it to be completely firm at this stage. Close the oven door, turn the heat off, and let rest in the cooling oven for one hour. This lets the cake finish cooking and cool down gently enough so that it won't crack on the top. After one hour, remove cheesecake from oven and lift carefully out of water bath. Let it finish cooling on the counter, and then cover and put in the fridge to chill. Once fully chilled, it is ready to serve.

Prep notes: While the actual making of this cheesecake is a minimal time commitment, it does need to bake for almost an hour, cool in the oven for an hour, and chill overnight before it is served. Please plan accordingly!

Lemon Curd
This recipe is taken from Elinor Klivans and I love it, check out the Fine Cooking post for helpful photos. The technique of whipping everything together and then heating it save you from whipping up a batch of lemon-scented scrambled eggs.

You'll end up with about two cups, which will be a little too much for the cheesecake, but leftovers are great on toast or scones or ice cream.
  • 6 tablespoons unsalted butter, at room temperature
  • 1 cup sugar
  • 2 large eggs
  • 2 large egg yolks (save the whites to use in the meringue)
  • 2/3 cup fresh lemon juice
  • 1 tsp. grated lemon zest

In a large bowl, beat the butter and sugar with an electric mixer, about 2 min. Slowly add the eggs and yolks. Beat for 1 min. Mix in the lemon juice. The mixture will look curdled, but it will smooth out as it cooks.

In a medium, heavy-based saucepan, cook the mixture over low heat until it looks smooth. (The curdled appearance disappears as the butter in the mixture melts.) Increase the heat to medium and cook, stirring constantly, until the mixture thickens, about 15 min. It should leave a path on the back of a spoon and will read 170°F on a thermometer. Don't let the mixture boil.

Remove the curd from the heat; stir in the lemon zest. Transfer the curd to a bowl. Press plastic wrap on the surface of the lemon curd to keep a skin from forming and chill the curd in the refrigerator. The curd will thicken further as it cools. Covered tightly, it will keep in the refrigerator for a week and in the freezer for 2 months.

Meringue topping

  • 4 egg whites
  • pinch salt
  • pinch of cream of tartar
  • 2 tablespoons sugar
Start whipping the egg whites, salt and cream of tartar with a beater, as the egg whites fluff up to soft peaks, slowly add the sugar. Whip the egg whites to firm peaks. Spoon with whites into a pastry bag.

Assembling the cheesecake
Spread a layer of lemon curd over the top of the cheesecake. Pipe the egg white meringue over the top the cheesecake. Using a bruleeing torch toast the meringue until golden. If you don't have a torch, you can run the cheesecake under the broiler to brown the top.

Store in the refrigerator until ready to serve.

Friday, March 27, 2009

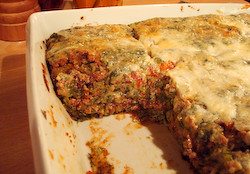
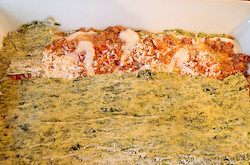
Daring Bakers March: The Lasagna of Emlia Romagna

The March 2009 challenge is hosted by Mary of Beans and Caviar, Melinda of Melbourne Larder and Enza of Io Da Grande. They have chosen Lasagne of Emilia-Romagna from The Splendid Table by Lynne Rossetto Kasper as the challenge.

I'm a pretty recent Daring Bakers member, so it was a pleasant surprise to me to see a savory item go onto the challenge roster. We were to make a ragu, a bechamel sauce, and most importantly, fresh spinach pasta.

The recipes were taken directly from Lynne Rossetto Kasper's glorious book The Splendid Table. The recipes are challenging, but doable, and I strongly recommend you give this dish a try. The ragu can be made ahead and frozen and the pasta can be done earlier in the day and held before assembly.

Lasagne of Emilia-Romagna (Lasagne Verdi al Forno)
(Serves 8 to 10 as a first course, 6 to 8 as a main dish)

  • 1 recipe Spinach Pasta cut for lasagna (recipe follows)
  • 1 recipe Bechamel Sauce (recipe follows)
  • 1 recipe Country Style Ragu (recipe follows)
  • 4 ounces freshly grated Parmigiano-Reggiano

Working Ahead:
The ragu and the béchamel sauce can be made up to three days ahead. The ragu can also be frozen for up to one month. The pasta can be rolled out, cut and dried up to 24 hours before cooking. The assembled lasagne can wait at room temperature about 1 hour before baking. Do not refrigerate it before baking, as the topping of béchamel and cheese will overcook by the time the center is hot.

Assembling the Ingredients:
Have all the sauces, rewarmed gently over a medium heat, and the pasta at hand. Have a large perforated skimmer and a large bowl of cold water next to the stove. Spread a double thickness of paper towels over a large counter space. Preheat the oven to 350 degrees Fahrenheit. Oil or butter a 3 quart shallow baking dish.

Cooking the Pasta:
Bring the salted water to a boil. Drop about four pieces of pasta in the water at a time. Cook about 2 minutes. If you are using dried pasta, cook about 4 minutes, taste, and cook longer if necessary. The pasta will continue cooking during baking, so make sure it is only barely tender. Lift the lasagne from the water with a skimmer, drain, and then slip into the bowl of cold water to stop cooking. When cool, lift out and dry on the paper towels. Repeat until all the pasta is cooked.

Assembling the Lasagne:
Spread a thin layer of béchamel over the bottom of the baking dish. Arrange a layer of about four overlapping sheets of pasta over the béchamel. Spread a thin layer of béchamel (about 3 or 4 spoonfuls) over the pasta, and then an equally thin layer of the ragu. Sprinkle with about 1&1/2 tablespoons of the béchamel and about 1/3 cup of the cheese. Repeat the layers until all ingredients are used, finishing with béchamel sauce and topping with a generous dusting of cheese. (I ended up with about six layers - you may have more or less depending on the thickness of your pasta.)

Baking and Serving the Lasagne:
Cover the baking dish lightly with foil, taking care not to let it touch the top of the lasagne. Bake 40 minutes, or until almost heated through. Remove the foil and bake another 10 minutes, or until hot in the center (test by inserting a knife – if it comes out very warm, the dish is ready). Take care not to brown the cheese topping. It should be melted, creamy looking and barely tinged with a little gold. Turn off the oven, leave the door ajar and let the lasagne rest for about 10 minutes. Then serve. This is not a solid lasagne, but a moist one that slips a bit when it is cut and served.

Spinach Egg Pasta (Pasta Verde)
Makes enough for 6 to 8 first course servings or 4 to 6 main course servings, equivalent to 1 pound (450g) dried boxed pasta.

  • 2 jumbo eggs (2 ounces/60g or more
  • 10 ounces (300g) fresh spinach, rinsed dry, and finely chopped; or 6 ounces (170g) frozen chopped spinach, defrosted and squeezed dry
  • 3&1/2 cups (14 ounces/400g) all purpose unbleached (plain) flour (organic stone ground preferred)

Mound the flour in the center of your work surface and make a well in the middle. Add the eggs and spinach. Use a wooden spoon to beat together the eggs and spinach. Then gradually start incorporating shallow scrapings of flour from the sides of the well into the liquid. As you work more and more flour into the liquid, the well’s sides may collapse. Use a pastry scraper to keep the liquids from running off and to incorporate the last bits of flour into the dough. Don’t worry if it looks like a hopelessly rough and messy lump.

With the aid of the scraper to scoop up unruly pieces, start kneading the dough. Once it becomes a cohesive mass, use the scraper to remove any bits of hard flour on the work surface – these will make the dough lumpy. Knead the dough for about 3 minutes. Its consistency should be elastic and a little sticky. If it is too sticky to move easily, knead in a few more tablespoons of flour. Continue kneading about 10 minutes, or until the dough has become satiny, smooth, and very elastic. It will feel alive under your hands. Do not shortcut this step. Wrap the dough in plastic wrap, and let it relax at room temperature 30 minutes to 3 hours.

If using an extra-long rolling pin work with half the dough at a time. With a regular-length rolling pin, roll out a quarter of the dough at a time and keep the rest of the dough wrapped. Lightly sprinkle a large work surface with flour. The idea is to stretch the dough rather than press down and push it. Shape it into a ball and begin rolling out to form a circle, frequently turning the disc of dough a quarter turn. As it thins outs, start rolling the disc back on the pin a quarter of the way toward the center and stretching it gently sideways by running the palms of your hands over the rolled-up dough from the center of the pin outward. Unroll, turn the disc a quarter turn, and repeat. Do twice more.

Stretch and even out the center of the disc by rolling the dough a quarter of the way back on the pin. Then gently push the rolling pin away from you with one hand while holding the sheet in place on the work surface with the other hand. Repeat three more times, turning the dough a quarter turn each time.

Repeat the two processes as the disc becomes larger and thinner. The goal is a sheet of even thickness. For lasagne, the sheet should be so thin that you can clearly see your hand through it and see colours. Cut into rectangles about 4 by 8 inches (10 x 20 cm).

Dry the pasta at room temperature and store in a sealed container or bag.

Bechamel

  • 4 tablespoons (2 ounces/60g) unsalted butter
  • 4 tablespoons (2 ounces/60g) all purpose unbleached (plain) flour, organic stone ground preferred
  • 2&2/3 cups (approx 570ml) milk
  • Salt and freshly ground pepper to taste
  • Freshly grated nutmeg to taste

Using a medium-sized saucepan, melt the butter over low to medium heat. Sift over the flour, whisk until smooth, and then stir (without stopping) for about 3 minutes. Whisk in the milk a little at a time and keep the mixture smooth. Bring to a slow simmer, and stir 3 to 4 minutes, or until the sauce thickens. Cook, stirring, for about 5 minutes, until the sauce thickens. Season with salt, pepper, and a hint of nutmeg.

Country Style Ragu’ (Ragu alla Contadina)
Makes enough sauce for 1 recipe fresh pasta or 1 pound/450g dried pasta).
I made mine batch of this in my crockpot - it worked perfectly for the slow simmer this sauce needs.

  • 3 tablespoons extra virgin olive oil (45 mL)
  • 2 ounces/60g pancetta, finely chopped
  • 1 medium onion, minced
  • 1 medium stalk celery with leaves, minced
  • 1 small carrot, minced
  • 4 ounces/125g boneless veal shoulder or round
  • 4 ounces/125g pork loin, trimmed of fat, or 4 ounces/125g mild Italian sausage (made without fennel)
  • 8 ounces/250g beef skirt steak, hanging tender, or boneless chuck blade or chuck center cut (in order of preference)
  • 1 ounce/30g thinly sliced Prosciutto di Parma
  • 2/3 cup (5 ounces/160ml) dry red wine
  • 1 &1/2 cups (12 ounces/375ml) chicken or beef stock (homemade if possible)
  • 2 cups (16 ounces/500ml) milk
  • 3 canned plum tomatoes, drained
  • Salt and freshly ground black pepper to taste

The ragu can be made 3 days ahead. Cover and refrigerate. It also freezes well for up to 1 month. Skim the fat from the ragu’ before using it.

Heat the olive oil in a 12 inch (30cm) skillet (frying pan) over medium-high heat. Have a large saucepan handy to use once browning is complete. Add the pancetta and minced vegetables and sauté, stirring frequently with a wooden spoon, 10 minutes, or until the onions barely begin to color. Coarsely grind all the meats together, including the prosciutto, in a food processor or meat grinder. Stir into the pan and slowly brown over medium heat. First the meats will give off a liquid and turn dull grey but, as the liquid evaporates, browning will begin. Stir often, scooping under the meats with the wooden spatula. Protect the brown glaze forming on the bottom of the pan by turning the heat down. Cook 15 minutes, or until the meats are a deep brown. Turn the contents of the skillet into a strainer and shake out the fat. Turn them into the saucepan and set over medium heat.

Reducing and Simmering: Add the wine to the skillet, lowering the heat so the sauce bubbles quietly. Stir occasionally until the wine has reduced by half, about 3 minutes. Scrape up the brown glaze as the wine bubbles. Then pour the reduced wine into the saucepan and set the skillet aside.

Stir ½ cup stock into the saucepan and let it bubble slowly, 10 minutes, or until totally evaporated. Repeat with another ½ cup stock. Stir in the last 1/2 cup stock along with the milk. Adjust heat so the liquid bubbles very slowly. Partially cover the pot, and cook 1 hour. Stir frequently to check for sticking.

Add the tomatoes, crushing them as they go into the pot. Cook uncovered, at a very slow bubble for another 45 minutes, or until the sauce resembles a thick, meaty stew. Season with salt and pepper.

Saturday, February 28, 2009

Daring Bakers February: For the Love of Chocolate

The February 2009 challenge is hosted by Wendy of WMPE's blog and Dharm of Dad ~ Baker & Chef. We have chosen a Chocolate Valentino cake by Chef Wan; a Vanilla Ice Cream recipe from Dharm and a Vanilla Ice Cream recipe from Wendy as the challenge.

For this month's Daring Bakers challenge we all made chocolate valentino cakes. We were to serve our cake with an ice cream of our choice. I made a buttermilk-vanilla ice cream to go with my cake.

The ice cream was a real experiment for me. I am going to be teaching a class later this year on making ice cream without an ice cream maker and so I experimented with David Lebovitz's method for machine-free frozen treats. It's pretty simple: put your ice cream base in a container. Stick in the freezer and stir vigorously about every half hour until it looks like ice cream. The advantage of this method is that is gives you very dense, almost gelato-like ice cream (and you don't need another appliance in the kitchen). That said, I think I prefer the smoother, churned texture I get from my ice-cream maker. But if I didn't have the equipment on hand, the "freeze and stir" method would be a very good fall back technique to have in your arsenal.

The recipe I developed doesn't contain any eggs: I wanted it to be super fast to pull together. I also scaled the recipe for a small quantity (about 2 cups worth).

Creamy Buttermilk Ice Cream
  • 1 cup buttermilk
  • 1 cup heavy cream
  • 1/2 cup sugar
  • pinch salt
  • 2 teaspoons vanilla extract
In a small saucepan, heat the sugar and about 1/2 cup of the cream together. Heat, stirring, until the sugar dissolves. Add the vanilla and salt. Pour the sweetened cream into a storage container and add the rest of the cream and the buttermilk. Stir to combine. Chill for at least four hours if you are going to use an ice cream maker. If you use the "freeze and stir" method, you can start that right away.

----------------------------------------
This flourless chocolate cake is fairly similar to the Cook's Illustrated version I make. The only material difference in the two recipes is the CI version has you whip the whole eggs until very thick. I made a half-batch of the recipe and baked it in a 6" springform. It makes a very dense, fudgy cake. I think I overbaked mine a tiny bit as it was the tiniest but dry (ice cream can cover that sin pretty well however). To account for the smaller pan, I reduced the oven temp to 350 and the baking time to 20 minutes, but I should have pulled it out at 17 minutes, methinks. The full recipe is reprinted below.

Chocolate Valentino Cake
  • 16 ounces (454 grams) of semisweet chocolate, roughly chopped
  • ½ cup plus 2 tablespoons (146 grams total) of unsalted butter
  • 5 large eggs, separated
Put chocolate and butter in a heatproof bowl and set over a pan of simmering water (the bottom of the bowl should not touch the water) and melt, stirring often.

While your chocolate butter mixture is cooling, butter your pan and line with a parchment circle then butter the parchment.

Separate the egg yolks from the egg whites and put into two medium/large bowls.

Whip the egg whites in a medium/large grease free bowl until stiff peaks are formed (do not over-whip or the cake will be dry).

With the same beater beat the egg yolks together.

Add the egg yolks to the cooled chocolate.

Fold in 1/3 of the egg whites into the chocolate mixture and follow with remaining 2/3rds. Fold until no white remains without deflating the batter.

Pour batter into prepared pan, the batter should fill the pan 3/4 of the way full, and bake at 375F/190C.

Bake for 25 minutes until an instant read thermometer reads 140F/60C. (Note – If you do not have an instant read thermometer, the top of the cake will look similar to a brownie and a cake tester will appear wet.)

Cool cake on a rack for 10 minutes then unmold.

Friday, January 30, 2009

Daring Bakers January: Extra Credit

I was so inspired by the savory nori tuiles over at Cafe Nilson, that I immediately had to try a sweet version. I made the tuiles, using the same recipe in this post with a few tablespoons of black cocoa powder for color (King Arthur sells it). I filled them with rice pudding and used a piece of blood orange as "tuna" and some pomegranate seeds as "salmon roe".

Thursday, January 29, 2009

Daring Bakers January: Tuiles

This month's challenge is brought to us by Karen of Baking Soda and Zorra of 1x umruehren bitte aka Kochtopf. They have chosen Tuiles from The Chocolate Book by Angélique Schmeink and Nougatine and Chocolate Tuiles from Michel Roux.

So this is my first experience with Daring Bakers. I have been watching Daring Bakers posts pop up over the last few years and thought it was finally time to join the fray.

This month's challenge was to make tuiles from the provided recipe and pair them with something light. The recipe suggested that the tuiles could be decorated with a little batter that was colored with a "food coloring of my choice". So I pulled out some beet powder and made a pink batter to provide contrast. I prepared a leaf-shaped batch and a batch of "twirlies". I had never really attempted tuiles before, so this was a great kick in the pants to give them a try.

I paired the tuiles with a buttermilk panna cotta and pomegranate gelee. I made the gels in little 1/4 cup ramekins. I used some pomegranate seeds for garnish.

What is wonderful about tuiles is their lightness and delicacy. They taste of butter and sugar and that's about it. If you add a flavoring like vanilla or a fruit liqueur, it will be a major component of the cookie's flavor, so use good quality flavors.

Here's the tuile recipe I used for the challenge. It's taken from a book called “The Chocolate Book”, written by female Dutch Master chef Angélique Schmeinck.


Buttermilk Panna Cotta (from Claudia Fleming)
Makes about 6 full servings, a lot more if you are making layered desserts (for this challenge, I made a half recipe and ended up with 10 gels total)
  • 2 cups buttermilk
  • 1 1/2 teaspoons powdered gelatin (about half an envelope, but measure directly)
  • 2/3 cup heavy cream
  • 1/2 cup sugar
  • pinch salt
Measure out 1/2 cup of buttermilk. Sprinkle the gelatin over the buttermilk. When the gelatin is softening, heat the cream and sugar in a small saucepan. When the sugar is dissolved and the cream is hot, stir in the buttermilk/gelatin mixture. Stir over low heat until the gelatin is dissolved (not long, about 2-3 minutes).

Pour the hot mixture into the remaining 1 1/2 cups buttermilk. Stir to combine. Pour the panna cotta into molds or serving dishes. Put in refrigerator to set.

The panna cotta is ready to serve when it has set, about 2-3 hours. To unmold, if desired, dip the molds into warm water to loosen. Or run a thin-bladed knife around the edge of the mold to loosen and release the panna cotta.

Pomegranate Gelee
Makes 2-4 servings
  • 1 cup pomegranate juice
  • 2 teaspoons powdered gelatin
  • 2 - 4 tablespoons sugar (depending on how sweet your juice is)
Measure out 1/4 of juice, sprinkle it with gelatin. While the gelatin is softening, heat remaining juice with sugar. When sugar is dissolved, stir in the juice/gelatin mixture. Stir over low heat to melt the gelatin (about 2-3 minutes).

Pour into molds or serving dishes. Let rest in refrigerator to set, about 2-3 hours. To unmold, if desired, dip the molds into warm water to loosen. Or run a thin-bladed knife around the edge of the mold to loosen and release the gelatin.

Tuiles
About 10-20 cookies, depending on the size
  • 1/4 cup softened unsalted butter (make sure it is very soft, but not melty and greasy)
  • 1/2 cup sifted confectioner’s sugar
  • 1/8 teaspoon vanilla extract
  • pinch of salt
  • 2 large egg whites, whisked
  • 1/2 cup ounces sifted all purpose flour
  • 1 tablespoon cocoa powder/or food coloring of choice (I used beet powder)
Preheat the oven to 350.

Cream butter, sugar, salt and vanilla to a paste using a hand mixer. With the mixer on low, slowly add the egg whites. Make sure the mixture is homogeneous - no clumps of butter should be visible. Add the flour slowly until the batter is smooth. Take a large spoonful of batter, and in a separate bowl, blend in the food coloring you are using. Chill the batters, covered, for at least 30 minutes. You can make the batter a day or so ahead, just take it out of the fridge 30 minutes before you make the cookies.

To form the cookies you'll need a stencil (made out of a yogurt lid or some other stiff plastic) or you can pipe the dough directly onto the baking sheet. If you're using a stencil, just lay it on the baking sheet and use a spatula to spread the dough within the stencil. Lift the stencil, place it on an empty area on the sheet and repeat spreading the batter. You'll probably get about 6 cookies per sheet. Until you're used to forming the tuiles, only do one sheet at a time.

If you are using the piping method, you can just put the batter into a ziploc bag and squeeze strips of batter out on the baking sheet.

Decorate the tuiles with the colored batter. You can use a piping bag or a ziploc with a small hole cut in it.

Bake the tuiles in a preheated oven for about 5-10 minutes or until the edges turn golden brown. Lift the cookies off the baking sheet and gently curve them over a rolling pin of bottle to shape them. To make my twirlies, I wrapped the piped cookies around a spoon handle.
Blog Widget by LinkWithin