Tuesday, June 8, 2010

Use Your Booty: Kale Pesto

This week's CSA pickup included a smallish bunch of kale. I knew when it cooked down it wouldn't be enough for side dish on its own and I already had soup on the menu. So I thought a pesto would be nice thing to try. I found a few kale pesto recipes on the internet and most of them asked for the kale to be boiled for 10 minutes or so to soften and tame it. That seemed like overkill to me so I decided to just do a quick blanch with a boiling water rinse instead.
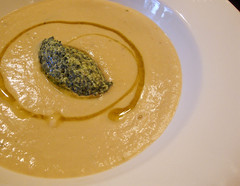
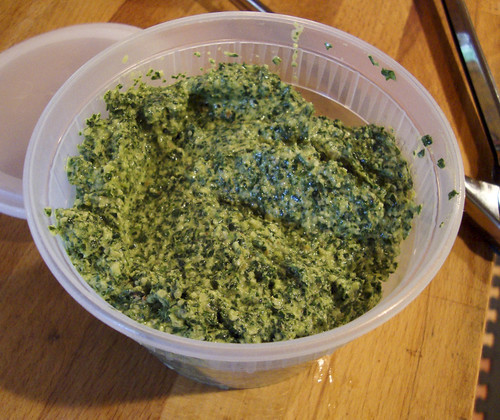
So, this picture above doesn't really really do this pesto justice. You can eat it on crostini, stir it into pasta (with a few spoonfuls of pasta cooking water) or a fritatta or use it as a sandwich spread or dip (thinned with some yogurt perhaps). Or you can use it in a totally swellegant presentation like that one, over there ---> and dazzle your friends and family.

Kale Pesto
Yields about 1 1/2 cups
You can use other nuts (I think pistachios would be great), but I liked the flavor of the walnuts against the kale. I didn't add any cheese to mine, but if you wanted to enrich this pesto with it, I would add a few tablespoons of grated pecorino romano.

This would probably work with collards too, but I wouldn't use chard or spinach - the leaves are too soft for this treatment.
  • 1 small bunch kale (to yield 4-6 cups loosely packed leaves)
  • 1 clove garlic
  • handful of walnuts (about 1/4 cup)
  • salt and pepper
  • red wine vinegar or lemon juice
  • olive oil
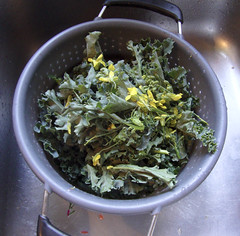
Strip the leaves from the kale stems and them in a colander or large strainer (if the leaves are large you can tear them into smaller pieces so they fit into the colander). Bring a quart of water to a boil. Pour the water over the kale leaves.
You'll see their color turn nice and bright and their volume will diminish a lot.

Press the kale to make sure it's not super soggy - a little moisture is okay. Put the kale into your food processor with the garlic and walnuts (leave out the cheese if you're using any). Pulse to form a paste - you might need to add a little water back in to keep things moving.

When the pesto looks nice and pesto-ish taste it and add salt, pepper and vinegar to taste. You can also add cheese now if you're using any. Give the pesto a glug of olive oil to enrich it a little. Pulse and taste again - the pesto will probably need more salt and acid than you might think.

This Summer, I am chronicling my first CSA (Community Supported Agriculture) experience. My CSA share is from Arrowhead Farm, a farm based in Newburyport, MA. Each week, I am posting about what was in my share and what I'm doing with it. By way of full disclosure, I won my share through a raffle and am not paying for it. However, Arrowhead did not know I was entered in the raffle, and I received no special consideration because of this blog.

Friday, June 4, 2010

CSA Booty - Week 3

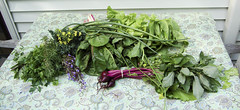
Week three's CSA share was:
  • 1 bunch of beets
  • 1 bunch of kale
  • 1 wee bunch o' onions
  • 2 heads of heads of lettuce: romaine and green leaf
  • 1 bunch of amaranth (woo hoo!)
  • 2 bunches of chard
  • 1 bunch of mustard greens
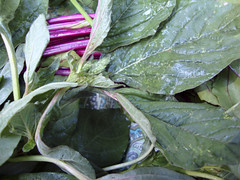
I am super-excited to see the amaranth. That's it over there <--- . If you're familiar with amaranth at all, it's probably the grain. The flowers of amaranth produce little, little, little seeds that can be cooked like quinoa: steamed is traditional. The greens can be eaten be raw but are best treated as a cooked green - think spinach. It's not a vegetable we ever see in supermarkets and rarely at farmers' market [in this neck of the woods anyway].

So here's what I think I'm doing with these items:
  • I'm going to use the amaranth on its own, in a simple sauté, to make sure we can appreciate the flavor of it.
  • I'm going to cook the chard leaves and beet greens with chickpeas and Indian spices. We'll eat it with rice and a fresh onion (from the wee bunch o') chutney.
  • The beets will be steamed and served with hard boiled eggs, olives, chunks of Mrs. Wheelbarrow's home-preserved tuna and lettuce in a Niçoise-esque salad
  • The mustard will be stir-fried with some smoky bacon, garlic and ginger and served with brown rice.
  • I'm going to make white bean and chard stem soup that will be topped with a kale & parsley pesto.
  • The lettuce wil be salads, yet again - still not tired of fresh salad.
So how'd I do with last week's haul? Here's what we ate (and what CSA items were used) last week:
This Summer, I am chronicling my first CSA (Community Supported Agriculture) experience. My CSA share is from Arrowhead Farm, a farm based in Newburyport, MA. Each week, I am posting about what was in my share and what I'm doing with it. By way of full disclosure, I won my share through a raffle and am not paying for it. However, Arrowhead did not know I was entered in the raffle, and I received no special consideration because of this blog.

Use Your Booty: Panzanella Verde


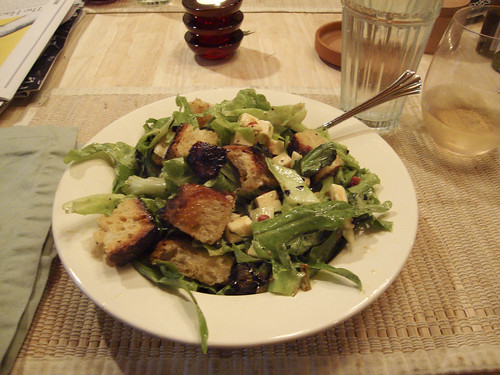
Panzanella means "little swamp". Most traditionally it's made with tomatoes and fresh mid-summer vegetables (like this one I made a few years ago), but it's nice to play with that tradition and use spring vegetables to make a green version.

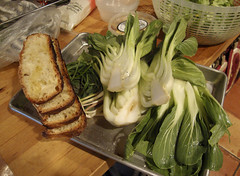
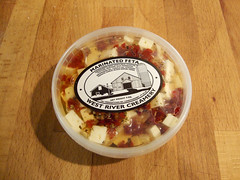
This time I used a large portion of lettuces, boy choy, baby shallots and marinated feta from West River Creamery. I made a lemon dressing (heavy on the mustard) and used some thick slices of no-knead bread.

Last Tuesday's Panzanella Verde
2-3 generous servings (two of us ate all of this in one sitting)
  • 3-4 thick slices of hearty bread
  • 2 heads bok choy, cut in half lengthwise
  • 1 bunch baby shallots or 1 bunch scallions
  • 4 cups torn lettuce leaves
  • 2 ounces cheese, cubed or shredded
  • handful of herbs: parsley, basil, thyme, chives, chive blossoms, etc.
  • 1/4 - 1/2 cup salad dressing of your choice
Heat the grill. Drizzle the bok choy, shallots and bread with a little olive oil. Grill the vegetables until they are charred and just starting to soften. Grill the bread on both sides until it is browned to your taste (I like mine pretty toasty).

Cut the shallots and bok choy into bite-sized pieces. Cut the bread in to large croutons. Toss the bread, vegetables, lettuce, herbs and cheese together. Drizzle with dressing and toss to combine. Use a generous amount of dressing - you want to moisten the bread cubes with it.

This Summer, I am chronicling my first CSA (Community Supported Agriculture) experience. My CSA share is from Arrowhead Farm, a farm based in Newburyport, MA. Each week, I am posting about what was in my share and what I'm doing with it. By way of full disclosure, I won my share through a raffle and am not paying for it. However, Arrowhead did not know I was entered in the raffle, and I received no special consideration because of this blog.
Use Your Booty: Cabbage-Chive Kimchi

I really have grown to love kimchi. For those not familiar with it: kimchi is a Korean fermented pickle of cabbage (usually napa cabbage), flavored with onion, garlic and CHILIES. Think of it as a spicy Korean sauerkraut. Out here in the hinterlands, it's close to impossible to find kimchi in any local market, so you've gotta make your own. Fortunately, kimchi is very easy to make and when I saw Chinese cabbage in my last CSA pickup I knew it was destined to become kimchi.

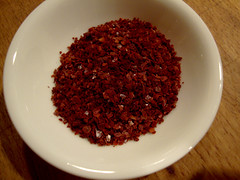
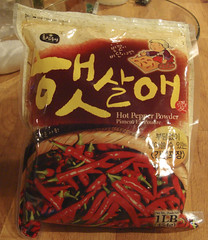
The only special ingredient you need for kimchi is Korean red pepper powder (gochugaru - you'll note that it's not technically a powder, it's more flaky).

You can find it in Korean markets like Hmart or order it online. It's not very expensive and a one-pound bag will last you through many batches of kimchi. If you can't find it Aleppo pepper makes a hotter, more expensive kimchi. Or use paprika for color and cayenne for heat (this is 100% non-traditional of course).

This is a basic recipe, based on the great recipe and How2Heroes video by Alex Lewin. I've modified it down to yield a smaller quantity and I used chives instead of scallions. Try different vegetables and feel free to adjust the heat level (this makes a moderately spicy kimchi) and the amount of garlic and ginger to match your taste.

Basic Kimchi
Yields about 1 pint
  • 1 pound Chinese cabbage
  • 1 cup water
  • 1/4 cup + 2 tablespoons kosher salt
  • 1 tennis ball-sized onion
  • 4 cloves garlic
  • 1" piece of ginger, peeled and roughly chopped
  • 1/4 cup Korean hot pepper powder
  • 2 teaspoons sugar
  • 1 bunch chives, cut into 1" pieces
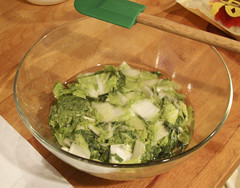
Cut the cabbage into strips and then bite-sized pieces. Dissolve the salt into the water and add the cabbage pieces. Let the cabbage rest in the brine for 4-8 hours (overnight is ok).
When the cabbage has finished brining (it will have lost most of its volume), drain the brine off, rinse the cabbage in cold water and squeeze it dry. Put the cabbage into a bowl while you make the pickling paste.

Puree the onion, garlic and ginger in a food processor, adding enough water to make a paste. Add in the sugar and pepper powder and puree. Scrape the paste out the processor and into the bowl with the cabbage. Add the chives. Stir the paste and the cabbage together until they are well combined. Pack firmly into a glass jar and cover loosely with a lid (the cabbage will start to ferment and you want the gases to be able to escape). Alternatively, use a plastic container and cover the surface of the kimchi with a piece of parchment or waxed paper.

Let the kimchi ferment on the counter for 12-24 hours. When it tastes right to you (I like about 16 hours of room-temperature fermentation), but the kimchi into the fridge. Keep it loosely covered as it will continue to ferment.

As the kimchi ages (over several weeks) it will get funkier and more sour. Use the "fresh" kimchi as a condiment on sandwiches or a side dish with grilled meats. The sourer product is great in soups and stirfries. I love using just a little kimchi, finely chopped, in cole slaws.

This Summer, I am chronicling my first CSA (Community Supported Agriculture) experience. My CSA share is from Arrowhead Farm, a farm based in Newburyport, MA. Each week, I am posting about what was in my share and what I'm doing with it. By way of full disclosure, I won my share through a raffle and am not paying for it. However, Arrowhead did not know I was entered in the raffle, and I received no special consideration because of this blog.
Thursday, June 3, 2010

Use Your Booty: Orzo with Arugula and Chive Blossoms

This is another non-recipe recipe, but that's the way market meals tend to go, isn't it?

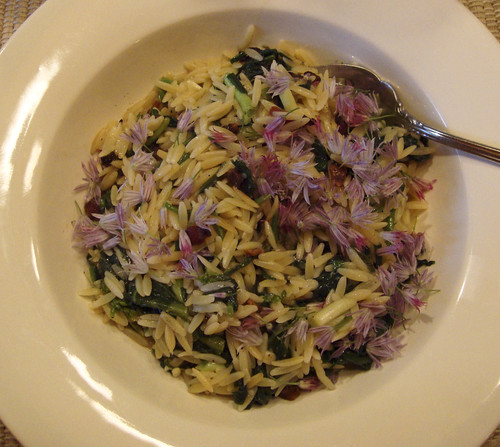
We ate this dish hot, like a pasta main course, but it would be pretty great at room temperature as a pasta salad too. Don't skimp on the chive blossoms: they're pretty and they taste great!

Orzo with Arugula and Chive Blossoms
Serves four as an entrée and six as a side dish
  • 1 pound orzo pasta (substitute another small pasta shape if you can't find orzo)
  • 2 bunches arugula, rabe, chard, mizuna, spinach (after the leaves are stripped off the stems you should have 6-8 cups of loosely packed leaves - I used some finely chopped Swiss chard stems too - those are the reddish bits you see)
  • a dozen chive blossoms (or 1/4 cup of mined chives)
  • 1/4 ounce parmesan cheese, finely grated
  • high quality extra virgin olive oil
Strip the greens leaves from their stems and then chop the leaves. In a large skillet over medium-high heat, sauté the greens in a little olive oil until they are wilted and softened - about 5 minutes or so. Turn off the heat.

Meanwhile, boil the pasta in plenty of salted water until it's cooked to your preferred doneness. before draining the pasta, reserve about a cup of cooking water.

In the skillet, combine the drained pasta, the parmesan cheese and enough pasta water to sauce things up. Stir in the chive blossoms and taste for salt and pepper. Drizzle some olive oil over the top of the pasta and serve.


This Summer, I am chronicling my first CSA (Community Supported Agriculture) experience. My CSA share is from Arrowhead Farm, a farm based in Newburyport, MA. Each week, I am posting about what was in my share and what I'm doing with it. By way of full disclosure, I won my share through a raffle and am not paying for it. However, Arrowhead did not know I was entered in the raffle, and I received no special consideration because of this blog.
Blog Widget by LinkWithin