Showing posts with label freezer. Show all posts

Monday, July 5, 2010

Fresh Fruit Galette

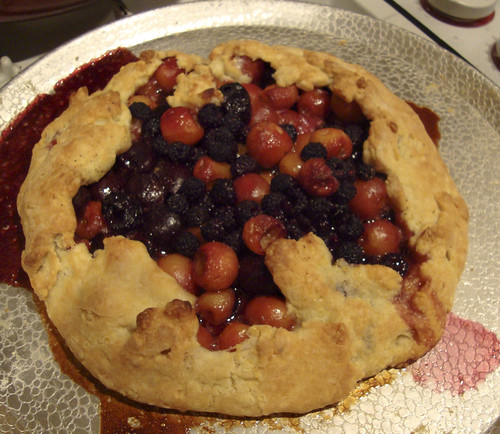
I do a ton of baking for my clients, but recently I feel like I'm been too busy to do any baking for us! Last night I wanted a tart for dessert and I had some gorgeous cherries from Arrowhead Family Farm and some black raspberries from our yard.

The crust in this recipe is a Flo Braker recipe from Baking With Julia. It's a great addition to your baking repertoire and works well in sweet and savory applications. Make sure you give yourself time to let the dough chill - I didn't and pushed it: the results were fine, but the dough was a lot more challenging to work with than it should have been.

Substitute any mixture of fresh fruit that you have on hand. You can layer the fruit daintily into the crust or just tumble it in like I did. If your fruit is super juicy, you can put a tablespoon or two of breadcrumbs or cookie crumbles into the crust before you add the fruit.

Fresh Fruit Galette
Serves 4-6
  • 1 recipe cornmeal galette dough (below)
  • 1 1/2 - 2 cups cut up fresh fruit - I used a mixture of yellow and red cherries and black raspberries
  • 1-3 tablespoons sugar (depending on the sweetness of your fruit)
  • 1 tablespoon butter
On a lightly floured surface, roll the galette dough into a 12" circle (it's okay if it's not a perfect circle, galettes can be "rustic"). Transfer the round of dough to a parchment-lined or non-stick baking sheet.

Stir the fruit and sugar together and spoon the fruit onto the center of the dough, leaving a 3-4" margin of dough. Dot the fruit with the butter.

Lift the dough up and over the fruit, forming a pleated edge (see the picture up there).

Bake for 20-30 minutes until fruit is juicy and the crust is nicely browned.

Cornmeal Galette Dough
From Flo Braker in Baking with Julia
  • 3 tablespoons yogurt or sour cream
  • 1/4 cup ice water
  • 1 cup flour
  • 1/4 cup cornmeal - I like a coarse-grind cornmeal, but you can use a finer grind if you don't want a crunchier crust
  • 1-2 teaspoons sugar
  • 1/2 teaspoon salt
  • 7 tablespoons butter, cut into 1/2" cubes
Whisk together the yogurt and water, set aside in the fridge so it stays cold.

Whisk the flour, cornmeal, sugar and salt together. Toss in the butter and cut the butter in (with your fingers, 2 knives, a pastry cutter or in the food processor - your choice) until you have a mixture that looks like like cornmeal with some pea-sized pieces in it.

With a rubber spatula, fold in the water/yogurt mixture. If the dough seems too dry, add more water, a tablespoon at a time until the dough holds together. Wrap in plastic and chill in the fridge for 2 hours or so at a minimum. The dough freezes really well, so make a double or triple batch and freeze the dough for later.

Thursday, January 21, 2010

Black Bean Soup with Savory Cream

Boy, do I like bean soups:
  • they're cheap to make
  • they're easy to make (once that pot's bubbling, you can head off to do whatever else you want
  • they're satisfying
  • they freeze exceptionally well, so you can always have a dinner on hand in the freezer
  • they taste better the day after they're made - perfect for a weekend cook day that results in a weeknight dinner
I didn't think I'd posted a black bean soup recipe before, but I did - almost three (!) years ago. This recipe is a little different from that one. To garnish, I'm using a savory whipped cream that I flavored with lime zest and cumin. It was a nice switch from sour cream and I usually have heavy cream on hand. The lovely ladies at food52 posted on this idea a few weeks ago. I recommend a visit to their site to learn about other savory whipped cream ideas.

Weekends are perfect for whipping up a batch of bean soup, so here are a few others to try:
Black Bean Soup
serves 4-6 - the soup doubles (or even quadruples!) really well
  • 1 onion, chopped
  • olive oil
  • 4 cloves of garlic, minced
  • 2 teaspoons freshly ground cumin
  • 1 pound black beans, picked over (sometime there's a stone or two in that bag) and rinsed until water runs clear
  • 1 cup diced tomatoes (optional)
  • juice of 1 lime
  • salt and pepper to taste
  • 1/4-1/2 cup heavy cream
  • zest of 1 lime
  • 1 teaspoon ground cumin
Saute onion over medium-high in a a little oil until softened. Add the garlic, cumin and a healthy sprinkle of salt. Stir and saute a few minutes until fragrant. Add black beans, tomatoes (if using) and cover with water by 1". Bring to a boil and then reduce heat to a simmer. Let soup simmer until beans are very soft. Depending on the age of the beans you're using, this could take anywhere from 1-3 hours. Stir the soup occasionally to make sure it's not sticking to the bottoom of the pot. Also, add water as needed, to keep things "soupy".

When the beans are cooked down the soup is pretty much done. Taste the soup for salt and pepper and adjust the seasoning as needed.

To garnish with the whipped cream: whip the heavy cream, lime zest and cumin with a whisk or electric mixer until it forms soft peaks.

Serve the soup topped with the cream - I sprinkled a little cilantro across our soup, but that's not required of course.

Wednesday, November 19, 2008

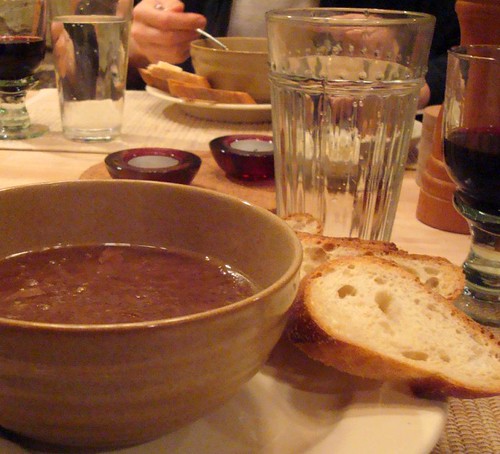
Onion Soup

According to a number of articles I have read lately, we're more and more interested in preparing cheap meals these days. I don't know about you, but one of the reasons I have always cooked for myself and my family is to save money (and to have more nutritious food and because I love to cook, etc. etc. etc.), so let's agree that most of us have been ahead of the cost-saving curve for a while.

One of the cheapest, most soul-satisfying soups I make is onion soup. Most of us are familiar with the spongy breaded, plastic-cheese encapsulated, super salty versions available at restaurants. It's quite easy to make your own version at home, yielding a much more delicious bowl of soup. I also think it's amazing that such a delicious dinner can come from such a short (and cheap) ingredient list.

Instead of crowning my soup with a slice of bread and melted cheese, I keep my garnishes on the side. I usually serve it with cheese toast (slices of toasted bread with some cheese melted on top) or slices of bread and cheese. This has the advantage of the diner getting to choose just how soaked they want their bread. Plus, since you aren't gently sliding soup bowls topped with molten cheese in and out of the oven, it is much easier to manage at dinner time.

This is a recipe, but a very loose one - substitute leeks, shallots, cipolline, and/or garlic for some of the onions. You can use sweet onions, Spanish onions, red onions, white onions ...

You can use broth or water and you can deglaze with wine, brandy or broth. Use soy sauce or Worcestershire sauce to boost flavor if needed. The only non-negotiable is the multiple deglazings. You want those onions to give up all of their flavor and deglazing 2 or 3 (or even 4) times is the way to make that happen. It takes a long time to cook the onions, but it's mostly hands-off and you can do other things while they're sizzling away. This soup tastes even better the next day so it's a great make-ahead.

Onion Soup
Serves 3-6, depending on serving size
  • 4 large onions, peeled (softball sized) - or substitute some shallots and/or leeks and/or garlic, half the vegetables should be onion
  • 1 cup red wine - or brandy or use broth
  • 1 quart chicken or beef broth - or use water
  • 2 cups water
  • optional: bay leaf, dried thyme
  • optional flavor boosters: soy sauce, Worcestershire sauce, Maggi, etc.
  • salt and pepper to taste
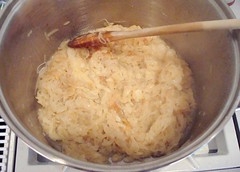
Cut the onions in half (or quarters if they are very large). Slice the onions very thin. Saute the onions over medium heat in a small stockpot or large saucepan. Cook the onions, stirring occasionally, until they are browned and very soft. This may take as long as an hour.

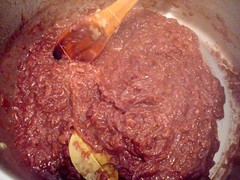
When the onions are browned and soft, turn the heat up and pour about 1/3 of the wine over the onion. Scrape up any browned bits. Simmer until all the wine is cooked off. Repeat the degalzing process 2 more times, each time cooking the wine off. Pour in the broth and water and add any dried herbs you want. Simmer the onion and broth together and taste for seasoning. If the flavor is flat (you'll know if it is - it should taste like something you want to eat) add soy or Worcestershire sauce, a few dashes at a time, until the flavor is better.

Adjust seasoning with salt and pepper. Serve with cheese toast if you like.

Tuesday, November 18, 2008

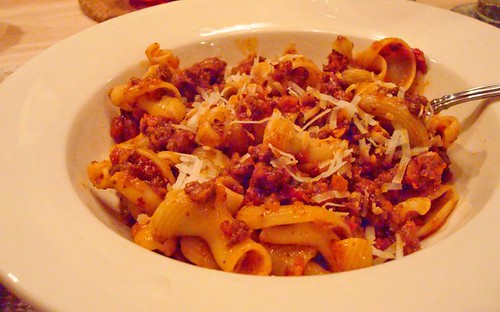
A Tale of Two Ragus

The "The Way We Eat" section of the New York Times' Sunday Magazine can be a hit or miss proposition for me. That's not say that I don't the stories aren't interesting or compelling. But often I find myself reading the article saying to myself "well I'll never make this ... interesting though." (The recent story on curried pork katsu being a prime example.)

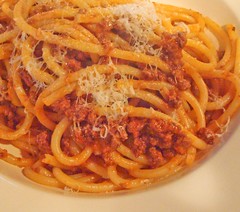
In February though, Christine Muhlke's story on ragus sent most of the foodie blogosphere, myself included, scurrying for their kitchens. I've now made two of the ragus (the beef and the lamb) in the story twice and encourage you to jump on the ragu-makin' wagon.

The benefits: These recipes yield sauces with incredible deep flavor and richness. Just a cupful or two makes for a decandent and satisfying pasta dish. They freeze *very* well so you can double or triple the recipe and stockpile these glorious sauces in your freezer.

The negatives: If you double the recipe (as I have), it takes a long time to make. The sauce should simmer for at least 3 hours to develop the full flavors and silky texture you want in a ragu. However, once you double the recipe, you should extend that simmer time to at least four hours, if not longer. But before you even get that far, everything needs to be browned, and reduced and browned again. That takes time, a lot of time. Use two frying pans to speed up the browning step, deglaze with the wine called for in the recipe, and then chuck everything into a big stockpot. Worth it though.

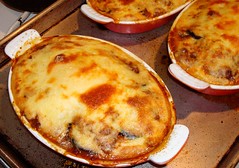
I have used these ragus to sauce homemade fresh pasta, artisan-quality dried pasta and regular old Barilla from a box. Each has resulted in a gorgeous meal. My finest moment was when I took lamb ragu, layered it between slices of roasted eggplant and then topped it with bechamel: a moussaka to please the gods (and since the sauce came from the freezer, it took about half and hour to pull together).

The link to the recipes is here. As the weather chills down and you start to shiver, go and try these sauces out, you won't be sorry.

Wednesday, October 29, 2008

Curried Cauliflower Soup

I developed this recipe this summer when the kitchen I was working in needed to use up a lot of extra cauliflower. Due to our clientele's dietary needs, it also needed to be low-fat and law-salt (and vegetarian).

Like most soups and stews, this soup tastes even better the next day. Since it contains no dairy (except as an optional garnish) or potatoes it also freezes really well.

Curried Cauliflower Soup
Serves 4-6
  • 2 tablespoons olive oil
  • 1 large onion, coarsely chopped
  • 1 or 2 carrots, coarsely chopped
  • 1 rib of celery, coarsely chopped
  • 3 cloves of garlic, peeled
  • 1 head of cauliflower
  • 1 tablespoon curry powder
  • 1/4 (or more) teaspoon cayenne pepper (optional)
  • 1 can (15 ounce) diced tomatoes
  • salt and and pepper to taste
Heat a large saucepan or stockpot over medium-high heat and add the oil and vegetables. Saute the vegetables until softened and brown. Add the curry powder and cayenne and saute for three more minutes.

Add the diced tomatoes and enough water to the pan to nearly cover the vegetables. Cover the pan and simmer until vegetables are soft. Puree the soup in a blender or with an immersion stick blender until the soup is smooth. Season with salt and pepper to taste.

Serve hot, garnished with chopped cilantro, a drizzle of cream, and/or a wedge of lime.

Tuesday, November 6, 2007

Gingersnappy Snack

I made the gingersnaps from David Lebovitz's website on Sunday. They are quite delicious (although I think my ginger was a little old - so they aren't quite hot enough. Sounds like it's time for a trip to Penzeys!)

This is a "slice and bake" cookie recipe, which means you don't need to make all the cookies at once. Perfect for the holidays.

Go to David's site for the recipe. You won't be disappointed.

Monday, April 23, 2007

Salted Butter Caramel Ice Cream

Holy crap. Wow. This is good ice cream. I am serious. Do yourself a favor and make a batch, like now. I mean it.

Find the recipe here on David Lebovitz's blog.

We absolutely inhaled our bowls of this ice cream. It's sweet, but not too sweet; salty, but not too salty. The depth of the flavor is incredible - due to the caramelized sugar, there's a richness in the flavor that you just can't get any other way. The praline mix-in is super easy and a very nice addition to the ice cream.

In the picture, the ice cream looks sort of melty. I do think the batch needed another few hours in the freezer to freeze up and ripen, but we couldn't wait. Chef David points out that due to the high-hat, high-sugar levels in this recipe, it will alway stay sort of soft and gelato-y. I don't see how that is a problem ... at all.

Happy Spring!

Thursday, March 22, 2007

Turkey Burgers

Thank you Andrea & Mike. This recipe was a referral from them and worked out very nicely. It's based on a MSL Everyday recipe. Find the original recipe here. We had our burgers on onion rolls from the deli.

We ate them with oven roasted potatoes, chopped fennel and cherry. We had fresh spinach, ketchup and lowfat mayonnaise on the burgers.

Turkey Burgers
  • 2 slices whole wheat bread, cut or torn into small pieces
  • 1.25 pounds lean ground turkey (7% fat) (my market only sells turkey in 1.25 pound packages - the original recipe calls for 1 pound of turkey)
  • 1/2 cup reduced-fat sour cream
  • 2-3 tablespoons of your mom's green tomato chutney, if you don't have any of that use prepared mango chutney, finely chopped
  • 1 tablespoon Dijon mustard
  • 1 tablespoon chili powder
  • 1 teaspoon salt
In a medium bowl, with your hands or a spoon, blend the burger ingredients together. Shape into 4 firmly packed patties. Make sure they aren't too thick, or they will be hard to cook.

Freeze on a baking sheet until firm, about 30 minutes, then wrap each burger in plastic; place all burgers in a resealable freezer bag, label, and date. Freeze up to 2 months.

To cook: Thaw burgers overnight in the refrigerator. Heat broiler with rack set 4 inches from heat. Place burgers on a rimmed baking sheet; broil until firm and cooked through, 4 to 5 minutes per side.

Serve on a toasted roll with all the burger fixings.

Tuesday, March 20, 2007

Macaroni and Cheese That Might Not Kill You

Let's get one thing straight. There is no way that eating a half-pound of cheese for dinner can be called healthy. However, if you sneak some cauliflower in there, you increase the fiber and add some vegetables to what is normally a pretty decadent meal.

The trick is to cut your cauliflower into cooked pasta-sized pieces, then it hides among the pasta, stealthily adding nutrients to your dinner. Really, you don't notice it unless it gets pointed out to you. I have successfully served this to avowed no-vegetable-eaters.

I make a double batch and freeze half of it, unbaked, in single-serve portions.

Stealthy-Healthy Macaroni & Cheese
  • 1/2 a head of cauliflower, cut into small florets (see below - if you just want to make regular mac and cheese, leave out the cauliflower and use a pound of pasta)
  • 1/2 pound macaroni, gemelli, cavatappi, fiore, etc.
  • salt
  • 4 tablespoons butter
  • 1/4 cup all-purpose flour
  • 4 cups milk (I use 2 cups 1% and 2 cups whole milk)
  • 1/8 teaspoon cayenne pepper
  • 1/8 teaspoon ground nutmeg
  • 3 cups shredded (12 ounces) sharp white cheddar cheese
  • 1 cup finely grated (2 ounces) Parmesan cheese
  • 1 cup panko (Japanese breadcrumbs, coarse dry breadcrumbs work too)
Put a large pot of salted water on to boil. When boiling, add the cauliflower and cook until just tender (about 3-5 minutes). To save yourself from having to boil a big pot of water again: scoop the cauliflower out into a colander and bring the water back to a boil again. Drop in the pasta and cook 1 to 2 minutes less than package instructions (you want it extra al dente). Drain, rinse with cool water, and return to pot with the cauliflower.

Make the cheese sauce. Depending on your confidence in the kitchen, do this while the water is boiling and the pasta cooking, or wait until the pasta's done so you don't get distracted.
Melt the butter in a medium saucepan over medium-high heat. Add flour; cook, whisking, 1 minute. Add milk, cayenne, nutmeg, and 2 teaspoons salt; bring to a simmer. Cook, whisking occasionally, until mixture is thick enough to coat the back of a spoon, 2 to 3 minutes. Whisk in cheeses until smooth. You have just made cheese sauce. Taste for salt and adjust if needed.

Pour the sauce over pasta and cauliflower and toss to coat - it will be saucy (I like a "wet" mac and cheese). Spoon the pasta into a large baking dish (9" x 13") or four smaller dishes. Sprinkle the panko over the pasta.

To bake: If refrigerated: Bake at 375 degrees for 30 minutes covered with foil, and another 15 minutes uncovered (for a large dish, smaller dishes will take less time). If frozen: Bake at 350 degrees for 45-60 minutes covered with foil, and another 15 minutes uncovered (for a large dish, smaller dishes will take less time). I usually defrost a frozen one overnight.

Prepping your cauliflower:
Make sure you cut your cauliflower into florets about the same size as your cooked pasta will be (otherwise, it won't be stealthy. If you care not for subterfuge, bigger pieces are fine).

Tuesday, March 13, 2007

Chili Night

This was a new recipe for me - I made a double batch - and boy am I glad I did. This chili was deeee-licious. This recipe is based on one I found in Gourmet a long time ago called Spicy Princeton Junction Chili (it's not on epicurious.com).

The recipe below is for a single batch, but I recommend doubling it and putting some away in the freezer for later.


Beef and Pork Chipotle Chili
  • 1 large onion, chopped
  • 3 cloves garlic, minced
  • 3 tablespoons chili powder (I used Penzey's medium chili powder)
  • 2 chipotle chilies in adobo, chopped
  • 1 teaspoon dried oregano
  • 1 pound ground beef
  • 1 pound ground pork
  • 2 ounces bittersweet chocolate
  • 28 ounce can crushed tomatoes (I used Progresso)
  • 3 cups beef broth
  • 3 cups cooked kidney beans (for those of you trying to cook dry beans at home - 1/2 pound of kidney beans are perfect, for those of you not cooking them from scratch: 3 large cans of cooked beans, rinsed, will work fine)

In a large skillet, saute the onions and garlic over medium-high heat until translucent (about 10 minutes), then add the chili powder, chipotles and oregano and saute for another minute. Put the onions into a large dutch oven or stockpot.

Brown the pork and beef, breaking it into small pieces as it cooks (depending on the size of your skillet, you may need to do this in two batches - you will have to do this in two batches if you double the recipe). Drain any fat off the meat and add it to the onions in the dutch oven.

Add the chocolate, tomatoes and broth to the pot. Bring the chili to a simmer and let it simmer for about 1 hour. Add the beans to the pot and simmer another 30 minutes.

Adjust salt to taste. The beef broth is salty, so you may need less salt than you need. If you use canned beans, they will be salty as well, so take heed not to overdo the salt.

Garnish with grated cheese, chopped olives, sliced scallions, salsa, etc. Serve alongside with corn chips or corn bread.

Wednesday, March 7, 2007

Navy Bean Soup

In addition to being on a casserole kick, I am also on a bean soup jag. Again, I cite the cold and the related need for coziness as my defense. The fortunate thing is this: there is no shame in loving a good bean soup.

First though: In talking to friends, I have discovered that there are people out there who fear dried beans (eek!). So, this weekend, I'll be posting a leguminous dissertation about beans and bean cookery. Stay tuned ...

Tonight's soup recipe is below, do not be skeptical of the limited ingredient list, and the secret ingredient.

Navy Bean Soup
  • 1 pound navy beans (these are small white beans, not to be confused with cannellini which are large white beans)
  • 1 tablespoon olive oil
  • 1 onion, chopped
  • 1/2 pound ham, chopped (I get thick sliced ham at the deli counter and cube it)
  • 1/4 - 1/2 cup ketchup, to taste
  • salt and pepper

Pick over and rinse the beans. Put them in a bowl and cover them with water. In a large soup pot, saute the onion in a little olive oil until soft and translucent, about 5-10 minutes, depending on the size of your chop.

Drain the beans and add them to the soup pot with the onions. Cover the beans with water (you want the water to be about 1" above the beans) and bring to a boil. Add salt (2 - 3 teaspoons). When the water is boiling, turn down the heat and simmer the beans until soft and smooshy, adding more water as needed (you don't want them falling apart, but they should be the opposite of al dente: gently yielding). Depending on the age of your beans, this could take anywhere from 45 minutes to 2 hours. Add the ham after the beans have started simmering.

When the beans are done, take your trusty potato masher and mash some of the soup up so it becomes creamy. Add more water if everything is too think.

Squirt in the ketchup. Start with 1/4 cup and see what it tastes like to you: you should taste a little tomato, but what you should find is that the ketchup brings the "beaniness" together with the onion and the ham. Add more ketchup if you'd like (remember this is not tomato soup ... unless you want it to be). Adjust salt to taste and grind in lots of pepper.

Makes 4-5 servings. I usually make a double batch of bean soups - so easy to freeze.

Wednesday, February 28, 2007

Black Bean Soup

This is a great, easy, make-ahead soup. You can freeze it or refrigerate it - it holds really well. You can make it vegetarian if you like or add ham or bacon for extra richness.

Depending on your mood and supplies, garnishes can include sour cream, grated cheese, pickled
jalapenos, sliced scallions, chopped cilantro, chopped hard boiled egg, salsa and lime. Serve it with cornbread, corn tortillas, or tortilla chips and some sliced cucumber as a salad.

Black Bean Soup

  • 1 pound dried black beans, pick over them and check for any badly broken beans, chunks of dirt or pebbles
  • 1 large onion, chopped medium
  • 3 cloves garlic, chopped fine or put through a garlic press
  • 2 chipotle peppers in adobo (these come in a can, pick out what you need and freeze the rest), chopped
  • 1-2 tablespoons chili powder, maybe more
  • 1 cup of choppd tomatoes or tomato sauce (optional)
  • salt

Rinse the black beans - they may be dusty - rinse them until the water isn't dusty and runs clear (could be 1 rinse or 5, depending on your beans). Set aside.

In a large dutch oven or soup pot, saute the onion and garlic in a little oil until soft. When softened, add the chipotle chiles and chili powder. Saute a few more minutes. Add the black beans to the pot. Add salt (about 1 tablespoon). Cover the beans with water and bring to a boil.

Turn the heat down and simmer the soup for 1-2 hours - the beans will be soft. When needed, add more water, the beans should stay covered with water. If you like a little tomato in your soup, add them about 45 minutes into cooking (I like tomato in my soup. I don't think it makes the soup tomatoey, but it adds a layer of flavor that really enhances the black beans.)

When the beans are cooked through, use a potato masher or immersion blender to puree some of the soup - this will make the soup creamier. If you want a very smooth soup, puree the soup in a blender. You may need to add more water to make your soup "soupier". If the taste is too bland, add more chili powder to taste.

Makes 4-5 servings

If you don't need to go vegetarian, you can:

Chop some bacon, fry it up and saute your onion and garlic in the bacon fat (adding the cooked bacon into the soup pot), or add a smoked ham hock to the beans as they start to cook, or add chopped ham to the beans after they've been cooking for about 45 minutes.

Monday, February 5, 2007

Indian Style Red Lentil Soup

This is an easy soup made with red lentils. It has a very southern Indian influence, but should not be considered authentic unless someone tells me otherwise.

This is the basic recipe, feel free to adjust or add spices (depending on my mood and the spices and time at hand, I will use whole or ground spices), the amount of broth (to make it thicker or soupier), etc. This makes about 11 cups of soup: enough for 4 large or 6 or more smaller portions (you can make half the recipe, but then you need to decide what to do with the half can of coconut milk). It freezes well.

Red Lentil Soup

  • 2 medium onions, chopped medium fine
  • 4 cloves garlic, pressed
  • 2 teaspoons mustard seeds
  • 2 teaspoons cumin seeds (or 1 teaspoon ground cumin)
  • 2 teaspoons coriander seeds
  • 1/2 teaspoon turmeric
  • 1 teaspoon ground pepper
  • pinch cayenne (to taste or fresh chilies, I used green Thai chilies in this batch)
  • 2 cups red lentils
  • 1 can coconut milk (light coconut milk is fine)
  • 2 Tablespoons tomato paste (or 1/4 cup tomato sauce, or some chopped tomatoes - fresh or canned)
  • 2 quarts-ish chicken broth or vegetable stock, or a blend of broth and water
  • 1 lime

Saute the onions until softened and starting to brown. Add the garlic and saute one more minute. Add spices and saute one minute.

Add lentils, coconut milk and 1 1/2 quarts broth. Simmer soup 30 - 45 minutes, adding more broth for a soupier consistency as desired. It's done when the red lentils have dissolved into the soup and they do not feel grainy or sandy when you try some.

Squeeze the lime's juice into the soup. Taste and correct seasoning with salt and pepper.

To serve: Top with a dollop of yogurt and chopped cilantro.

Monday, January 29, 2007

Polenta Lasagna

Okay - this is more of a method than a recipe. The basic idea is to layer polenta and yummy fillings (this week I used: sausage, pepperoni, mushrooms, red peppers, and green garbanzo beans - goodness!) to make a lasagna-like casserole. The trick is to have enough interesting flavors and textures. The basic method is this:


Polenta Lasagna (for one 9"x9" pan - enough for 4 generous servings)

  • 1 batch polenta - made with 1 cup polenta meal and 6 cups liquid - see below
  • 3 cups of fillings (this can be a varied of things, enough to make 3 cups total): cooked sausage, pepperoni, chopped or sliced salami or ham, sauteed mushrooms, roasted red peppers, caramelized onions, chopped black olives, cooked and chopped spinach or other green, cooked vegetables, diced tomatoes, leftover pasta sauce, etc. etc. etc. You get the point? Raid the fridge.
  • 1/2 - 1 cup shredded or grated cheese (the richer your other ingredients, the less cheese you'll want/need)

Layer about 1/3 of the polenta in the bottom of a 9"x9" (or similarly sized) baking dish. Layer half of your ingredients over the polenta, sprinkle about a third of your cheese over the filling. Put on one more layer of polenta, vegetables and cheese. Top with a final layer of polenta and cheese.

Cover and refrigerate until ready. When ready to bake: bake covered with foil at 375 for 25 minutes, uncover and bake another 20 minutes or until bubbly. That is it.

Easy Oven Polenta

This is a method from Paula Wolfert that I read about in Fine Cooking magazine. Dunno why everyone doesn't make their polenta this way.

  • 1 cup polenta meal
  • 4-6 cups liquid: water and/or broth (The more liquid, the looser the polenta. Use the 4 cup amount for a stiffer polenta - the kind you'd grill or fry. Use 6 cups for a pourable polenta - better for a base for a ragu, or for this lasagna.)
  • 2 tablespoons olive oil
  • salt and pepper to taste

Set the oven to 350. Put all the ingredients in a baking dish large enough to hold them (I use a roasting pan) and stir everything together. Gently (this will be splashy) put the pan in the oven. Every 10 minutes or so, reach in and stir what's the pan around to make sure nothing is sticking and everything is coming together well. (Be careful, this is sloshy stuff and nothing burns like a splash of polenta on your arm.) After about half an hour, it should look like polenta: creamy, smooth, not lumpy. If it's too stiff, you could gently work in more water or broth to loosen it up.


Season to taste with salt and pepper. You can add grated cheese now if you want. I have also used bottled pesto or roasted red pepper spread to add a different flavor. If you want to mold it to cut into slices to grill or fry, pour it into a loaf pan and let it sit until cool (a day or two ahead is great). If you want to use it in the polenta lasagna, go ahead and layer!

Sunday, January 28, 2007

Lentil Soup

The full recipe makes enough for 4 good sized servings (2+ cups each), plus 3+ more servings for the freezer. Your yield will depend on how much soup you need for a meal. For those without freezer space I put the amounts for a half portion in parentheses.

This recipe is lifted liberally from the Cook’s Illustrated version found in their January 2004 issue.


Lentil Soup

  • 6 (3) slices bacon, cut into smallish pieces (easiest if you use a pair of kitchen scissors to do this

  • 2 (1) large onions , chopped small

  • 4 (2) carrots , peeled and chopped medium

  • 6 (3) cloves garlic, minced or pressed through garlic press

  • 2 (1) cans (14 1/2 ounces) diced tomatoes , drained (I have also used one 28 oz. can of whole tomatoes, drained and chopped)

  • 1 bay leaf

  • 2 (1) teaspoon minced fresh thyme leaves (or a healthy pinch of dried thyme)

  • 2 (1) cups lentilles duy Puy (rinse them and make sure there are no stones or other inedible bits) – see below for more on this kind of lentil

  • 2 (1) teaspoons table salt

  • ground black pepper to taste

  • 1 (1/2) cup dry white wine

  • 8 (4) cups low-sodium chicken broth (one brick pack of broth = 4 cups)

  • 4 (2) cups water

  • 3 (1 ½) teaspoons balsamic vinegar

  • handful of parsley leaves, chopped fine

Fry bacon in large stockpot or Dutch oven over medium-high heat, stirring occasionally, until fat is rendered and bacon is crisp, 5ish minutes. Add onion and carrots; cook, stirring occasionally, until vegetables begin to soften, about another 5 minutes. Add garlic and cook another minute. Stir in tomatoes, bay leaf, and thyme; cook 1 minute.

Stir in lentils, salt, and pepper to taste; cover (this is important to do), reduce heat to medium-low, and cook until vegetables are softened and lentils have darkened, 8 to 10 minutes.

Uncover, increase heat to high, add wine, and bring to simmer. Add chicken broth and water; bring to boil, cover partially, and reduce heat to low. Simmer until lentils are tender but still hold their shape, 30 to 35 minutes; discard bay leaf.

Use an immersion blender or potato masher to mash up the soup a little. You want it to get a little creamy. (the original told you to "puree 3 cups soup in blender until smooth, then return to pot" if you only have a blender and want the creamier texture, you should do this step. If you don't mind a brothy soup, don't worry about it). Stir in vinegar and heat soup over medium-low until hot, about 5 minutes. Stir in 2 tablespoons parsley and serve, garnishing each bowl with some of remaining parsley.

Lentilles du Puy are small French lentils. You can get them in some supermarkets, Whole Foods, Trader Joe's and another speciality food stores. Get them, they are worth it. You can also find them at igourmet.com.
Blog Widget by LinkWithin