Friday, August 27, 2010

The Porchetta Project

Porchetta - Carved Up
I have been dreaming of porchetta lately: a big roast of pork, redolent of rosemary and garlic and wrapped in crispy, crackly pork skin. This is a dish that's easy to get if you live in Italy, or near the eponymous shop in NYC, but up in my neck of the woods, not so much.

So what's a girl to do but take this porky problem into her own hands? Technically I needed what's called a "long middle" (a pork loin with the belly still attached), but my favorite pork supplier Tim Rocha at Kellie Brook Farm let me know that might be a tough cut for him to get. So, I decided to cobble together Frankenpig from a loin, some fatback and a skin-on belly.

Porchetta - 1st layer - belly with rub
I made a rub of rosemary, garlic, black pepper and salt to use for seasoning the roast and got to work assembling the beast: I laid the belly out and rubbed it liberally with half of the seasoning. I laid the loin over it and rubbed on the other half of the seasoning. I took the fatback (I did trim it down as it was really thick, so it ended up with a piece that was about 1/3 inch thick ) and laid it over the top.

Porchetta - ready to roast
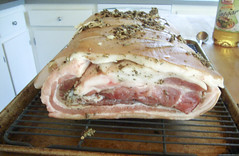
I then did a ridiculously poor job of trussing this amalgam into a cylinder. I put it onto a rack on a sheet pan and left it in the fridge for for a day, to let the rub's herbiness perfume the meat.

Since the roast was so thick (almost 10 inches) I took it out of the fridge an hour before I started roasting it. I followed the basic instructions that Molly Stevens used in her
porchetta project. Porchetta - first 30 minutes
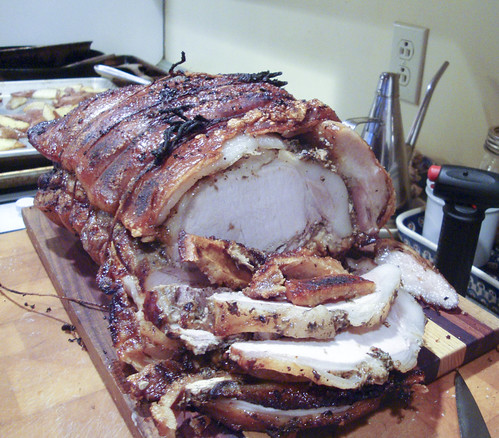
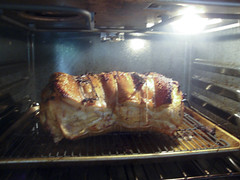
I put the roast into a 475-degree oven on a roasting rack on a sheet pan and let it crackle away for 30 minutes (this will create A LOT of smoke; turn off the smoke detectors first). Then the oven went down to 325-degrees and the porchetta roasted away for another 3 hours.

I popped into the oven every now and then and basted the skin with the fat that was accumulating in the pan. I also siphoned off a lot of this fat as it rendered. This was a necessary chore as a lot of fat rendered off: nearly 2 cups.

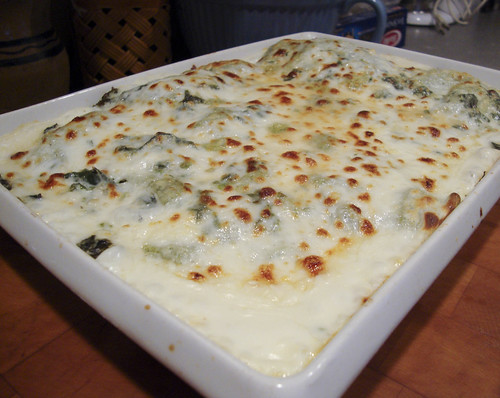
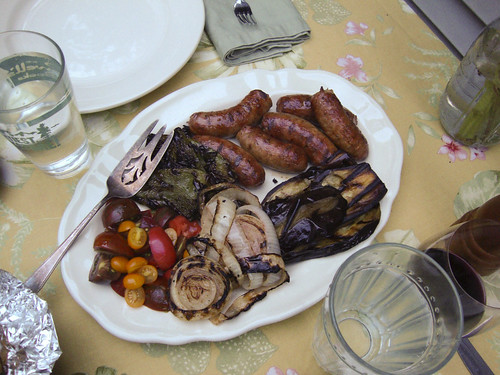
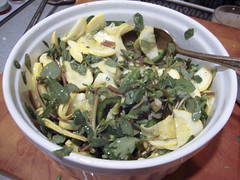
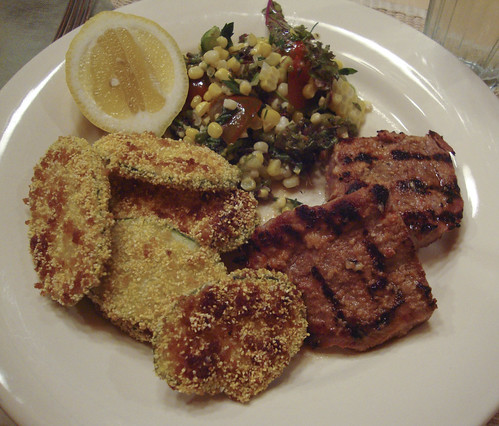
While this wasn't my perfect porchetta: it was a little too fatty, the loin on the ends was a little dry and the skin wasn't crispy all the way around. But, holy moly, it was a delicious. The skin that was crisped up was super crunchy and toothsome. The rosemary and garlic flavor permeated the meat and made for a great flavor. While the roast was resting, I roasted potatoes on a sheet pan with some of the rendered fat. We enjoyed our porchetta and potatoes with a fennel salad.

Porchetta Sandwich
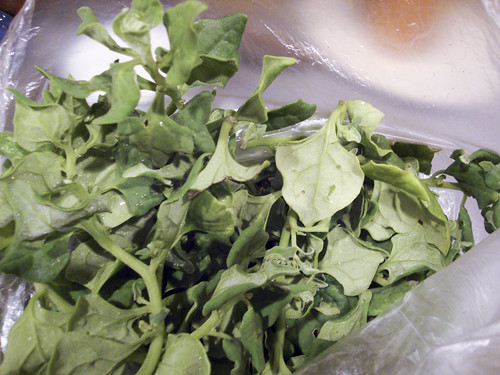
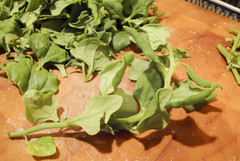
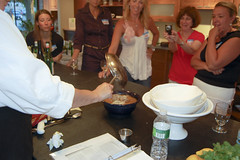
Two days later, we had an amazing sandwiches of gently-warmed porchetta, tomatoes and Swiss chard salad for dinner. Nom nom.

Changes for next time:
  • Remember to score the skin before you truss the roast - very very hard to score skin without cutting through the trussing twine.
  • Don't put the rub on the outside of the roast. I did and it started scorching up right off the bat.
  • Trim back a little more fat from the roast: a had a double layer of fat on the top (the loin fat against the back fat was too thick a layer).
  • Roll the roast during the skin-crisping stage to make sure that all the skin gets exposed to the heat.

Monday, August 16, 2010

Use Your Booty: Grilled Sausage Sub Platter

Grilled Sausage Dinner
Yesterday I asked Dave what he wanted for dinner and he sheepishly asked for sausage and pepper subs. I'm not a huge fan of this type of sandwich (and he knows it): the roll is always too big and fluffy, overshadowing the filling; the filling needs to be inserted perfectly, otherwise everything slithers out the back end when you take a bite; and frankly, I like to eat with a knife and fork most of the time.

So this was a great compromise: we took the traditional insides threw them all on the grill and served it all on a platter with fresh tomatoes, olive focaccia and some spicy kale (not in the picture) on the side.

I made garlic oil and brushed it on the peppers, onions and eggplant prior to grilling. I'll admit the eggplant is not traditional, but I love grilled eggplant and it stretched the sausage so we had enough left over for another meal. The peppers and kale came from my CSA and the eggplant from the farmstand down the road. The tomatoes were a gift from the lovely ladies at The Herb Farmacy (a fellow farmer's market vendor).

A note about the sausage: This sausage was INCREDIBLE. I got it from Tim Rocha at Kellie Brook Farm. His booth is two over from mine at the farmers' market, so I was able to do some shopping in between customers. I bought a pound each of his hot Italian and chorizo sausages. Last night we grilled the hot Italian sausage. It was everything you want sausage to be: fatty enough so it didn't try out on the grill (even though we had a fiery flareup or two), good seasoning (not too salty, just enough heat), and deep porky flavor. Seriously, we sat at the table, chewing the meat and saying over and over how good it was.

Tim raises Berkshire hogs and the flavor is just great: rich and porky with just enough fat (although it is a leaner breed than some other heritage breeds). In addition to Newburyport, MA, Tim also sells his meat (pork, chicken, veal) at markets in Portsmouth, Exeter and Hampton, NH.

This Summer, I am chronicling my first CSA (Community Supported Agriculture) experience. My CSA share is from Arrowhead Farm, a farm based in Newburyport, MA. Each week, I am posting about what was in my share and what I'm doing with it. By way of full disclosure, I won my share through a raffle and am not paying for it. However, Arrowhead did not know I was entered in the raffle, and I received no special consideration because of this blog. I paid for my livestock share. A full set of all the photos I've taken of this share is here.

Use Your Booty: Quick Pasta Dinner

Linguine with Tomato, Chard and Crispy Crumbs

What can I say? I'm a sucker for an egg and some crispy crumbs. If you've been reading this summer's posts, this dish may look a little familiar, but it's a nice go-to for when you don't know what's going on the dinner table. I boil some pasta, make a quick sauce of sautéed vegetables and top the plate with a poached or fried egg and some crispy bits. The crispy crumbs add a nice textural contrast to the plate.

This plate was: linguine and a sauce of bacon, chunks of plum tomato, and shreds of Swiss chard and onion. I drained the pasta (I lifted it out of the pot with tongs), and added it right to the skillet containing the sauce. Then I poached the eggs right in the pasta pot. In the meantime, the crumbs were toasting in the toaster oven with a little olive oil.

Dinner in about 15 minutes!


This Summer, I am chronicling my first CSA (Community Supported Agriculture) experience. My CSA share is from Arrowhead Farm, a farm based in Newburyport, MA. Each week, I am posting about what was in my share and what I'm doing with it. By way of full disclosure, I won my share through a raffle and am not paying for it. However, Arrowhead did not know I was entered in the raffle, and I received no special consideration because of this blog. I paid for my livestock share. A full set of all the photos I've taken of this share is here.

Saturday, August 14, 2010

Ladies and Gentlemen, May I Introduce: Purslane!

When I stopped by to make my CSA pickup on Friday, I got an added treat: Purslane! Purslane has always been eaten in Mediterranean and Middle Eastern countries and has recently become a greenmarket darling. The nice thing for you and me is that purslane is also a weed. If your farmer doesn't spray his crops, ask if you can pick some purslane - as it's seen as a weed, he'll likely be thrilled to have you do it. Heck, if you have a yard, you've probably got some growing around the margins - purslane likes slightly bare, sandy soil.

When you get your purslane home store it, wrapped in a dishtowel, in a plastic bag. Before eating it, wash it well. Purslane grows really close to the ground so it can be super-sandy. If the stems are thin and not too fibrous (they should snap easily - like a fresh green bean) you can use them. If the stems are tough or stringy, strip the leaves from the stems and just use them.

Purslane, Squash and Jalapeno Salad
I like using purslane fresh in salads like this one here. It's a succulent leaf that holds up well to citrusy dressing and chunky partners like this summer squash. I chopped my bunch of purslane into 1/2" lengths and tossed it with sliced summer squash, chopped jalapeno and a lemon dressing.

In addition to using it fresh, you can quickly sauté the stems and leaves with garlic and chili. I have also pickled purslane stems and they're a great addition to a sandwich (use a dilly bean recipe).

This Summer, I am chronicling my first CSA (Community Supported Agriculture) experience. My CSA share is from Arrowhead Farm, a farm based in Newburyport, MA. Each week, I am posting about what was in my share and what I'm doing with it. By way of full disclosure, I won my share through a raffle and am not paying for it. However, Arrowhead did not know I was entered in the raffle, and I received no special consideration because of this blog. I paid for my livestock share. A full set of all the photos I've taken of this share is here.

Grilled Goat Striploin

Last Sunday, the farmers' market was hopping! So much so, that I sold out of all of my baked goods with 30 minutes left to go before the closing bell. I took the opportunity to do a little shopping.

Riverslea Farm sells lamb and goat meat as well as wool products. I picked up two pieces of what they called goat "strips". After looking at the meat I figured out, I think, that this was the same cut as tenderloin: the muscle fibers ran the long way along the meat and the cut was shrouded in silverskin, line a tenderloin.

I trimmed the silverskin from the meat and then rubbed the meat with a spice paste made from:
  • 3 cloves garlic
  • 15 fenugreek seeds, toasted and ground
  • 1/4 tsp cayenne pepper
  • 1 tablespoon red wine vinegar
  • 1/2 teaspoon salt
We let the paste flavor the meat while the grill heated. We grilled the meat for about 4 minutes a side and dinner was done.

I made sure we cut the meat across the grain and it was wonderfully tender. Surprisingly, the flavor of the meat wasn't as strong as I expected it to be. I'm not sure if that was a function of the cut, the age of the goat at slaughter, or both.

CSA Booty - Week 13

Be sure to check out Use Your Booty: Show Your CSA Box Who's Boss for ideas about how to manage your CSA vegetables.

In this week's share I picked up:
  • 6 ears of corn
  • 2 pattypan squash, 2 yellow squash
  • 1 head of cabbage
  • Cherry and plum tomatoes
  • 4 Anaheim chile peppers
  • 1 bunch of broccoli
  • A whole pile of kale - picked my own!
  • 1 bunch of Swiss chard
  • A bunch of basil
  • A whole mess of purslane (more to come on this!)
So here's what I think I'm doing with these items:
  • I think I'm going to make a pudding with the corn.
  • The cabbage is going most likely become another slaw, maybe with the broccoli.
  • The plum tomatoes will get roasted and eaten either on pasta or perhaps on bruschetta.
  • I have two avocados ripening on the counter, so I'll like make chile rellenos with the peppers and spiced greens with some of the kale.
  • The cherry tomatoes have already gone into tomato pie.
So how'd I do with last week's haul? Here's what we ate from the CSA last week:
  • Half the corn was steamed and eaten hot with butter. Yum. The other half went into a salad with a few other vegetables.
  • I stuffed the Anaheims with Monterey jack and some thinly sliced onions. They went into a skillet and got all silky soft.
  • The cabbage made a slaw with a few other vegetables.
  • I fried some of the zucchini and the rest went into the corn salad.
  • I made this gorgeous tomato rarebit to test for Food52 with great tomatoes I had.
  • The plum tomatoes went into a pasta sauce with Swiss chard, onions and bacon.
This Summer, I am chronicling my first CSA (Community Supported Agriculture) experience. My CSA share is from Arrowhead Farm, a farm based in Newburyport, MA. Each week, I am posting about what was in my share and what I'm doing with it. By way of full disclosure, I won my share through a raffle and am not paying for it. However, Arrowhead did not know I was entered in the raffle, and I received no special consideration because of this blog. I paid for my livestock share.

Friday, August 13, 2010

Ladies and Gentlemen, May I Introduce: Tetragonia!

Tetragonia, or New Zealand spinach, is a green that you may find at the famers' market this summer. It's gotten very popular with farmers and shoppers because it doesn't bolt (go to seed and turn bitter) like spinach when the temperature rises.

Tetragonia is not a member of the spinach family, but it tastes a lot like it. The leaves are slightly succulent - not quite as juicy as your Mom's jade plant, but still. As a result, when you buying it, you should make sure the leaves are bouncy/crispy without a hint of wilty softness.

To prepare it for cooking, strip the leaves from the stems and wash them well. Sauté like spinach; I like mine with lots of garlic and a splash of lemon or vinegar. Not that Tetragonia has quite a bit of oxalic acid in it (like spinach and chard do), so your teeth may get that sandy feeling after eating it. It's also why I don't like eating tetragonia raw: I find the oxalic acid sandiness is diminished when the vegetable is cooked. Also, because oxalic acid isn't super-great for your liver in general, don't go eating this stuff at every meal.

Use Your Booty: Box Car Willie and Friends Rarebit

For the recipe for this delicious bowl of comfort, you're going to have to head over to Food52. This rarebit was an Editor's Pick in the recent heirloom tomato contest. Those of you familiar with rarebit will wonder where the toast is. Just think of the tomatoes as the toast and go happily on your way. I recommend you have some bread on hand to sop up the gorgeous tomatoey-cheesiness that will be in the bottom of the dish.

I used a combination of tomatoes: a big beefy type, a few cherries and a stripy saladette number - no idea of the names of any of them. A note of warning: the tomatoes will be insanely hot when you pull the dish out of the oven. As painful as it will be to wait for them to cool, it will be less painful than the scorched mouth you'll have otherwise.


This Summer, I am chronicling my first CSA (Community Supported Agriculture) experience. My CSA share is from Arrowhead Farm, a farm based in Newburyport, MA. Each week, I am posting about what was in my share and what I'm doing with it. By way of full disclosure, I won my share through a raffle and am not paying for it. However, Arrowhead did not know I was entered in the raffle, and I received no special consideration because of this blog. I paid for my livestock share. A full set of all the photos I've taken of this share is here.

Thursday, August 12, 2010

Cooking Class: Yes We Can Can!

Last week I ran a canning workshop at the gorgeous Jewett Farms Studio in Newburyport, MA. We had a great group of students join us for this class. We made: Blueberry-Lemon Jam, Plum Chutney, Quick Pickles and Personalized Dills.

First off, everyone was put to work chopping up plums for the chutney. I demonstrated a basic technique for cutting up onions and a quick way to cut clingstone stone fruit from its pit. After the chutney simmered down to a thick consistency (about 90 minutes), it was ladled into pint jars and processed in a boiling water bath.

Next, we started the blueberry jam. This jam has whole lemon slices in it and they provide a nice bitter/sour note to the jam. I used my enormous skillet (18"!) and was able to fit four pounds of berries into its wide embrace. The berries and lemons bubbled away and when the hot mixture reached set (220 degrees Fahrenheit) we pulled the jam from the heat and ladled it into 4 oz. jars. Jams don't have to be hot water processed, but for safety's sake and to ensure a seal, we processed our jam for 10 minutes.

While everything simmered away, the class turned its attention to our last two pickles. I demonstrated a quick julienne technique (a way to cut thin strips of vegetables) and put everyone to work julienning a mountain of carrots and two ginormous daikon radishes. These vegetables were salted and left to sit to exude some liquid.

Finally everyone dressed their pickles to their taste (with Japanese chilies and Korean thin pepper strings) they were dressed with a rice wine vinegar/sugar brine and left to pickle at room temp. These pickles need to be eaten within a week or so.

Finally the dills: The class cut up enough cucumbers to fill their jars - some went for spears, others for chips. Everyone seasoned their pickle jar to taste with garlic, dill, mustard seed and chilies. After topping with brine, the cukes went in for processing.

At the end of the day, everyone went home with 2 4oz. containers of jam, a pint of chutney, a pint of dills and a pint of quick Asian-style pickles. I'd say that's a pretty good haul for three hours of class time!

I was honored to have two of my fellow Food52istas join me in class. Thanks Midge and Sagegreen for visiting!

See the full set of photos from class starting here.

Saturday, August 7, 2010

CSA Booty - Week 12


Be sure to check out Use Your Booty: Show Your CSA Box Who's Boss for ideas about how to manage your CSA vegetables.

In this week's share I picked up:
  • 9 ears of corn
  • 3 zucchini
  • 1 head of cabbage
  • 1 cucumber
  • A lotta tomatoes
  • A whole mess of Anaheim chile peppers (I used three of my choices to make sure I got enough for us for dinner)
  • 5 jalapenos
  • I had more options in "pick your own" but didn't have time, so I had to pass on some flowers and greens. Boo.
So here's what I think I'm doing with these items:
  • We've already eaten half the corn - steamed with butter. Yum.
  • I stuffed the Anaheims with Monterey jack and some thinly sliced onions. We ate them last night with the corn.
  • The cabbage could become sauerkraut but is more likely to become a slaw.
  • I think I'll make fritters with the zucchini and pickle some of the rest.
  • I'm have to make this tomato rarebit to test for Food52 and plan on using the great heirlooms I picked up.
  • I'll turn the plum tomatoes I got into a simple pasta sauce.
So how'd I do with last week's haul? Here's what we ate from the CSA last week:
  • I made a green lasagna with the amaranth, kale and onions
  • We made a super delicious stack of BLTs - my bacon comes from North Country Smokehouse, it's amazingly smoky and really makes the dish.
  • We enjoyed a lovely plate of green pasta with tomato sauce and burrata.
  • I am confident that I have a stash of leftover vegetables waiting in the fridge that I'll need to address later today.
This Summer, I am chronicling my first CSA (Community Supported Agriculture) experience. My CSA share is from Arrowhead Farm, a farm based in Newburyport, MA. Each week, I am posting about what was in my share and what I'm doing with it. By way of full disclosure, I won my share through a raffle and am not paying for it. However, Arrowhead did not know I was entered in the raffle, and I received no special consideration because of this blog. I paid for my livestock share.

Friday, August 6, 2010

Use Your Booty: Pasta Verde with Tomato Sauce and Burrata


After making that green lasagna on Tuesday I still had some leftover pasta dough. So I wrapped it up and left in the fridge to await future use (or the compost bin). Tonight I made a quick tomato sauce with the remainder of our CSA tomatoes (mostly cherry tomatoes) and decided to roll the rest of the pasta and have it for supper.

As an aside: I got this Kitchen Pasta Rolling dingus for Christmas (thanks Mom!). If you like fresh pasta I can't recommend the purchase (or gifting, if you are so lucky) of of these more highly. A hand cranked machine isn't that hard to use, but this motorized roller makes pasta making so much faster.

I rolled the pasta and turned it into corzetti (or croxetti), a hand-stamped round pasta from Genoa, Italy. That there is my corzetti stamp, purchased on our trip to Genoa a few years ago. And down there, is a tray of corzetti ready for boiling. For those playing along at home, I rolled my to "6" on the pasta roller - this is a thicker setting (the thinning setting is "8") about what I would use for linguine.

Burrata is a cheese made of mozzarella wrapped around fresh cheese curd. If you can't find it, a few slices of fresh mozzarella and/or a scoop of fresh ricotta would be a satisfactory substitute.

So, no recipe today, just the idea for you:

Make a fresh tomato sauce: I used about 1 pound of tomatoes (coarsely chopped) and 2 cloves of garlic, sautéed together until the tomatoes broke down and got saucy. I didn't seed or skin my tomatoes, but probably should have (the cherry tomatoes seeds and skins were a little tough). Season to taste with salt & pepper.

Boil up some fresh pasta (about 3-4 ounces per person).

Sauce the pasta with the sauce and top the dish with a few slices of burrata.


This Summer, I am chronicling my first CSA (Community Supported Agriculture) experience. My CSA share is from Arrowhead Farm, a farm based in Newburyport, MA. Each week, I am posting about what was in my share and what I'm doing with it. By way of full disclosure, I won my share through a raffle and am not paying for it. However, Arrowhead did not know I was entered in the raffle, and I received no special consideration because of this blog. I paid for my livestock share. A full set of all the photos I've taken of this share is here.

Thursday, August 5, 2010

Use Your Booty: Lasagna Verde


I admit it, I had blog envy. I saw this gorgeous post on radicchio lasagna over at AuthorJane's Cooking from the Farms series and got lasagna on the brain. She had gotten her radicchio through one of her CSA memberships. I didn't have radicchio, but have a lot of greens so I decided to use my bunch of amaranth and half of my kale.

I'm going to give this recipe to you in several steps (pasta, filling, bechamel, assembly) because each component can be made ahead and/or used as its own dish. Make sure each component is well-seasoned and delicious on its own before layering it into the lasagna.

This looks like a lot of steps and components, but from start to finish I pulled this dish together in 45 fast-paced minutes (not counting baking time). It would have been even easier had I had a stash of cooked greens in the fridge like I usually do.

Pasta Verde
I made a green pasta for my lasagna. If you don't want to make your own pasta, skip this step and use Barilla No-Boil lasagna noodles.
Makes about 1 pound of pasta
  • 4 cups tender greens (amaranth, spinach, chard leaves, etc.)
  • 2 eggs
  • pinch salt
  • approximately 2 1/4 cups (about 10 ounces) flour
In a saucepan of boiling water, cook the greens until they are tender, about 5 minutes. Drain the greens and run cool water over them to cool them off. Squeeze as much water out of the greens as you can.

Put the greens into the bowl of a food processor with the eggs and salt. Process until the greens are very finely chopped. Add 1 1/2 cups of flour into the processor bowl and process, pulsing, to pull the eggs, greens and flour into a dough. The dough will come up onto the blade of the processor and roll around. Feel the dough and it will likely be sticky, add about 1/4 cup into the bowl and process a little more.

Pull the dough out of the bowl and knead the dough, adding flour as needed to keep the dough from sticking to the countertop. The dough should be soft, smooth and supple. Wrap the dough in plastic and set aside until you're ready to roll it out.

After the dough has rested for 20 minutes, it's ready to roll.

Sautéed Greens
Makes about 3-4 cups of greens
  • olive oil
  • 1 large onion, peeled and thinly sliced
  • 10-12 cups of greens leaves, coarsely chopped (kale, amaranth, chard, spinach, collards, etc.)
  • 3 cloves garlic, minced or pressed
  • 1 tablespoon red wine vinegar
  • salt
In a large skillet, over medium-high heat sauté the onion in olive oil until softened. Add the greens and a pinch of salt to the skillet and continue to cook, stirring and tossing the greens to wilt them down - this will take about 10 minutes. If the skillet seems too dry, add a 1/2 cup of water and keep cooking. After the greens are wilted, add the garlic and vinegar to the pan and sauté for another 5 minutes.

Set aside to let the greens cool.

Bechamel Sauce
Makes 4 cups
  • 4 tablespoons butter
  • 4 tablespoons flour
  • 4 cups milk
  • pinch of nutmeg
  • salt & pepper
Melt the butter in a saucepan over medium heat and then add the flour. Using a heatproof rubber spatula, stir in the flour making sure it's well blended. When the flour has started to turn golden, add a splash of milk. Stir the milk in well with the spatula. Whisk in the rest of the milk in 1 cup increments.

Bring the bechamel to a gentle boil, whisking frequently. Season well with nutmeg, salt and pepper.

Set aside. If making aside, cover the surface of the bechamel with a piece of waxed paper.

Lasagna Verde
Note that I don't pre-boil my fresh pasta noodles in this dish, the pasta stays much softer this way. For more firm pasta layers, parboil the noodles for 1-2 minutes before layering them into the dish.
  • 1 recipe green pasta or 1 pound Barilla no-boil noodles
  • 3-4 cups cooked greens
  • 8 oz mozzarella, shredded (I used the little mozzarella balls called perlini)
  • 3 ounces parmesan cheese
Preheat the oven to 375.

Grease a 9" x 13" baking dish and cover the bottom of the pan with a few spoonfuls of bechamel.

Roll the pasta in a pasta roller (I like to roll as I assemble because it's so much easier to just put the sheets straight into the pan), rolling each new layer of pasta as you need it.

Stack ingredients up in the pan to make three layers in the lasagna. Each layer contains: 1 layer pasta, 1 layer greens, mozzarella, grated parmesan and about 1/2 cup of bechamel. The final and top layer is pasta, bechamel and parmesan. Make sure the entire surface is covered with bechamel.

Cover the dish loosely with foil and bake for 30 minutes, until the sauce is bubbling. Take off the foil and broil the top to brown the cheese.

Let the lasagna sit for 5 minutes before serving.


This Summer, I am chronicling my first CSA (Community Supported Agriculture) experience. My CSA share is from Arrowhead Farm, a farm based in Newburyport, MA. Each week, I am posting about what was in my share and what I'm doing with it. By way of full disclosure, I won my share through a raffle and am not paying for it. However, Arrowhead did not know I was entered in the raffle, and I received no special consideration because of this blog. I paid for my livestock share. A full set of all the photos I've taken of this share is here.

Tuesday, August 3, 2010

Sweet [and Sour] Tomato Chutney


This was, by far, the most loved item on the menu from last week's
Indian cooking class. Many dishes had fans, but everyone thought this was just great. Even better, it's super easy and can be made way ahead. I used canned tomatoes, but you could substitute peeled fresh tomatoes if you wish.

We enjoyed this chutney with chicken and shrimp dishes, but I think it would just fabulous alongside goat cheese on a cheese tray or spread onto roast pork or beef sandwich. This chutney would pair well with multiple flavors (it doesn't necessarily taste "Indian"). The slivered almonds are not something most people expect, but they add a nice contrasting texture. If you're allergic to almonds, pine nuts would be a satisfactory, albeit more expensive, alternative.

Sweet [and Sour] Tomato Chutney
From Madhur Jaffrey's Introduction to Indian Cooking

Makes about 2-3 cups
  • 1 head of garlic, peeled and chopped
  • 2" x 1" x 1" piece of ginger, peeled and coarsely chopped
  • 1 1/2 cups red wine vinegar
  • 1 28 ounce can whole tomatoes (I used Muir Glen tomatoes)
  • 1 1/2 cups sugar
  • 1 1/2 teaspoon salt
  • 1/4 teaspoon cayenne pepper
  • 2 tablespoons golden raisins
  • 2 tablespoons slivered almonds
Purée the garlic, ginger and about a third of the vinegar (enough to keep things moving) in a blender. Blend until smooth.

Put the paste from the blender, and all the other ingredients except the raisins and the almonds into a large saucepan. Bring to a boil and then reduce to a simmer. Simmer for 1 1/2 - 2 hours, stirring occasionally, until the sauce is superthick (Madhur says it should be like honey, mine was chunkier and thicker than honey).

Stir in the almonds and raisins and simmer 5 more minutes.

Taste for salt and sugar and adjust to taste. It may smell like it's too acidic, but give it a taste anyway - add a little sugar if things are too puckery.

Cooking Class: Indian Dishes at Home


This past Friday, I had the pleasure of leading a class in Indian Cooking at home. This is one of many classes I've been teaching at Jewett Farms Studio's gorgeous Newburyport location.

The class enjoyed some whole wheat samosas, stuffed with spiced potatoes, while I demonstrated the rest of the menu:
Whole-Wheat Samosas
Vegetables with Cilantro Chutney
****
Chicken Tikka Masala
Shrimp with Whole Spices
Smoked Eggplant (Eggplant Bharta)
Spinach with Fresh Cheese (Sag Paneer)
Moong Dal
Basmati Rice
Chutneys & Relishes
****
Fresh Fruit

Chicken tikka masala and Shrimp with spices: ready for dinner


Some of the spices we used at dinner (rear plate) and a selection of dals (lentils and beans)

We had a huge group of students (fifteen!) and everyone seemed to have a great time. Check my website for future classes: we have a canning workshop scheduled for the 7th and a Farmer's Market dinner for the 13th.

Pouring "tarka", hot spiced oil, over the dal


At the dinner table

Sunday, August 1, 2010

Welcome!

Hello Boston Globe readers and Food52ers and everyone else! (Regular visitors might find this article in The Boston Globe and this Food52 profile interesting.)

Thank you for stopping by. Feel free to browse around. To help you find your way, here are a few posts you might find especially interesting:

Use Your Booty: Show Your CSA Box Who's Boss
A review of the steps I take to make sure that I get the most out of my weekly CSA pickup.

Labor Day Coolers
A quick method for aguas fresca, fruit drinks that will help keep you cool through the dog days of August.

This is the most popular post on this blog. These ribs are not the BBQ-style you might be expecting, but they're a quick, flavor-filled, gnaw on the bone experience.

Steak, Caveman-Style The second-most popular post on this site: our method for producing dirty steak, or steak grilled directly on hot coals.

Just Plane Food
The third-most visited post on the site: a discussion of packing TSA-friendly food for satisfying in-flight dining. Note: the post was written back in 2007, so the rules are wee bit more lenient these days. I'll be taking a trip in September and plan to update this post to meet the new requirements after we're back.

Blog Widget by LinkWithin